
 pin it
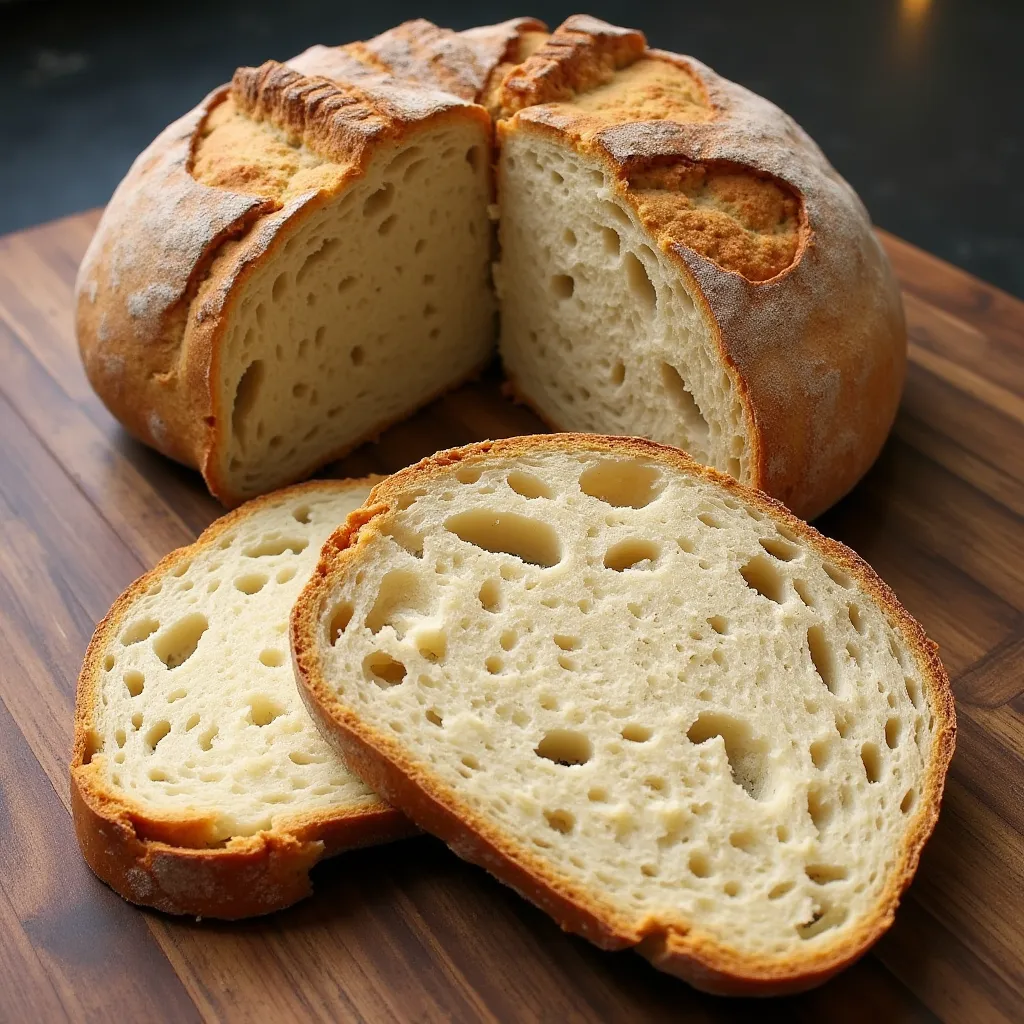
I discovered traditional sourdough bread during a trip to San Francisco years ago and became obsessed with recreating that perfect balance of tangy flavor and airy texture. After maintaining my own starter and experimenting with countless methods, I've finally perfected this recipe. The key is patience – allowing the natural fermentation to develop those complex flavors and create that beautiful open crumb structure. I love the rhythm of making sourdough: the mixing, folding, shaping, and finally hearing that satisfying crackle as it cools on the counter. The process connects me to bakers from centuries past who used these same simple ingredients.
Why I love this recipe
I love this sourdough recipe because it transforms just flour, water, and salt into something magical through time and patience. The process is meditative – from feeding my starter to the final scoring before baking – each step requires presence and attention. There's nothing quite like the satisfaction of slicing into a loaf you've nurtured for days and seeing that perfect, open crumb structure. The flavor complexity that develops naturally without additives or enhancers is remarkable. Plus, I find immense joy in sharing these loaves with friends and family, watching their eyes light up at that first bite of warm bread with a smear of butter. It's a recipe that connects us to tradition while allowing endless experimentation.
What You Need From Your Kitchen
- Bread flour: Provides the structure and protein needed for proper gluten development
- Filtered water: Helps activate the starter and form the dough
- Sourdough starter: Acts as the natural leavening agent and provides flavor
- Rice flour: Used for dusting the banneton to prevent sticking
- Dutch oven: Creates steam during baking for optimal crust development
Let's Make These Together
- Prepare the dough
- Mix flour and water thoroughly in a large bowl until no dry spots remain. Cover with a damp cloth and let rest for 30 minutes to hydrate the flour completely.
- Add starter and salt
- Incorporate your active sourdough starter and salt into the dough. Use wet hands to mix thoroughly, pinching and folding until everything is well combined. This is the beginning of the fermentation process.
- Develop structure
- Over the next 3-4 hours, perform gentle stretch and folds every 30 minutes. Grab one side of the dough, stretch it up and fold it over the center, then rotate the bowl and repeat on all four sides. This builds strength and traps air in the dough.
- Bulk fermentation
- Allow the dough to rise at room temperature until it increases in volume by about 50% and you can see bubbles forming on the surface. This typically takes 4-6 hours depending on your kitchen temperature.
- Shape and cold proof
- Gently turn the dough onto a lightly floured surface and shape into a tight ball. Place in a floured banneton seam-side up and refrigerate overnight to develop flavor and make the dough easier to handle.
- Bake with steam
- Preheat your Dutch oven, score the cold dough, and bake covered at high heat to create steam. This helps the bread rise fully before removing the lid to develop that beautiful golden crust.
 pin it
Switch Things Up
I started making sourdough during that long pandemic lockdown, like everyone else it seems. My first few loaves were dense bricks, but I kept at it. This recipe is the result of countless tweaks and failures. I've found that using filtered water and weighing ingredients precisely makes a huge difference. My favorite variation is adding a handful of roasted garlic cloves to the dough during the final fold - it creates the most amazing aroma!
Perfect Pairings
This sourdough bread shines when paired with creamy, salted butter or dipped in high-quality olive oil with a sprinkle of flaky sea salt. For a more substantial meal, serve thick slices alongside a hearty vegetable soup or stew to soak up the broth. It also makes exceptional grilled cheese sandwiches or avocado toast for breakfast. For a lovely appetizer, toast thin slices and top with ricotta and honey.
 pin it
Frequently Asked Questions
- → Do I need a sourdough starter?
Yes, this recipe requires an active sourdough starter. You can either make your own (which takes about 7-10 days) or get some from a friend who bakes sourdough. Many local bakeries will also share some of their starter if you ask nicely.
- → Can I use all-purpose flour instead of bread flour?
While bread flour is recommended for its higher protein content which creates better structure, you can substitute all-purpose flour. Your bread might be slightly less chewy and may not rise quite as much, but it will still be delicious.
- → How do I know when my dough is properly fermented?
Your dough should increase in volume by about 50% (not double), feel airy when gently poked, and show bubbles on the surface. If you press it with a wet finger, the indentation should slowly spring back but not completely.
- → Can I skip the overnight refrigeration?
The cold proof is important for flavor development and makes the dough easier to handle. If you must skip it, let the shaped dough rise at room temperature for 2-4 hours until properly proofed, but the flavor won't be as complex.
- → Why didn't my bread get those big air holes?
Large air pockets develop from proper hydration, gentle handling, adequate fermentation, and good oven spring. Make sure your starter is very active, handle the dough gently to preserve air bubbles, and ensure your oven and Dutch oven are properly preheated.
Conclusion
This artisan sourdough bread is the perfect balance of simplicity and sophistication. The long fermentation creates complex flavors and that signature sourdough tang, while the high-temperature baking gives you that crackling crust everyone loves. Master this recipe and you'll never want to buy bread again.