
 pin it
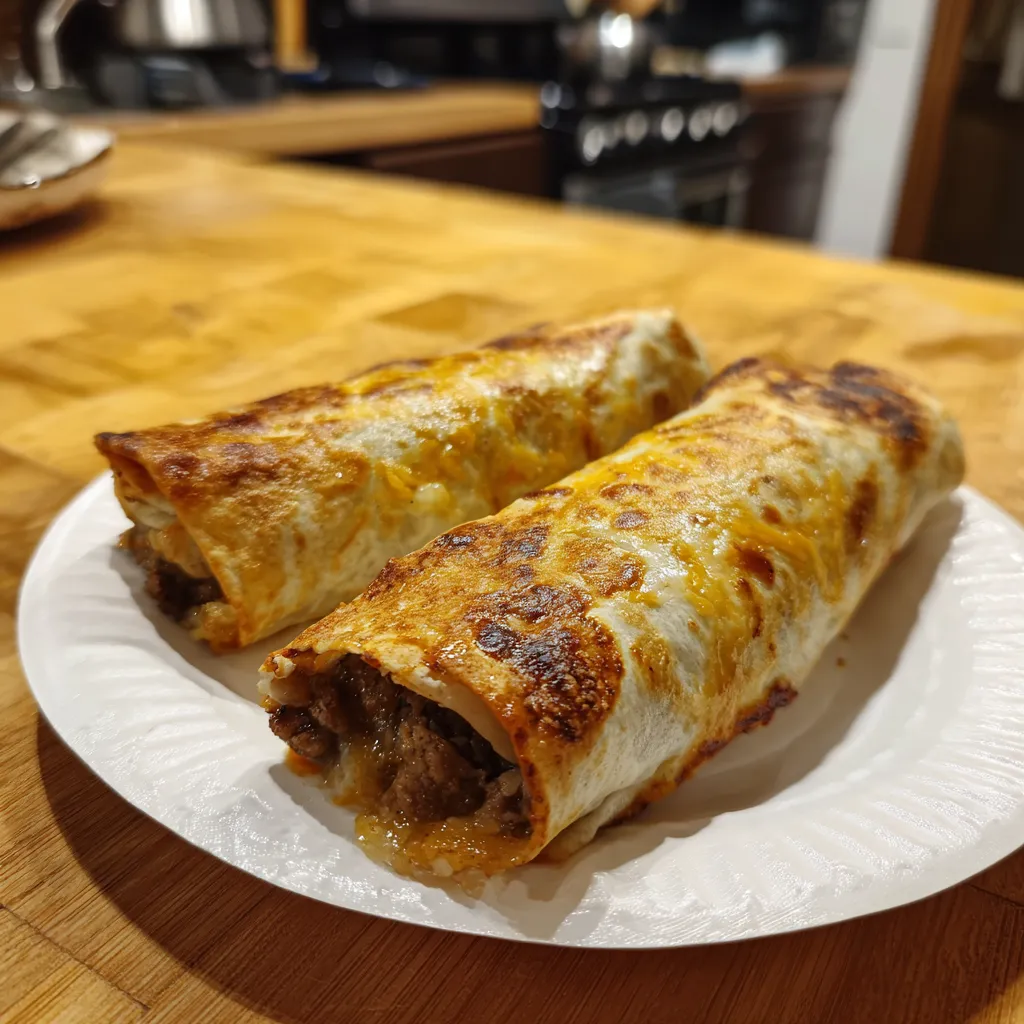
I discovered this recipe during one of those "what's for dinner" moments when I wanted something hearty but didn't have much time. The beauty of these rollups lies in their simplicity - you're essentially creating a cheeseburger filling and wrapping it in a tortilla. The magic happens when you cook them until golden and crispy on the outside while keeping that filling hot and melty inside. The garlic butter isn't just a finishing touch; it's what transforms these from simple wraps into something truly special. I love how the beef gets perfectly seasoned and the cheese melts into every crevice. The tortilla becomes this perfect crispy shell that holds everything together while adding a wonderful textural contrast. Every bite delivers that classic cheeseburger flavor profile but in a completely new and exciting format. It's comfort food innovation at its finest, taking familiar flavors and presenting them in a way that feels both nostalgic and fresh. These rollups have become my answer to busy nights when I want something satisfying without spending hours in the kitchen.
Why I love this recipe
What I absolutely love about these rollups is how they satisfy that cheeseburger craving in a completely unexpected way. They're incredibly versatile - you can customize the filling with whatever you have on hand, and they always turn out delicious. The preparation is so straightforward that even my teenagers can make them successfully. There's something deeply satisfying about that first bite when you break through the crispy exterior and hit that warm, cheesy filling. The garlic butter adds this layer of richness that elevates the entire dish from simple to sublime. I love that they're handheld, making them perfect for casual dinners or even packed lunches. They reheat beautifully too, which means leftovers are never a problem. The fact that you get all those classic burger flavors without the mess of actually grilling burgers makes them a winner in my book. Plus, they cook so quickly that they're perfect for those nights when everyone's hungry and patience is running thin. These rollups have honestly changed how I think about weeknight dinners - sometimes the best comfort food comes from the most unexpected combinations.
What You Need From Your Kitchen
- Ground Beef: Brown thoroughly and season well for the base filling
- Flour Tortillas: Use large burrito-size tortillas for easier rolling
- Cheddar Cheese: Shred fresh for better melting and flavor
- Fresh Garlic: Mince finely and sauté until fragrant
- Butter: Melt for brushing and mix with garlic for extra flavor
- Yellow Onion: Dice and cook until softened for sweetness
Let's Make These Together
- Prepare the Filling
- Start by heating oil in your skillet and cooking the diced onion until it's soft and translucent. Add the ground beef and break it up as it browns, making sure to cook it thoroughly. The key is getting a nice even browning for maximum flavor.
- Add Aromatics
- Once your beef is perfectly browned, add the minced garlic and let it cook for just a minute until you can smell that amazing aroma. This step is crucial for building layers of flavor in your rollups.
- Assembly Time
- Lay out your tortillas and divide that delicious beef mixture right down the center of each one. Sprinkle the cheese generously over the beef - don't be shy, this is what makes them so irresistibly gooey inside.
- Roll and Cook
- Roll those tortillas up nice and tight, then get them into a hot skillet seam-side down. Let them get golden and crispy on all sides while that cheese melts into pure comfort food heaven.
 pin it
Switch Things Up
I first made these rollups on a busy weeknight when I was craving cheeseburgers but didn't want the hassle. I had some tortillas left over and thought, why not wrap up all those burger flavors? The first bite was a revelation - all that cheesy, beefy goodness wrapped in a crispy shell was even better than I imagined. Now it's become our go-to comfort meal. My kids love helping roll them up, and I love how quick they come together. Sometimes I add pickles or a touch of mustard to the filling for extra burger vibes. These have honestly become more popular in our house than actual burgers. The garlic butter takes them completely over the top - it's that little extra touch that makes them feel special rather than just a quick weeknight dinner.
Perfect Pairings
These rollups pair beautifully with crispy sweet potato fries or classic french fries for that full burger experience. A fresh coleslaw or simple green salad helps balance the richness. For drinks, try them with an ice-cold beer, milkshake, or even a sparkling soda. Pickles and onion rings make excellent sides, and a dollop of ketchup or special sauce for dipping never goes wrong.
 pin it
Frequently Asked Questions
- → Can I make these ahead of time?
Yes! You can assemble the rollups and refrigerate them for up to 2 hours before cooking. Just make sure the beef mixture has cooled completely first.
- → What other cheeses work well?
Monterey Jack, mozzarella, or a Mexican cheese blend all work wonderfully. Choose melting cheeses for the best results.
- → Can I freeze these rollups?
You can freeze the assembled uncooked rollups for up to 1 month. Cook them directly from frozen, adding a few extra minutes to the cooking time.
- → How do I prevent them from falling apart?
Roll them tightly and cook seam-side down first. Don't overfill them, and make sure your beef mixture isn't too wet.
- → What sides go best with these?
French fries, sweet potato fries, coleslaw, or a simple green salad all complement these rollups perfectly.
Conclusion
These Garlic Butter Beef Cheeseburger Rollups are the perfect fusion of comfort and convenience. They deliver all the flavors of a classic cheeseburger in a crispy, handheld wrap that's impossible to resist. Whether you're feeding hungry kids or looking for a satisfying dinner, these rollups hit every mark. The combination of seasoned beef, melted cheese, and garlic butter creates a flavor explosion that will have everyone asking for seconds.