
 pin it
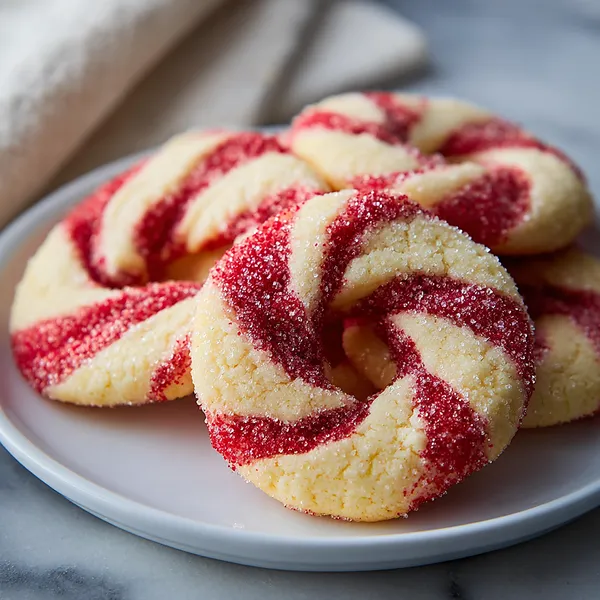
I first encountered Candy Cane Cookies at a neighborhood holiday party about six years ago, and I was immediately captivated by their stunning appearance. The host had arranged them on a vintage crystal platter, and they looked almost too pretty to eat. But once I tasted one, I was hooked—the cookie had this incredible buttery richness balanced by refreshing peppermint that wasn't overwhelming at all. The sparkling sugar added a delightful crunch, and the texture was perfectly tender yet sturdy enough to hold that iconic twisted shape. I asked for the recipe that night and went home determined to recreate them. My first attempt was slightly messy (the dough ropes kept breaking!), but the flavor was spot-on. Over the years, I've refined my technique, and now these cookies are my signature holiday treat. I love how they bring together everything wonderful about the season: they're festive, delicious, and fun to make. Every time I pull a batch from the oven, I'm transported back to that magical party where I discovered them, and I'm grateful I can now share that same joy with others.
Why I love this recipe
What I love most about this recipe is how it transforms simple ingredients into something truly spectacular. There's something deeply satisfying about taking two balls of dough—one plain, one colored—and creating those beautiful swirled patterns. It's like edible art! The recipe is forgiving enough for beginners but impressive enough to wow experienced bakers. I also appreciate that the peppermint flavor is perfectly balanced; it's refreshing without being medicinal or overpowering the buttery cookie base. The texture is another winner—these cookies are tender and almost melt in your mouth, yet they hold their shape beautifully and don't spread too much during baking. They're also incredibly versatile: shape them into wreaths for elegance, traditional candy canes for nostalgia, or simple twisted logs for ease. And let's talk about that sparkling sugar coating—it adds visual magic and a subtle crunch that elevates every bite. These cookies make people smile, they fill your home with the most wonderful aroma, and they're genuinely delicious. That's why I return to this recipe year after year.
What You Need From Your Kitchen
- All-purpose flour: Provides structure to the cookies; measure correctly by spooning into cup and leveling off
- Unsalted butter: Must be softened to room temperature for proper creaming; provides rich flavor and tender texture
- Granulated sugar: Sweetens the cookies and helps create a tender crumb when creamed with butter
- Egg: Binds ingredients together and adds moisture; bring to room temperature for best incorporation
- Peppermint extract: Provides the signature candy cane flavor; use pure extract for best results
- Red food coloring: Creates the festive candy cane appearance; gel coloring works best for vibrant color
- Coarse sparkling sugar: Adds sparkle and a delightful crunch to the finished cookies
Let's Make These Together
- Cream Butter and Sugar
- Begin by ensuring your butter is properly softened—it should indent easily when pressed but not be greasy or melted. Beat it with the sugar using an electric mixer until the mixture becomes pale, fluffy, and nearly doubles in volume. This process incorporates air and creates that tender, melt-in-your-mouth texture we're after. Add your egg and extracts, beating until everything is beautifully combined and the mixture looks smooth and creamy.
- Mix and Divide Dough
- Combine your dry ingredients in a separate bowl to ensure even distribution of the salt throughout the flour. Gradually incorporate this into your butter mixture, mixing just until the flour disappears. Overmixing at this stage can lead to tough cookies, so stop as soon as you have a cohesive dough. Split the dough in half, keeping one portion plain while you work the red food coloring into the other half. Knead the colored portion until you achieve a uniform, vibrant red with no streaks remaining.
- Chill and Shape
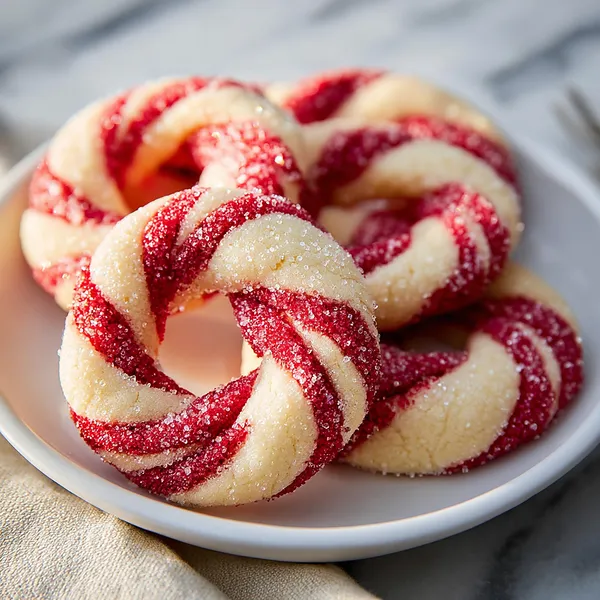
- Refrigerate both dough portions for at least 30 minutes—this crucial step makes the dough much easier to handle and prevents the cookies from spreading too much during baking. Once chilled, work with small portions to keep the dough cool. Roll each color into thin ropes, keeping them uniform in thickness for the prettiest twisted effect. Lay one red and one white rope side by side, then twist them together with a gentle, steady motion. Shape into candy canes or wreaths, handling them carefully to maintain those beautiful swirls.
- Coat and Bake
- Arrange your shaped cookies on parchment-lined baking sheets with plenty of space between them. Lightly dampen each cookie's surface—this helps the sparkling sugar stick beautifully. Sprinkle generously with the coarse sugar, making sure every curve catches some sparkle. Bake in your preheated oven just until the edges begin to set and barely start to color. These cookies should remain soft and tender, so resist the urge to overbake. Let them rest on the baking sheet briefly before moving to a cooling rack, where they'll firm up to perfection.
 pin it
Switch Things Up
I'll never forget the first time I made these cookies with my niece during a snowy December afternoon. We started with two bowls of dough—one plain, one vibrantly red—and she was absolutely mesmerized by the twisting process. Her little hands worked carefully to roll the ropes and twist them together, and when we shaped them into wreaths and candy canes, her eyes lit up like Christmas morning. The kitchen filled with the most incredible peppermint aroma as they baked, and we couldn't resist sneaking one warm cookie each (okay, maybe two). Now it's become our annual tradition, and she asks about "our special cookies" every November. The joy on her face when we pull that first tray from the oven makes all the flour-covered counters worth it. These cookies aren't just dessert; they're memories in the making.
Perfect Pairings
These Candy Cane Cookies pair beautifully with a steaming cup of hot chocolate topped with whipped cream and chocolate shavings. For an adult gathering, serve them alongside peppermint mocha coffee or a rich eggnog latte. They also complement vanilla ice cream wonderfully—try making ice cream sandwiches with softened vanilla bean ice cream between two cookies. For a festive dessert board, arrange them with chocolate truffles, white chocolate bark, and fresh berries. And don't overlook the classic pairing: a cold glass of whole milk is absolutely perfect for dunking these buttery treats.
 pin it
Frequently Asked Questions
- → Can I use regular sugar instead of sparkling sugar?
Yes, you can use regular granulated sugar, but sparkling sugar (also called sanding sugar) provides a much prettier appearance with its larger crystals and sparkly finish. If you only have regular sugar, consider using it and the cookies will still taste delicious—they just won't have that magical sparkle.
- → Why do my cookies lose their twist pattern when baking?
This usually happens when the dough is too warm or the ropes are rolled too thin. Make sure your dough is properly chilled before shaping, and keep it refrigerated if it starts to soften while working. Roll the ropes to about ¼ inch thickness, and don't overwork the dough. You can also chill the shaped cookies on the baking sheet for 10 minutes before baking to help them hold their shape better.
- → Can I make these cookies without peppermint extract?
Absolutely! If you're not a fan of peppermint or want a more versatile cookie, simply omit the peppermint extract and increase the vanilla extract to 2 teaspoons. You'll still have beautiful, festive-looking cookies with a lovely butter-vanilla flavor. You could also experiment with almond extract or other flavors you prefer.
- → How do I prevent the red dough from staining my hands?
Wear disposable food-safe gloves when working with the red dough, especially when kneading in the food coloring. This will keep your hands clean and also prevent the warmth of your hands from softening the dough too much. Alternatively, lightly dust your hands with flour, though some minimal staining may still occur with this method.
- → Can I freeze these cookies?
Yes, these cookies freeze beautifully! You can freeze them either before or after baking. For unbaked cookies, freeze the shaped cookies on a baking sheet until solid, then transfer to freezer bags for up to 3 months. Bake from frozen, adding 2-3 minutes to the baking time. For baked cookies, let them cool completely, then layer them between parchment paper in an airtight container and freeze for up to 2 months. Thaw at room temperature before serving.
Conclusion
These Candy Cane Cookies are the perfect addition to your holiday baking lineup. They combine visual appeal with incredible flavor, making them ideal for gift-giving, cookie exchanges, or simply enjoying with loved ones. The buttery texture paired with cool peppermint creates a cookie that's both nostalgic and irresistible. Once you master the twisting technique, you'll want to make these every year—they're that good and that beautiful!