
 pin it
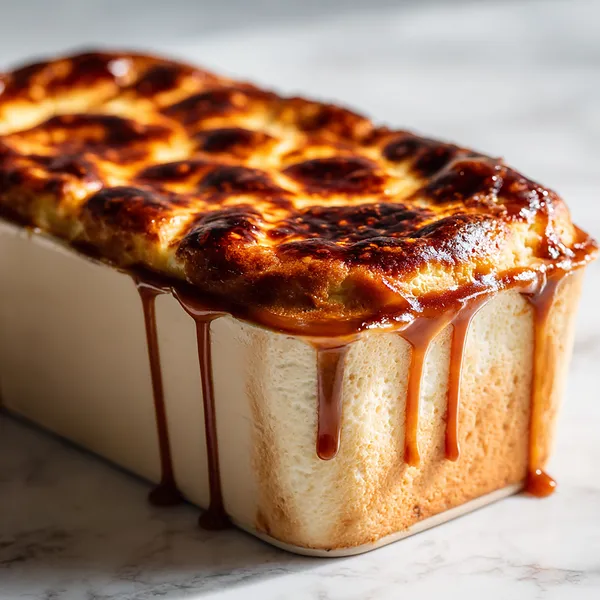
I first encountered Basque cheesecake in a small café in San Francisco, and I was immediately captivated by its rustic, almost burnt appearance. Unlike the perfectly smooth, pristine cheesecakes I was used to, this one looked deliberately imperfect – and that's what made it so appealing. The texture was a revelation: creamy and custardy, almost like a flan, but with the richness of cheesecake. When I started researching how to make it at home, I discovered that the "burnt" top isn't a flaw – it's the defining characteristic. The high baking temperature caramelizes the sugars on the surface, creating complex flavors that you simply can't achieve with a traditional water bath cheesecake. I decided to take it one step further by adding caramel sauce, because if caramelization on top is good, why not double down? This recipe uses a loaf pan instead of the traditional round springform, which I find makes for easier slicing and a more elegant presentation. The technique is surprisingly simple: you just blend everything together, pour it into a parchment-lined pan, and bake it hot. No water bath, no fussing with temperatures – just pure, unapologetic baking until the top is deeply golden and the center still jiggles. The result is a cheesecake that's sophisticated yet approachable, impressive yet easy to make.
Why I love this recipe
What I love most about this Caramel Basque Cheesecake is how it breaks all the traditional cheesecake rules and comes out better for it. There's no crust to worry about, no water bath to fuss with, and that burnt top that would be considered a disaster in any other cheesecake is exactly what you're aiming for here. It's liberating! The texture is what really sets this apart – it's not dense and heavy like New York cheesecake, but rather light, creamy, and almost ethereal. The slight wobble when you take it out of the oven is perfect, and as it cools, it settles into this amazing custard-like consistency. The caramel sauce elevates it from delicious to absolutely decadent. I love that this recipe is relatively foolproof once you understand that the dark top is intentional. It's also incredibly forgiving – even if you slightly overbake it, it still tastes amazing. The loaf shape makes it perfect for slicing and serving at gatherings, and it always sparks conversation because it looks so different from traditional cheesecake. Every time I serve this, people are amazed by the flavor and texture, and they're even more amazed when I tell them how simple it is to make. This is the kind of recipe that makes you look like a professional pastry chef with minimal effort!
What You Need From Your Kitchen
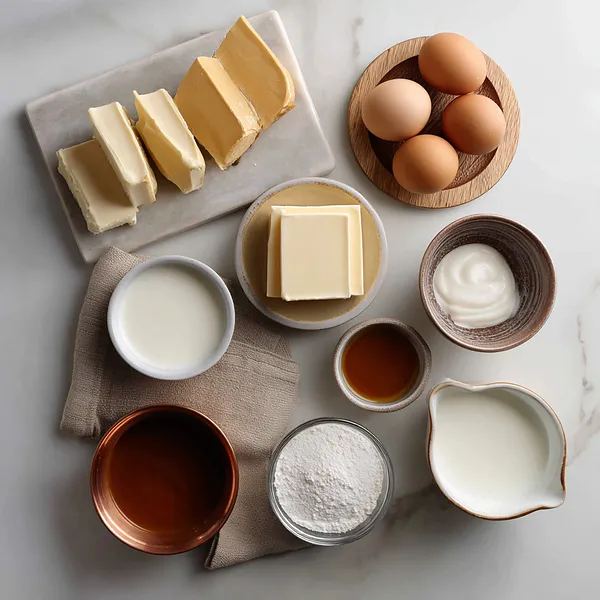
- Cream Cheese: Use full-fat cream cheese at room temperature for the creamiest texture
- Heavy Cream: Adds richness and creates the signature custardy texture
- Eggs: Provide structure while keeping the cheesecake soft and creamy
- Caramel Sauce: Homemade or store-bought, for drizzling over the finished cheesecake
- Granulated Sugar: Sweetens the batter and helps create the caramelized top
- Flour: Just a small amount to provide subtle structure without making it dense
Let's Make These Together
- Prepare Your Pan
- Start by preheating your oven to a high temperature of 400°F. Line your loaf pan with parchment paper, making sure it extends well above the rim since this cheesecake puffs up beautifully during baking. This also makes it easy to lift out once it's cooled.
- Create Smooth Batter
- Beat your room temperature cream cheese until it's silky smooth with no lumps. This is crucial for that velvety texture we're after. Add your sugar and salt, then incorporate the eggs one at a time, ensuring each is fully mixed before adding the next. Pour in the heavy cream and vanilla, then gently fold in the sifted flour.
- Bake Hot and High
- Pour your smooth batter into the prepared pan and bake at high heat. This high temperature is what creates that gorgeous, deeply caramelized top. Don't panic when you see it getting very dark – that's exactly what we want! The center should still have a wobble when you remove it from the oven.
- Cool and Set
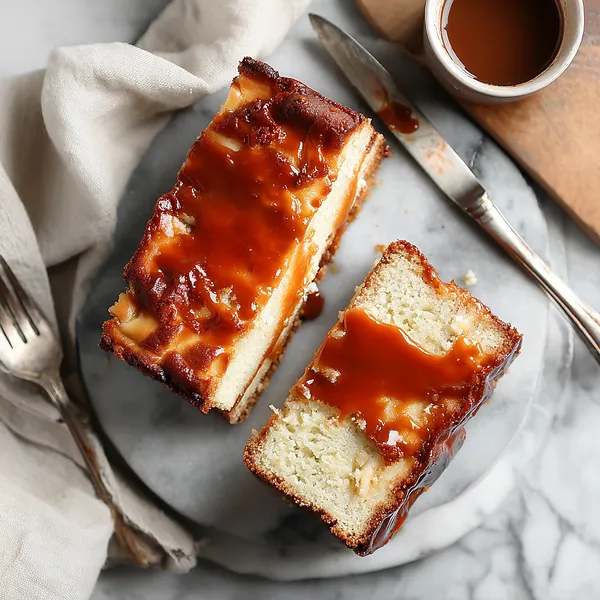
- Let the cheesecake cool completely at room temperature before refrigerating. It will deflate and settle as it cools, which is perfectly normal. Chill for at least 4 hours, though overnight is even better. Once chilled, slice and drizzle with luscious caramel sauce.
 pin it
Switch Things Up
I'll never forget the first time I made Basque cheesecake – I was terrified when I saw the top turning dark brown, almost black in spots. My instinct was to pull it out immediately, convinced I'd ruined it. But I trusted the recipe, let it continue baking, and when I finally tasted it after it cooled, I understood what all the fuss was about. The creamy, custardy interior was like nothing I'd ever experienced in a cheesecake. Now, I've taken that experience and made it even better by adding caramel sauce. The first time I drizzled warm caramel over the cooled cheesecake, watching it pool around the slices, I knew I'd created something special. Sometimes I make extra caramel just to have on hand – it's incredible on ice cream too. My family now requests this specifically for celebrations, and I love how the loaf shape makes it easier to transport than a traditional round cheesecake. The key is not to panic when you see that beautiful burnt top forming – that's exactly what you want!
Perfect Pairings
This Caramel Basque Cheesecake pairs beautifully with a strong espresso or dark roast coffee – the slight bitterness cuts through the richness perfectly. For a more indulgent pairing, try it with a glass of dessert wine like Pedro Ximénez sherry or a tawny port. If you're serving it as part of a dessert spread, fresh berries (especially raspberries or blackberries) provide a tart contrast that complements the sweet caramel. A dollop of barely sweetened whipped cream can lighten each bite, while a sprinkle of flaky sea salt on top enhances all the flavors. For a complete Basque-inspired meal, serve this after a hearty dinner of grilled meats or seafood.
 pin it
Frequently Asked Questions
- → Why is the top of my Basque cheesecake so dark?
The deeply caramelized, almost burnt top is the signature of authentic Basque cheesecake! This happens because of the high baking temperature and is completely intentional. It adds incredible depth of flavor and a slight bitterness that balances the sweet, creamy interior perfectly.
- → Can I make this without a loaf pan?
Yes! You can use a traditional 9-inch round springform pan instead. The baking time may need to be adjusted slightly – look for that golden-brown top and jiggly center as your indicators of doneness rather than relying solely on time.
- → How do I know when the cheesecake is done?
The top should be deeply golden brown to almost burnt-looking, and the center should still jiggle like jello when you gently shake the pan. It will continue to set as it cools, so don't wait for it to be completely firm in the oven.
- → Can I use store-bought caramel sauce?
Absolutely! High-quality store-bought caramel sauce works wonderfully for this recipe. If you want to make homemade, go for it – but don't let that extra step prevent you from making this amazing cheesecake.
- → Why is my cheesecake cracking?
Unlike traditional cheesecakes, cracks in Basque cheesecake are totally fine and part of its rustic charm! The high heat and lack of water bath means cracking is normal and doesn't affect the taste or texture at all.
- → How long will this cheesecake keep?
Store covered in the refrigerator for up to 5 days. Actually, it tastes even better after a day or two as the flavors develop and meld together. Just make sure it's well wrapped to prevent it from absorbing other refrigerator odors.
Conclusion
This Caramel Basque Cheesecake Loaf is everything you want in a dessert – rich, creamy, and absolutely stunning. The burnt exterior isn't a mistake; it's the signature of authentic Basque cheesecake, bringing incredible depth and a slight bitterness that balances perfectly with the sweet caramel. Whether you're serving this at a dinner party or treating yourself to a special weekend bake, this cheesecake delivers restaurant-quality results every single time. The loaf shape makes it easy to slice and serve, while the caramel sauce adds that extra touch of indulgence. Once you master this technique, you'll find yourself making it again and again!