
 pin it
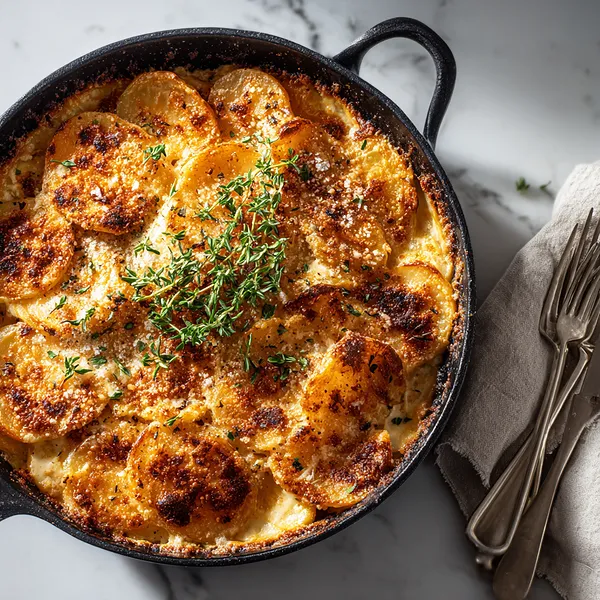
I first encountered scalloped potatoes at a French bistro during a trip to Quebec, where they called it "gratin dauphinois." The chef there taught me that the secret wasn't just in the cream sauce, but in the vessel you bake it in. Years later, when I started experimenting with cast iron cooking, everything clicked. The heavy skillet distributes heat so evenly that every layer of potato cooks perfectly, while the sides and top develop this incredible caramelized crust that's impossible to achieve in a regular baking dish. I've tweaked the traditional recipe over time, adding Gruyere for its nutty flavor and fresh thyme for an aromatic touch. The garlic cream sauce is my own addition – I gently infuse the cream with minced garlic before pouring it over the potatoes, creating layers of flavor that seep into every slice. What makes this recipe special is the attention to detail: uniformly thin potato slices, proper seasoning between layers, and that final broil at the end to create extra crispiness. It's a labor of love that pays off in every creamy, crispy bite.
Why I love this recipe
There's something deeply satisfying about this recipe that goes beyond just taste. It's the visual drama of arranging those potato slices in concentric circles, watching them transform from raw to golden perfection. I love how the cast iron skillet becomes part of the presentation – you can bring it straight from oven to table, still bubbling and gorgeous. The texture contrast is what really gets me: you've got those crispy, almost chip-like edges that crackle when you cut through them, then layers of tender potatoes that are so creamy they practically melt on your tongue. The Gruyere adds this sophisticated nuttiness that elevates it beyond typical comfort food, while the fresh thyme provides little bursts of herbaceous flavor throughout. What I appreciate most is how this recipe makes me feel like a professional chef, even though the technique is quite forgiving. Sure, your first attempt at arranging the potatoes might not be Instagram-perfect, but it'll still taste incredible. And there's something almost therapeutic about the process – the rhythmic slicing, the careful layering, the anticipation as it bakes. It's the kind of recipe that turns cooking from a chore into an experience.
What You Need From Your Kitchen
- Yukon Gold Potatoes: Wash thoroughly, peel if desired, and slice into uniform 1/8-inch rounds using a mandoline for best results
- Heavy Cream and Milk: Warm gently with garlic and butter to create the rich, flavorful sauce base
- Gruyere Cheese: Grate fresh for maximum meltability and nutty flavor throughout the dish
- Garlic: Mince finely and infuse into the cream mixture for aromatic depth
- Fresh Thyme: Strip leaves from stems and add to cream sauce, plus reserve some for garnish
- Parmesan Cheese: Grate fresh and mix with Gruyere for a complex, savory cheese blend
Let's Make These Together
- Prep Your Potatoes
- Start by washing your potatoes thoroughly and slicing them into paper-thin rounds. Consistency is key here - each slice should be about 1/8 inch thick. The mandoline is your best friend for this task, but if you're using a knife, take your time to make them as uniform as possible. Once sliced, immediately submerge them in cold water to prevent oxidation and keep them crisp. This also helps remove excess starch, which can make your finished dish gummy. While the potatoes soak, prepare your workspace and gather all remaining ingredients.
- Create the Creamy Base
- In a saucepan, gently warm your cream and milk mixture with butter and minced garlic. You want to infuse the dairy with garlic flavor without scorching it, so keep the heat at medium and stir occasionally. Once it reaches a gentle simmer, remove from heat and stir in half your cheese until it melts into a smooth, luxurious sauce. The thyme goes in next, releasing its aromatic oils into the warm cream. Season generously with salt and pepper, remembering that this sauce needs to flavor all those potato layers. Taste and adjust - this is your flavor foundation.
- Layer with Love
- Drain your potato slices thoroughly and pat them completely dry - excess moisture will dilute your cream sauce. Now comes the fun part: creating those beautiful layers in your buttered cast iron skillet. Start at the outer edge and work in concentric circles, overlapping each slice slightly like fallen dominos. Take your time here; the visual pattern you create will be the star of your finished dish. As you build each layer, give it a light seasoning of salt and pepper. Continue until you've used all your potatoes, creating a dome of perfectly arranged slices.
- Bake to Golden Glory
- Pour your warm cream mixture slowly over the arranged potatoes, letting it cascade down and settle between the layers. Use the back of a spoon to gently press down, ensuring everything is submerged. Top with your remaining cheese in an even layer - this will create that irresistible golden crust. Cover tightly with foil and bake covered for 45 minutes to cook the potatoes through, then uncover and bake until golden and bubbling. The cast iron ensures crispy edges while keeping the center creamy. For the ultimate finish, a quick broil at the end creates extra caramelization on top.
 pin it
Switch Things Up
I'll never forget the first time I made these in my grandmother's old cast iron skillet. I was nervous about getting those perfect overlapping layers, but once I got into a rhythm, it became almost meditative – slice, arrange, repeat. The kitchen smelled incredible as it baked, and when I pulled it out with those gorgeous caramelized edges, I knew I'd created something special. Now, every time I make this dish, I use that same cast iron pan. There's something magical about how it conducts heat, creating those crispy bits around the edges while keeping everything else creamy. I've experimented with different cheeses – sometimes I'll throw in some sharp cheddar for extra bite, or fontina for extra creaminess. My favorite variation includes thinly sliced onions between the potato layers. The cast iron has become my secret weapon for this recipe.
Perfect Pairings
These scalloped potatoes are incredibly versatile and pair beautifully with so many dishes. They're a natural match for roasted meats – think herb-crusted prime rib, garlic butter steak, or roasted chicken with crispy skin. For a lighter pairing, serve alongside grilled salmon with dill or pan-seared pork chops with apple compote. The creamy richness also complements tangy dishes wonderfully, so consider pairing with a fresh arugula salad dressed in lemon vinaigrette, or roasted Brussels sprouts with balsamic glaze. For wine, reach for a buttery Chardonnay or a crisp Sauvignon Blanc to cut through the richness.
 pin it
Frequently Asked Questions
- → Can I make this recipe ahead of time?
Absolutely! You can assemble the entire dish up to 24 hours in advance. Just cover it tightly with plastic wrap and refrigerate. When you're ready to bake, remove it from the fridge and let it sit at room temperature for about 30 minutes, then add an extra 15-20 minutes to the covered baking time since you're starting with a cold dish. This makes it perfect for holiday entertaining when oven space is precious.
- → Why do my scalloped potatoes turn out watery?
Watery scalloped potatoes usually result from excess moisture in the potatoes or not allowing enough resting time after baking. Make sure to thoroughly dry your potato slices after rinsing them, and always let the dish rest for 10-15 minutes after removing from the oven. This resting period allows the cream sauce to thicken and set properly. Also, avoid overcrowding the pan or using too much liquid relative to the potatoes.
- → Can I use a different type of potato?
While Yukon Golds are ideal for their creamy texture and buttery flavor, you can use Russet potatoes for a more traditional result. Russets have higher starch content, which creates a thicker sauce but can sometimes be less creamy. Avoid waxy potatoes like red potatoes or fingerlings, as they don't absorb the cream as well and can result in a less cohesive dish. Whatever you choose, consistent slicing thickness matters more than the variety.
- → Do I need to use a cast iron skillet?
While cast iron creates the best crispy edges and even heat distribution, you can use any oven-safe baking dish. A ceramic or glass 9x13 baking dish works well, though you'll miss out on those signature crispy edges that cast iron provides. You can also use individual cast iron skillets or ramekins for elegant single-serving presentations. Just adjust the baking time accordingly for smaller vessels - start checking for doneness around 40-45 minutes.
- → How do I know when the potatoes are done?
The potatoes are perfectly cooked when a knife slides through the center layers with no resistance, the top is golden brown with crispy edges, and the cream sauce is bubbling around the sides. If the top is browning too quickly but the potatoes aren't tender yet, cover loosely with foil and continue baking. The internal temperature should reach about 210°F. Remember, the dish will continue cooking slightly during the resting period, so don't overbake.
- → Can I freeze leftover scalloped potatoes?
While you can freeze scalloped potatoes, the texture of the cream sauce may become slightly grainy when reheated due to the dairy separating. If you do freeze them, cool completely, wrap tightly in plastic wrap and foil, and freeze for up to 2 months. Thaw overnight in the refrigerator and reheat covered at 350°F until warmed through. For best results, I recommend making smaller batches and storing leftovers in the refrigerator for 3-4 days, reheating individual portions in the microwave or oven as needed.
Conclusion
These Ultimate Cast Iron Scalloped Potatoes are the perfect marriage of technique and comfort food. The cast iron skillet creates an unbeatable texture contrast – crispy, golden edges that give way to layers of tender potatoes in luxurious cream sauce. Whether you're serving this at a holiday dinner or a casual weeknight meal, it never fails to impress. The beauty of this recipe is its versatility: you can prepare it ahead, customize the cheese blend, or add your favorite herbs. Once you master this technique, you'll find yourself reaching for your cast iron skillet every time potatoes are on the menu.