
 pin it
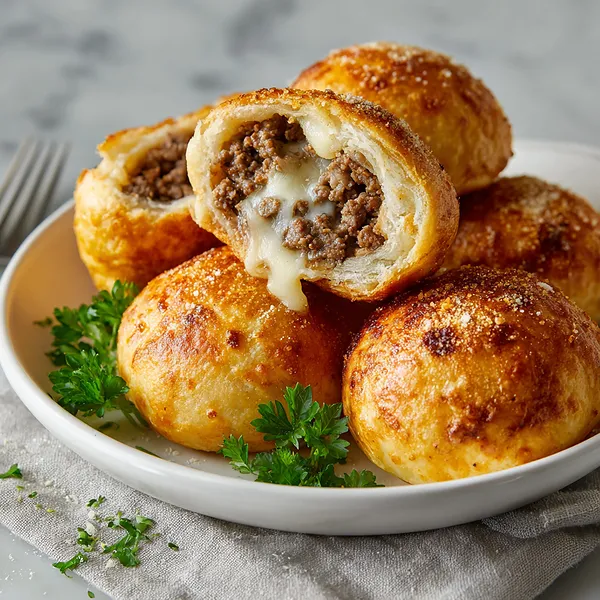
I remember the first time I encountered the concept of stuffed dough bombs at a local food festival – it was love at first bite. The idea of combining a cheeseburger with pizza dough seemed almost too good to be true, but it works magnificently. These Garlic Parmesan Cheeseburger Bombs take that concept and elevate it with a luxurious garlic butter coating that transforms them into something truly special. The process is therapeutic – browning the beef, watching the cheese melt, carefully wrapping each bomb, and brushing them with that fragrant garlic butter. What makes this recipe particularly brilliant is the texture contrast: the crispy, golden exterior gives way to soft dough, then hits you with that molten cheese and savory beef center. The parmesan adds a salty, umami depth that ties everything together, while the fresh parsley provides a bright finish. They're substantial enough to serve as a main course, yet perfect as an appetizer or snack. The beauty of this recipe lies in its simplicity – basic ingredients come together to create something that feels gourmet and indulgent.
Why I love this recipe
This recipe holds a special place in my heart because it represents everything I love about comfort food – it's warm, satisfying, shareable, and always brings smiles. I love how forgiving this recipe is for beginners, yet it offers enough room for experienced cooks to get creative with seasonings and fillings. The prep work is minimal, and most of the cooking happens in the oven, which means you can socialize while they bake. These bombs are conversation starters – people always ask about them, want to know the recipe, and remember them long after the party ends. I appreciate how they solve the eternal question of "what should I bring?" for gatherings. They transport well, reheat beautifully, and appeal to almost everyone. Kids absolutely adore them, which makes them perfect for family meals. The garlic parmesan coating is addictive, and I often find myself making extra just to have on hand. What truly makes me love this recipe is the joy it brings – that first bite when the cheese stretches, the satisfied expressions, the requests for seconds. It's not just food; it's an experience that brings people together around the table.
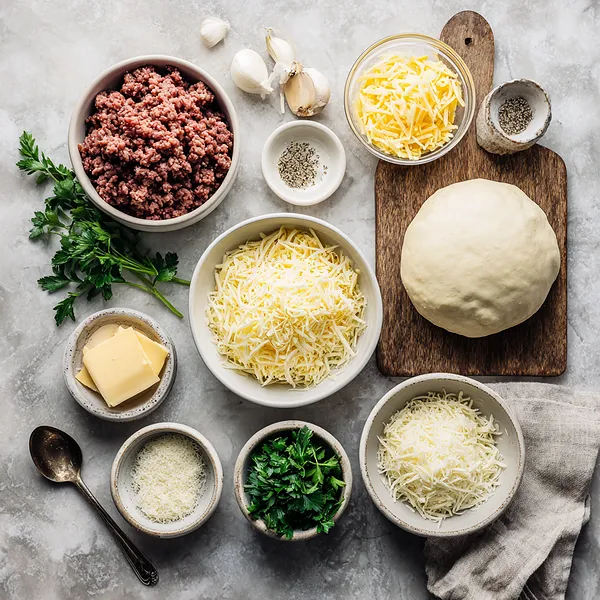
What You Need From Your Kitchen
- Ground Beef: Brown and season with garlic powder, onion powder, salt, and pepper until fully cooked
- Pizza Dough: Divide into 12 equal pieces and roll into 4-inch circles
- Cheddar and Mozzarella Cheese: Mix together and use as filling for each bomb
- Garlic: Mince finely and combine with melted butter for brushing
- Parmesan Cheese: Grate fresh and mix half with butter, reserve rest for topping
- Fresh Parsley: Chop finely for garnishing the finished bombs
Let's Make These Together
- Season and Brown Beef
- Heat your skillet over medium-high heat and add the ground beef. As it cooks, break it into small, uniform crumbles using a wooden spoon. Season generously with garlic powder, onion powder, salt, and black pepper. The key here is to get nice browning on the meat for maximum flavor – don't rush this step. Once no pink remains and the beef is nicely browned, drain any excess fat and set aside to cool. This slight cooling makes it easier to handle when filling the bombs.
- Prepare Dough Circles
- Take your pizza dough and divide it into 12 equal portions – a kitchen scale helps ensure consistency, but eyeballing works too. Roll each portion into a smooth ball, then use a rolling pin or your hands to flatten each ball into a 4-inch circle. The dough should be thick enough to hold the filling without tearing – about 1/4 inch thickness is perfect. Work on a lightly floured surface to prevent sticking, and keep unused dough covered to prevent drying.
- Fill and Seal
- This is where the magic happens! Place each dough circle in your palm, add about a tablespoon of the seasoned beef in the center, then top with a generous pinch of the cheese mixture. Here's the trick: don't overfill, or they'll burst during baking. Carefully pull all edges of the dough up and over the filling, meeting in the center. Pinch and twist to seal completely, making sure there are no gaps. Place each bomb seam-side down on your parchment-lined baking sheet, spacing them about 2 inches apart.
- Create Garlic Butter Coating
- In a small bowl, combine your melted butter with minced garlic and half of the grated parmesan. This garlic butter is what transforms these from good to absolutely irresistible. Mix it well so the garlic is evenly distributed. Using a pastry brush, generously coat the top of each bomb with this mixture. Don't be shy – the butter helps them brown beautifully and adds incredible flavor.
- Bake and Finish
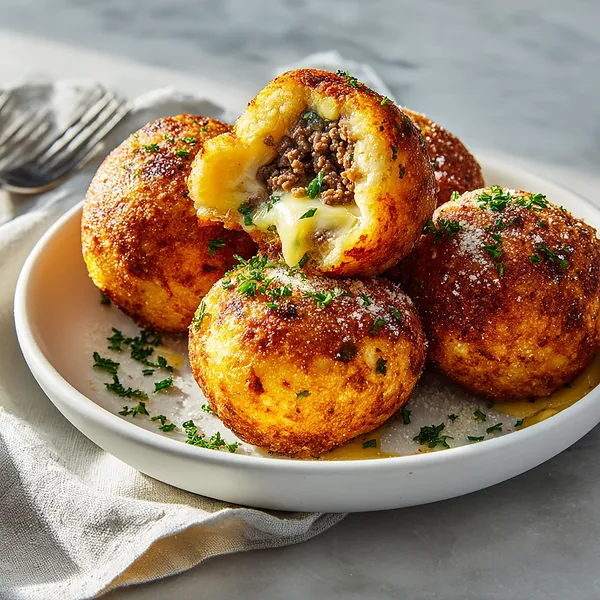
- Slide your baking sheet into the preheated 375°F oven and bake for 18-20 minutes. You're looking for a gorgeous golden-brown color on top. The dough should be cooked through and the cheese inside should be fully melted. As soon as they come out of the oven, brush them again with any remaining garlic butter while they're still hot – it soaks right in. Sprinkle with the remaining parmesan and a shower of fresh chopped parsley. The parsley isn't just for looks; it adds a fresh note that balances the richness. Serve immediately while they're hot and the cheese is still gooey.
 pin it
Switch Things Up
I first stumbled upon the idea of cheeseburger bombs during a late-night cooking video binge, and I knew I had to try them immediately. The next day, I gathered my ingredients and got to work in the kitchen. My first attempt was a bit messy – I overstuffed them and cheese leaked everywhere – but they still tasted incredible. I learned that less is more when it comes to filling, and sealing them properly is key. The garlic parmesan coating was a game-changer that I added on my second try, inspired by my love for garlic knots. Now, I make these regularly for family gatherings, and they've become a requested favorite. My nephew calls them "flavor grenades," which is honestly the perfect description. The best part? Watching everyone's face when they bite into one and discover that melted cheese center. These bombs have earned their place in my regular rotation, and I'm always tweaking the recipe to make them even better.
Perfect Pairings
These Garlic Parmesan Cheeseburger Bombs pair beautifully with classic marinara sauce for dipping, but don't stop there! Try them with ranch dressing, spicy sriracha mayo, or even a tangy barbecue sauce. For a complete meal, serve them alongside a crisp garden salad with a light vinaigrette to balance the richness. French fries or sweet potato fries make excellent companions, creating the ultimate comfort food platter. If you're serving them at a party, set up a dipping station with multiple sauce options – garlic aioli, cheese sauce, and honey mustard are all fantastic choices. Beverage-wise, they go perfectly with cold beer, soda, or even a chilled glass of lemonade. For a fun twist, serve them with pickles and crispy onion rings on the side to complete that cheeseburger experience.
 pin it
Frequently Asked Questions
- → Can I make these ahead of time?
Absolutely! You can prepare the bombs through the assembly stage, place them on a baking sheet, and freeze until solid. Transfer to a freezer bag and store for up to 3 months. Bake directly from frozen, adding 5-7 minutes to the cooking time. You can also bake them completely and reheat in a 350°F oven for 10 minutes.
- → What if my dough keeps tearing?
If your dough is tearing, it's likely either too cold or you're overfilling the bombs. Let refrigerated dough come to room temperature for about 30 minutes before working with it. Also, make sure you're not adding too much filling – about 1 tablespoon of meat and a small pinch of cheese is perfect. Roll the dough to an even thickness to avoid thin spots.
- → Can I use different types of cheese?
Yes! While cheddar and mozzarella create that classic cheeseburger flavor, feel free to experiment. Pepper jack adds a spicy kick, Swiss gives a nutty flavor, or try a mixture of provolone and mozzarella for extra stretchiness. Just make sure at least one cheese is a good melter like mozzarella.
- → My cheese leaked out during baking. What went wrong?
Cheese leakage usually happens when the bombs aren't sealed properly. Make sure to pinch the seams very tightly and place them seam-side down on the baking sheet. Also, avoid overfilling – less is more with these. If you notice a weak spot, pinch it again before baking. The dough will expand and seal better during baking if properly closed.
- → What are the best dipping sauces?
The classic choice is marinara sauce, which complements the garlic and cheese beautifully. Ranch dressing is another favorite, as is garlic aioli. For something different, try spicy sriracha mayo, barbecue sauce, or even a cheese sauce. I love offering multiple options and letting everyone choose their favorite.
- → Can I make these vegetarian?
Definitely! Skip the ground beef and use sautéed mushrooms, black beans, or plant-based ground meat substitute. You could also do a combination of sautéed peppers, onions, and mushrooms. Just make sure any vegetables are cooked and excess moisture is removed before filling the bombs, or they'll become soggy.
- → How do I store leftovers?
Store cooled bombs in an airtight container in the refrigerator for up to 3 days. Reheat in a 350°F oven for 8-10 minutes until warmed through and crispy again. Avoid microwaving if possible, as it makes the dough soggy. If you must microwave, do so for 30-45 seconds on 50% power, then crisp up in a hot skillet.
Conclusion
These Garlic Parmesan Cheeseburger Bombs are the perfect fusion of two beloved comfort foods – cheeseburgers and garlic bread. They're incredibly versatile, making them ideal for parties, game day, or even a fun family dinner. The combination of melted cheese, seasoned beef, and that irresistible garlic parmesan coating creates a flavor explosion in every bite. What I love most is how they look impressive but are surprisingly simple to make. Once you master the basic technique, you can experiment with different fillings and seasonings. They also freeze beautifully, so you can make a big batch and have them ready whenever cravings strike. Serve them hot with your favorite dipping sauces, and prepare for everyone to ask for the recipe!