
 pin it
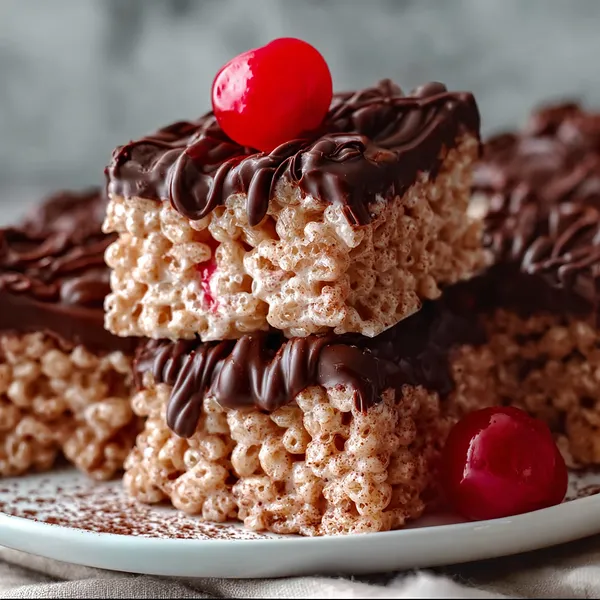
I stumbled upon the idea for these treats during a late-night baking session when I was experimenting with ways to elevate childhood favorites. The classic rice krispies treat has always held a special place in my heart – it was one of the first things I learned to make as a kid. But as an adult, I wanted something with a bit more sophistication, something that still honored that nostalgic crunch but added layers of flavor. The cherries came to mind because I've always loved chocolate-covered cherries, and I thought, why not combine that concept with the ease of rice cereal treats? When I folded those bright red cherry pieces into the marshmallow mixture, I knew I was onto something special. The chocolate coating was the final touch that transformed these from simple to spectacular. Now they're my go-to when I want to make something impressive without spending hours in the kitchen.
Why I love this recipe
What I love most about this recipe is how it bridges the gap between simple and sophisticated. It takes minimal time and effort – you're essentially just melting, mixing, and coating – but the result looks and tastes like something you'd buy from a fancy bakery. The texture combination is absolutely perfect: that signature krispies crunch, the chewiness from the marshmallow, the soft burst of cherry, and the snap of chocolate coating. Every bite is different depending on where you get a cherry piece or extra chocolate. I also love how forgiving this recipe is – you can adjust the cherry amount, try different chocolates, even add a pinch of sea salt on top. It's become my signature contribution to potlucks and holidays, and I never get tired of watching people's faces light up when they take that first bite. Plus, there's something deeply satisfying about making something this delicious without turning on the oven.
What You Need From Your Kitchen
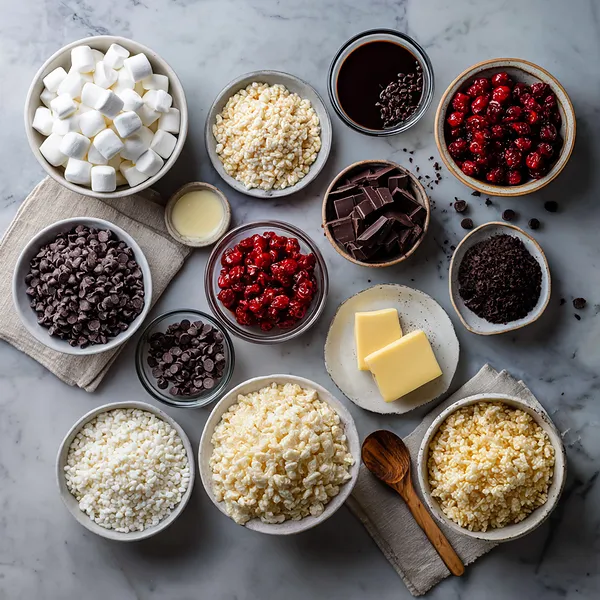
- Crispy rice cereal: Provides the signature crunchy texture and base structure for the treats
- Mini marshmallows: Creates the sticky-sweet binding that holds everything together when melted
- Maraschino cherries: Adds bright fruity flavor and beautiful pink color throughout each bite
- Dark chocolate chips: Forms the rich, glossy coating that elevates these treats to dessert status
- Butter: Helps melt the marshmallows smoothly and prevents sticking
- Coconut oil: Thins the chocolate for easier coating and adds shine to the finished product
Let's Make These Together
- Prepare your workspace
- Start by setting up your workspace with all ingredients measured and ready. Line your baking pan with parchment paper, making sure to leave overhang on the sides – this will be your handle for lifting out the treats later. Having everything ready before you start is crucial because once that marshmallow melts, you need to work quickly. Trust me, there's nothing worse than having your mixture start to set while you're still looking for the pan.
- Create the marshmallow base
- Melt your butter in a large pot over medium heat, then add those fluffy marshmallows. Stir constantly and watch as they transform into a smooth, glossy mixture. This is where the magic starts to happen. The key is not to let it get too hot or it will become tough, so keep the heat moderate and be patient. Once it's completely smooth with no lumps, immediately remove from heat.
- Combine and add cherries
- Here's where you need to work with purpose. Pour in your rice cereal and fold it through the marshmallow mixture until every piece is coated. Then gently fold in those bright, chopped cherries. They should be distributed throughout but not crushed. The mixture will be sticky and a bit unwieldy, but that's exactly what you want. The warmth of the marshmallow mixture will slightly soften the cherries, releasing a hint of their sweet flavor into every bite.
- Press and set firmly
- Transfer this beautiful sticky mixture into your prepared pan. Using buttered hands or a greased spatula, press down firmly and evenly across the entire surface. You want a consistent thickness so every piece will be uniform. Don't be timid here – really press it down. Then let it rest at room temperature. This cooling period is essential for the treats to firm up properly before cutting.
- Coat in chocolate luxury
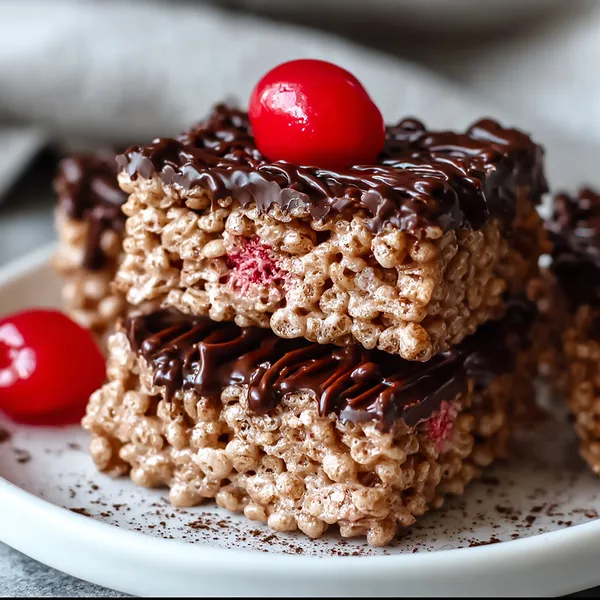
- Once your treats are set, lift them out using the parchment handles and cut into your desired shapes. Now comes the best part – the chocolate coating. Melt your chocolate with coconut oil until it's silky smooth, then dip each piece. You can fully coat them or just do the tops – your choice. Watch as that glossy chocolate cascades down the sides. Place them on fresh parchment and add your cherry garnish while the chocolate is still wet. Let them set completely and prepare to be amazed by what you've created.
 pin it
Switch Things Up
I first made these on a whim when I had leftover cherries from making sundaes and a craving for something sweet but didn't want to deal with a complicated recipe. I thought, why not throw them into rice krispies treats? The first batch was good, but when I added the chocolate coating, everything changed. Suddenly, these weren't just treats – they were an experience. My kitchen smelled like a chocolate shop, and when I bit into that first piece, the combination of textures and flavors was so perfect I immediately made another batch. Now, whenever I bring these anywhere, they disappear within minutes. People always ask for the recipe, surprised that something so decadent is actually so simple to make. The trick is patting those cherries really dry so they don't make the treats soggy, and using good quality chocolate makes all the difference in that coating.
Perfect Pairings
These treats pair beautifully with a cold glass of whole milk or a rich cup of coffee – the bitterness balances the sweetness perfectly. For a more indulgent dessert spread, serve them alongside vanilla ice cream or whipped cream. They're also fantastic with fresh strawberries or raspberries on the side, which echo the fruity cherry flavor. If you're feeling adventurous, a glass of cherry liqueur or port wine makes for an elegant adult pairing. For parties, set them out with other bite-sized desserts like brownies or cookies for a varied dessert board.
 pin it
Frequently Asked Questions
- → Can I use regular-sized marshmallows instead of mini?
Yes, you can use regular marshmallows – you'll need about 40 large marshmallows to equal 4 cups of mini marshmallows. They may take slightly longer to melt, but the result will be the same.
- → What if I don't have coconut oil for the chocolate?
You can substitute with vegetable oil, butter, or even a tablespoon of heavy cream. The coconut oil helps thin the chocolate and adds shine, but these alternatives work well too.
- → Can I use fresh cherries instead of maraschino?
Fresh cherries contain too much moisture and will make the treats soggy. Stick with maraschino cherries, but make sure to pat them extremely dry before adding them to the mixture.
- → How do I prevent the treats from being too hard?
Don't overcook the marshmallow mixture – as soon as it's melted and smooth, remove from heat. Also, don't press the mixture into the pan too firmly, as this can compress it too much and make it dense.
- → Can I make these ahead of time?
Absolutely! These treats actually keep very well. Store them in an airtight container at room temperature for up to 5 days, or refrigerate for up to 2 weeks. They're perfect for make-ahead party treats.
- → What type of chocolate works best?
Dark chocolate chips work beautifully, but you can also use semi-sweet or milk chocolate depending on your preference. Higher quality chocolate will give you a smoother, more professional-looking coating.
- → Why is my chocolate coating not setting?
Make sure you're using real chocolate chips, not candy melts or coating chocolate which set differently. Also, ensure your treats are completely cool before dipping. If it's very warm in your kitchen, pop them in the fridge for 15 minutes to help the chocolate set faster.
Conclusion
These Chocolate Covered Cherry Rice Krispies Treats are the ultimate upgrade to a beloved classic. They're proof that sometimes the best recipes come from taking something familiar and adding your own creative twist. The combination of textures – crispy, chewy, smooth – and flavors – sweet, tart, rich – creates a treat that's truly special. Whether you're making them for a party, a gift, or just because you deserve something wonderful, these bars deliver every single time. They're easy enough for beginners but impressive enough to wow any crowd.