
 pin it
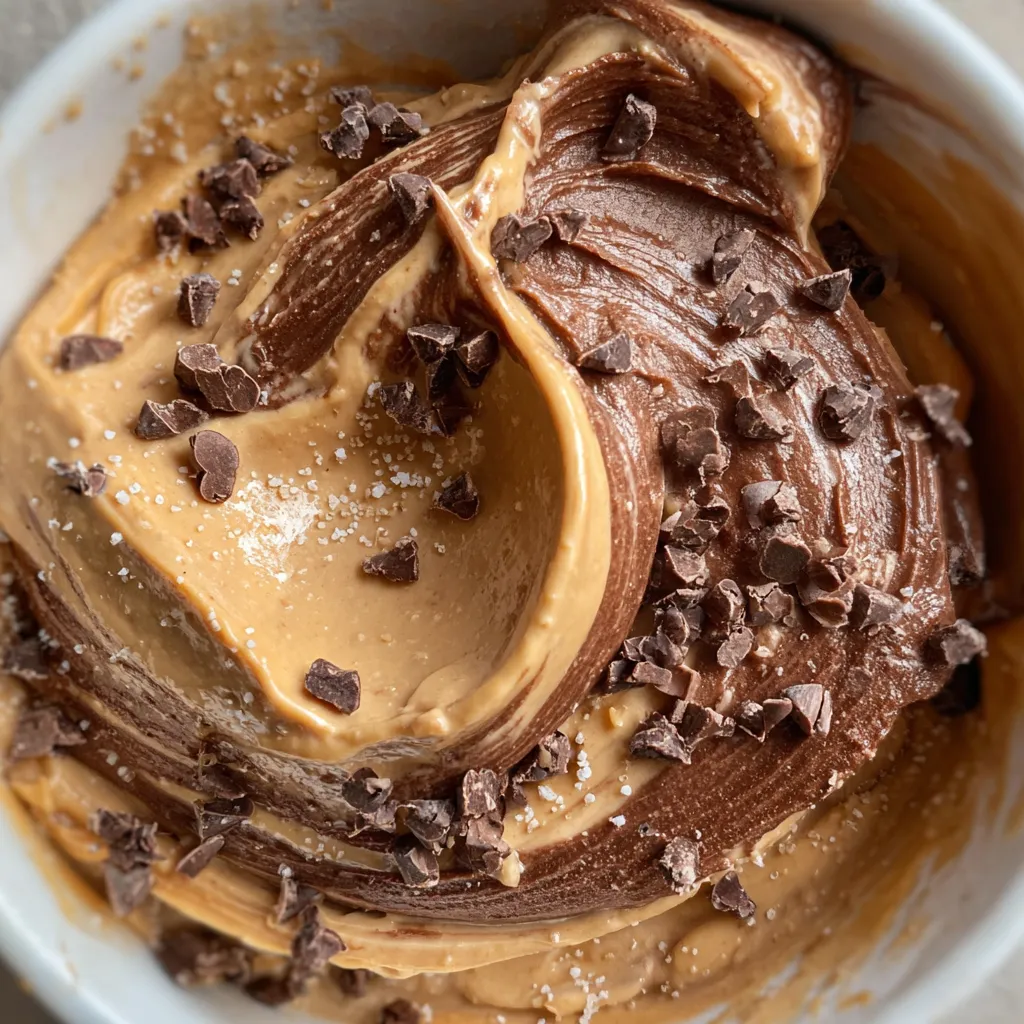
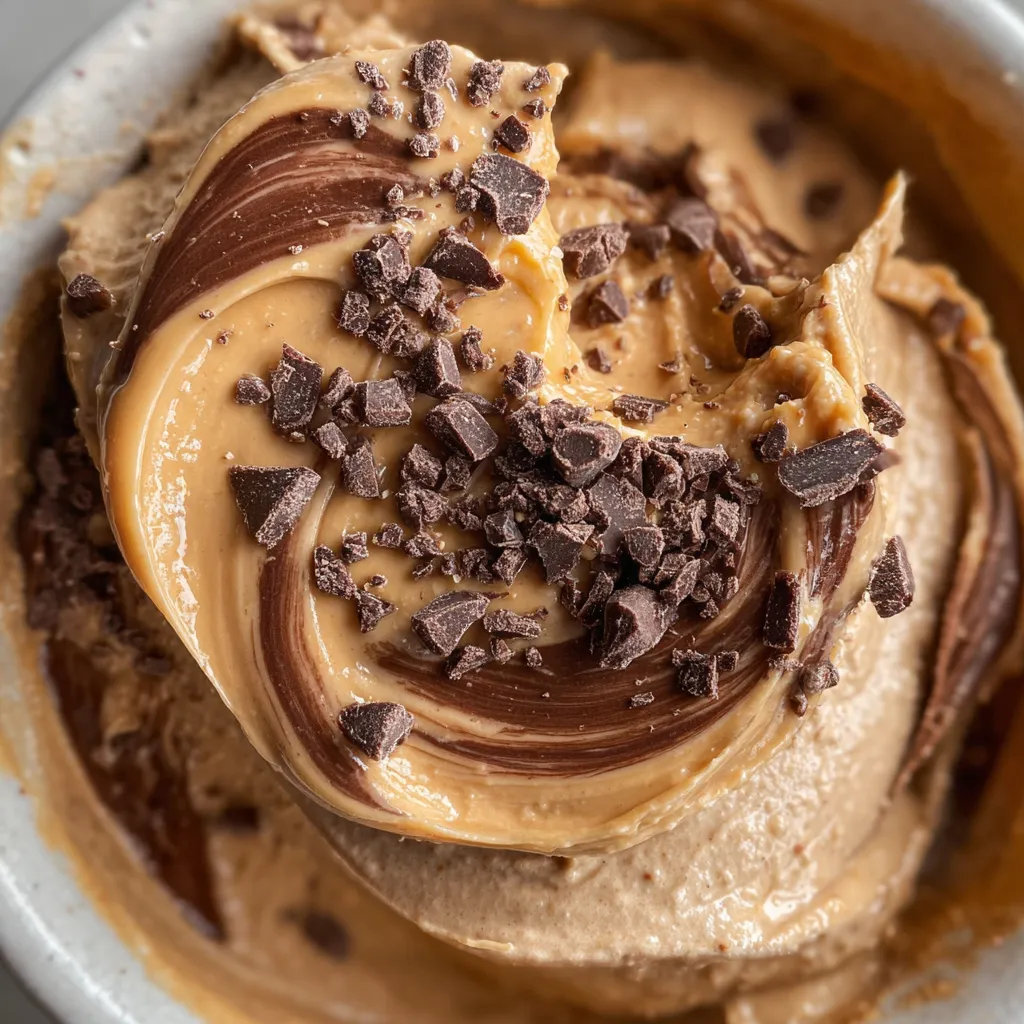
I first discovered the magic of combining chocolate and peanut butter in frozen desserts during a late-night craving session. This Ninja Creami recipe has become my absolute favorite way to satisfy that craving. The process is incredibly straightforward - you simply blend your base ingredients, freeze overnight, and let the machine transform it into silky smooth ice cream. What I love most is how the peanut butter doesn't just flavor the base but creates these gorgeous swirled patterns throughout. The addition of chocolate chunks gives every bite a delightful textural contrast. Every time I make this, I'm amazed at how professional the results look and taste. It's become my signature dessert that friends and family constantly request.
Why I love this recipe
This recipe holds a special place in my heart because it represents everything I love about homemade desserts - simplicity, quality, and pure indulgence. The Ninja Creami makes the process so foolproof that even beginners can achieve perfect results every time. I love how you can customize the chocolate chunks to your preference, whether you want dark chocolate intensity or milk chocolate sweetness. The peanut butter base is rich but not overwhelming, creating the perfect balance with the chocolate elements. What really gets me excited is how this recipe allows me to control every ingredient, ensuring the highest quality without any artificial additives. Plus, the satisfaction of creating something this beautiful and delicious at home never gets old. It's become my stress-relief activity and my way of showing love to family and friends.
What You Need From Your Kitchen
- Heavy Cream: Provides richness and smooth texture to the ice cream base
- Peanut Butter: Creates the main flavor profile and creamy consistency
- Cocoa Powder: Adds chocolate flavor and creates beautiful marbled swirls
- Powdered Sugar: Sweetens the mixture and dissolves easily for smooth texture
- Chocolate Chunks: Provides textural contrast and bursts of chocolate flavor
- Whole Milk: Balances the richness and helps achieve proper consistency
Let's Make These Together
- Prepare the creamy base mixture
- Start by whisking together all your liquid ingredients with the peanut butter and powdered sugar. Make sure everything is well combined and smooth before moving to the next step. This creates the foundation of your delicious ice cream.
- Create chocolate marble swirls
- Take some of your prepared mixture and blend it with cocoa powder to create a rich chocolate paste. Gently swirl this back into your main mixture to create those beautiful marbled patterns you see in the final product.
- Freeze overnight for best results
- Pour your mixture into the Ninja Creami container and freeze for a full 24 hours. This ensures the mixture is completely solid and will process properly in your machine for the smoothest texture.
- Process and add chocolate chunks
- Remove from freezer and run through your Ninja Creami on the ice cream setting. Once processed, fold in those delicious chocolate chunks using the mix-in setting for the perfect finishing touch.
 pin it
Switch Things Up
I'll never forget the first time I made this recipe - it was during a summer heatwave when I was craving something cold and indulgent. I had just gotten my Ninja Creami and was experimenting with different flavor combinations. The moment I saw those beautiful chocolate and peanut butter swirls come together, I knew I had struck gold. My family couldn't believe I had made something so professional-looking at home. Now it's become our go-to dessert for special occasions and hot summer days. The best part is watching everyone's faces light up when they take that first spoonful of creamy, dreamy goodness.
Perfect Pairings
This creamy treat pairs beautifully with warm brownies or chocolate chip cookies for an ultimate dessert experience. For a more sophisticated touch, serve alongside fresh berries or a drizzle of salted caramel sauce. It also makes an excellent base for milkshakes or can be sandwiched between graham crackers for gourmet ice cream sandwiches.
 pin it
Frequently Asked Questions
- → Can I use natural peanut butter instead of regular?
Yes, but make sure to mix it well first as natural peanut butter can separate. The oil separation might affect the final texture slightly.
- → How long does this ice cream last in the freezer?
Properly stored, this ice cream will last up to 1 month in the freezer. Re-spin before serving if it becomes too hard.
- → Can I make this without chocolate chunks?
Absolutely! The ice cream is delicious on its own. You could also substitute with crushed cookies, nuts, or other mix-ins of your choice.
- → What if my mixture is too hard to process?
Let the container sit at room temperature for 5-10 minutes to soften slightly, then try processing again. You can also add 1-2 tablespoons of milk.
- → Can I double this recipe?
This recipe is designed for one Ninja Creami pint container. To make more, prepare multiple single batches rather than doubling in one container.
Conclusion
This Chocolate Peanut Butter Ninja Creami is the perfect marriage of two beloved flavors. The smooth, creamy texture achieved by the Ninja Creami paired with the rich taste makes this dessert absolutely irresistible. It's surprisingly simple to make yet delivers restaurant-quality results that will have everyone asking for the recipe. Store any leftovers in the freezer and simply re-spin when ready to serve again.