
 pin it
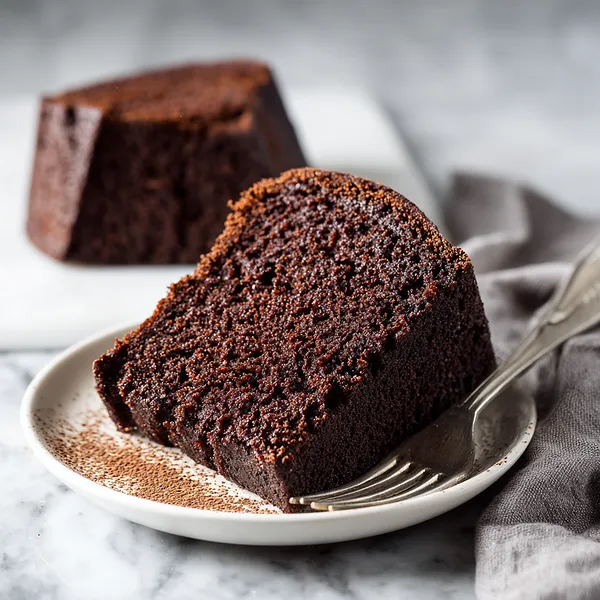
I first encountered buttermilk chocolate pound cake at a small Southern bakery during a road trip through Georgia, and I was immediately captivated by its deep chocolate flavor and incredibly moist texture. Unlike regular chocolate cakes that can be light and fluffy, this pound cake has a satisfying density that makes each bite feel substantial and indulgent. The buttermilk is what sets this recipe apart from other chocolate cakes – it reacts with the baking soda to create tenderness while adding a subtle tang that balances the sweetness perfectly. When I got home, I experimented with several recipes until I found the perfect ratio of cocoa powder to flour, creating a cake that's intensely chocolatey without being bitter. The beauty of this recipe lies in its simplicity – you don't need any fancy techniques or equipment, just a good mixing bowl and a bundt pan. What I love most is how the cake develops an almost brownie-like crust on the outside while staying incredibly soft and tender on the inside. It's the kind of dessert that tastes even better the next day, as the flavors meld together and the texture becomes even more velvety. Every time I make it, I'm transported back to that little bakery in Georgia, and I'm reminded that sometimes the best recipes are the ones that have been perfected over generations.
Why I love this recipe
I love this recipe because it delivers maximum chocolate flavor with minimal effort, making it perfect for both experienced bakers and beginners. The buttermilk creates a texture that's impossible to achieve with regular milk – it's tender, moist, and stays fresh for days without drying out. Unlike lighter cakes that can be temperamental, this pound cake is incredibly forgiving and produces consistent results every single time. I appreciate how versatile it is – you can dress it up with ganache and berries for a dinner party, or simply dust it with powdered sugar for a casual family dessert. The recipe also scales beautifully if you want to make mini loaves for gifting, and it freezes wonderfully for make-ahead convenience. What really makes me love this cake is the reaction I get from people who try it – they're always surprised by how much better it is than box-mix cakes or bakery versions. The deep, rich chocolate flavor comes from using quality cocoa powder, and the dense crumb provides a satisfying eating experience that lighter cakes can't match. It's become my signature dessert, the one I bring to potlucks and make for birthdays, because I know it will always be a crowd-pleaser. Plus, there's something deeply satisfying about slicing into a perfectly baked pound cake and seeing that beautiful, even crumb structure.
What You Need From Your Kitchen
- All-purpose flour: Forms the structure of the cake; sift if needed to prevent lumps
- Unsweetened cocoa powder: Provides deep chocolate flavor; use high-quality brand for best results
- Unsalted butter: Must be softened to room temperature for proper creaming with sugar
- Granulated sugar: Sweetens and helps create the cake's tender crumb when creamed with butter
- Eggs: Bring to room temperature for better incorporation and structure
- Buttermilk: Creates tender, moist texture and reacts with baking soda for subtle rise
- Vanilla extract: Enhances the chocolate flavor; use pure extract for best taste
Let's Make These Together
- Prepare Your Workspace
- Start by gathering all your ingredients and measuring them accurately. Preheat your oven to 325°F and prepare your bundt pan with butter and cocoa powder. Having everything ready before you begin mixing ensures a smooth baking process and helps prevent mistakes. Room temperature ingredients mix together more easily, so take your butter, eggs, and buttermilk out of the refrigerator about an hour before you plan to bake.
- Mix the Dry Ingredients
- Whisk together your flour, cocoa powder, baking soda, and salt in a medium bowl. This step is crucial because it ensures the leavening agent and cocoa powder are evenly distributed throughout the flour. If you notice any lumps in your cocoa powder, sift the mixture through a fine-mesh sieve. Set this bowl aside – you'll add it to the wet ingredients in alternating batches later.
- Cream Butter and Sugar
- In your large mixing bowl, beat the softened butter and sugar together using an electric mixer on medium-high speed. This process, called creaming, incorporates air into the batter and is essential for the cake's texture. Beat for 4-5 minutes until the mixture becomes light, fluffy, and pale in color. The sugar crystals will cut into the butter, creating tiny air pockets that help the cake rise. Don't rush this step – proper creaming makes a significant difference in the final texture.
- Add Eggs and Vanilla
- Add your eggs one at a time, beating well after each addition. This gradual incorporation prevents the batter from curdling and ensures a smooth, emulsified mixture. After all eggs are incorporated, mix in the vanilla extract. The batter should look smooth and glossy at this point. If it appears slightly curdled, don't worry – it will come together when you add the flour.
- Combine Wet and Dry
- Now comes the critical step of combining your dry ingredients with the wet mixture. With your mixer on low speed, add about one-third of the flour mixture, then half of the buttermilk, another third of the flour, the remaining buttermilk, and finally the last third of flour. This alternating method ensures the batter stays smooth and the gluten doesn't overdevelop. Mix just until you no longer see streaks of flour – overmixing will result in a tough cake.
- Bake to Perfection
- Pour your thick, glossy batter into the prepared bundt pan and spread it evenly. Tap the pan on the counter a few times to release air bubbles. Bake for 70-75 minutes without opening the oven door during the first hour. The cake is done when a toothpick inserted into the center comes out clean or with just a few moist crumbs. The top should spring back when gently pressed.
- Cool and Finish
- Let the cake cool in the pan for 15-20 minutes on a wire rack. This cooling period allows the cake to firm up slightly, making it easier to unmold without breaking. After cooling, place your serving plate upside down on top of the pan, then flip both together so the cake releases onto the plate. Let it cool completely before dusting with powdered sugar or cocoa powder for that bakery-perfect finish.
 pin it
Switch Things Up
I remember the first time I made this cake for a family gathering, and I was nervous because I'd never made a chocolate pound cake before. I followed the recipe exactly, mixing the batter until it was smooth and glossy, and the smell that filled my kitchen while it baked was absolutely intoxicating. When I pulled it from the oven and let it cool, I couldn't resist cutting a small slice to taste. The texture was perfect – dense but not heavy, moist but not wet, with that classic pound cake firmness that holds up beautifully. My aunt, who's an incredible baker herself, asked for the recipe immediately. Since then, I've made this cake countless times, and I've learned that letting it cool completely before slicing is essential for clean cuts. I've also discovered that a simple dusting of cocoa powder or powdered sugar transforms it from homemade to bakery-quality presentation. Now it's my go-to recipe whenever I need a chocolate dessert that's guaranteed to impress without requiring fancy techniques or hard-to-find ingredients.
Perfect Pairings
This chocolate pound cake pairs beautifully with a variety of accompaniments. Serve it with fresh whipped cream and berries for an elegant dessert, or alongside vanilla ice cream for a classic combination. A cup of strong coffee or espresso complements the deep chocolate flavor perfectly, making it an ideal afternoon treat. For a more decadent presentation, drizzle warm chocolate ganache over individual slices and top with toasted pecans or almonds. The cake also pairs wonderfully with cherry compote or raspberry sauce, as the tartness cuts through the richness. During holidays, serve it with peppermint ice cream or eggnog for a festive twist.
 pin it
Frequently Asked Questions
- → Can I make this cake without buttermilk?
While buttermilk is preferred for its unique tangy flavor and tenderizing properties, you can make a substitute by adding 1 tablespoon of white vinegar or lemon juice to 1 cup of regular milk. Let it sit for 5 minutes before using. However, the texture and flavor will be slightly different from the original recipe.
- → Why did my cake sink in the middle?
A sunken center usually indicates underbaking or opening the oven door too early. Make sure your oven temperature is accurate using an oven thermometer, and avoid opening the door during the first 60 minutes of baking. Also ensure you're using the correct pan size – a pan that's too small will cause the batter to rise too high and then collapse.
- → How do I know when the pound cake is done?
Insert a toothpick or cake tester into the thickest part of the cake (usually near the center). It should come out clean or with just a few moist crumbs attached. The top of the cake should spring back when lightly pressed, and the edges should start pulling away slightly from the pan. If the toothpick comes out with wet batter, continue baking and check every 5 minutes.
- → Can I add chocolate chips to this recipe?
Yes, you can fold in 1 to 1.5 cups of chocolate chips at the end of mixing. Toss them in a tablespoon of flour first to prevent them from sinking to the bottom of the cake. Keep in mind this will make the cake sweeter and add extra chocolate intensity. Semi-sweet or dark chocolate chips work best.
- → How should I store leftover pound cake?
Wrap the cooled cake tightly in plastic wrap or store in an airtight container at room temperature for up to 5 days. The cake actually improves after a day or two as the flavors meld together. For longer storage, wrap individual slices in plastic wrap, then place in a freezer bag and freeze for up to 3 months. Thaw at room temperature when ready to serve.
- → My cake stuck to the pan – how can I prevent this?
Proper pan preparation is essential for bundt cakes. Use softened butter or baking spray to coat every ridge and crevice of the pan, then dust with cocoa powder instead of flour for a chocolate cake. Make sure the coating is even and complete. Also, let the cake cool in the pan for the recommended 15-20 minutes – removing it too early or too late can cause sticking.
- → Can I make this recipe in a different pan?
Yes, you can use two 9x5-inch loaf pans instead of a bundt pan. The baking time will be slightly shorter, around 55-65 minutes, so start checking for doneness at 50 minutes. You can also make this in a 9x13-inch rectangular pan, which will bake in about 45-50 minutes. Just remember that different pan sizes affect baking times.
Conclusion
This Buttermilk Chocolate Pound Cake is everything a chocolate lover dreams of – rich, dense, and intensely chocolatey without being overly sweet. The buttermilk creates an incredibly tender crumb that stays moist for days, making it perfect for meal prep or gifting. Whether you enjoy it plain, with a scoop of vanilla ice cream, or alongside your morning coffee, this cake delivers pure satisfaction in every bite. The beauty of this recipe is its simplicity and reliability – it works every single time, producing a bakery-quality dessert that looks as impressive as it tastes. Store it wrapped tightly at room temperature for up to five days, or freeze individual slices for whenever a chocolate craving strikes.