
 pin it
I first discovered the magic of truly fudgy brownies during a rainy afternoon in college when my roommate was baking for her boyfriend's birthday. The aroma that filled our tiny apartment was absolutely hypnotic – rich, chocolatey, and warm. She let me try one before boxing them up, and I was blown away by the texture. It wasn't like those cake-like brownies I'd grown up with; this was dense, fudgy, and intensely chocolate. The top had this delicate, papery crust that shattered at the slightest touch, giving way to the most incredible gooey center. I begged her for the recipe, and she laughed and told me it was just a simple ratio of butter, sugar, eggs, and chocolate – no secret ingredient, just good technique. From that day on, I became obsessed with perfecting my own version. I tested different cocoa powders, adjusted sugar ratios, and experimented with baking times until I found my ideal brownie. What I love most is that this recipe delivers consistent results every time – you don't need to be a expert baker to make these. The key is using quality cocoa powder and not overbaking them. When they come out of the oven, they might look slightly underdone in the center, but trust me, that's exactly what you want. As they cool, they set up perfectly into these incredible fudgy squares.
Why I love this recipe
This brownie recipe holds a special place in my heart for so many reasons. First, it's incredibly forgiving – even if you slightly overmix or overbake, you still end up with delicious brownies. Second, it's a one-bowl recipe that doesn't require any special equipment or techniques. You don't need a stand mixer or even an electric beater; just a bowl, a spatula, and your arm muscles. I love that I can have these in the oven within 15 minutes of deciding I want brownies. There's something deeply satisfying about melting butter and chocolate together, watching it transform into this glossy mixture. The way the eggs create that signature crackly top never fails to excite me – it's like a little bit of baking magic every single time. These brownies have been with me through so many moments: late-night study sessions, celebrations, comfort food marathons, and even as thank-you gifts for neighbors. They're rich enough to feel indulgent but simple enough to make on a whim. What really seals the deal is how people react when they taste them – that moment of surprise when they realize they're homemade, followed by requests for the recipe. It's become my signature dessert, and I genuinely never get tired of making them.
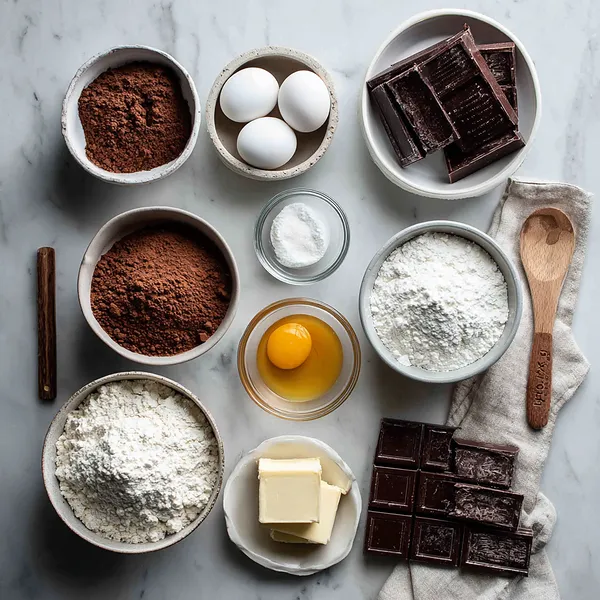
What You Need From Your Kitchen
- Unsalted butter: Melt completely and let cool slightly before mixing with sugar
- Granulated sugar: Whisk thoroughly with melted butter until mixture is smooth and slightly pale
- Large eggs: Bring to room temperature and add one at a time, whisking well after each addition
- All-purpose flour: Sift with cocoa powder to prevent lumps and ensure even distribution
- Unsweetened cocoa powder: Use high-quality cocoa for best flavor; Dutch-processed preferred
- Chocolate chips: Fold into batter gently and reserve some for topping
Let's Make These Together
- Prepare Your Workspace
- Start by preheating your oven and lining your baking pan with parchment paper. This simple step makes removing the brownies so much easier and ensures clean edges. Make sure to leave some overhang on the sides so you can lift the entire batch out once cooled.
- Create the Base
- Melt your butter until completely liquid, then whisk in the sugar vigorously. This step is crucial for developing that signature crackly top - you want to create a smooth, slightly pale mixture. Take your time here; it should take about 2 minutes of good whisking.
- Build the Batter
- Add your eggs one at a time, incorporating each fully before adding the next. This creates a smooth, emulsified mixture that will give you that perfect fudgy texture. The batter should look glossy and thick. Then stir in your vanilla for that extra depth of flavor.
- Incorporate Dry Ingredients
- Sift your flour, cocoa powder, and salt together to avoid any lumps. Fold this gently into your wet ingredients using a spatula - be careful not to overmix! Stop as soon as you don't see any flour streaks. Overmixing can make your brownies tough instead of tender.
- Final Touches and Bake
- Fold in most of your chocolate chips, then pour the thick batter into your prepared pan. Smooth the top and sprinkle with remaining chips. Bake until the top looks set and crackly, but a toothpick comes out with moist crumbs. Remember, slightly underbaked is better than overbaked for fudgy brownies!
 pin it
Switch Things Up
I remember the first time I made these brownies from scratch instead of using a box mix. I was hosting a small get-together and wanted to impress everyone with something homemade. I was nervous about getting that perfect fudgy texture – you know, not too cakey, not underbaked. When I pulled them out of the oven and saw that beautiful crackly top, I knew I'd nailed it. The hardest part was waiting for them to cool enough to cut because the smell was absolutely intoxicating. My friends couldn't believe these were homemade – they kept asking what my secret was! Now I make these at least twice a month because they're so easy and always turn out perfect. Sometimes I add walnuts, sometimes I swirl in peanut butter, but the base recipe is always this one. Pro tip: slightly underbake them for maximum fudginess!
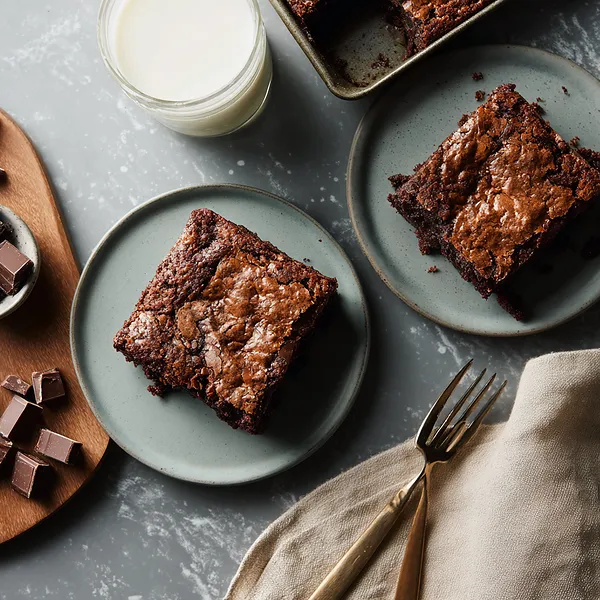
Perfect Pairings
These brownies are incredibly versatile when it comes to pairings. Serve them warm with a scoop of vanilla ice cream for an indulgent brownie sundae, or alongside fresh raspberries to cut through the richness with a tart contrast. A dollop of whipped cream adds a light, airy element that complements the dense chocolate. For beverage pairings, cold milk is classic and perfect, but they're also incredible with hot coffee or espresso – the bitterness balances the sweetness beautifully. If you're feeling fancy, pair them with a glass of red wine like Cabernet Sauvignon. For an extra decadent dessert, drizzle with salted caramel sauce or top with a sprinkle of flaky sea salt.
 pin it
Frequently Asked Questions
- → Can I use salted butter instead of unsalted?
Yes, you can use salted butter, but reduce the added salt to 1/4 teaspoon to avoid making the brownies too salty. Unsalted butter gives you better control over the overall salt content.
- → Why do my brownies turn out cakey instead of fudgy?
The most common reason is overbaking. Brownies continue to cook as they cool, so pull them out when they still look slightly underdone in the center. Also, make sure you're not overmixing the batter after adding the flour.
- → Can I add nuts to this recipe?
Absolutely! Fold in 1 cup of chopped walnuts or pecans along with the chocolate chips. Toast the nuts first for even better flavor.
- → How do I get clean cuts when slicing brownies?
Let the brownies cool completely, or even better, refrigerate them for an hour. Use a sharp knife and wipe it clean between each cut. You can also run the knife under hot water and dry it between cuts.
- → Can I make these brownies gluten-free?
Yes! Substitute the all-purpose flour with a 1:1 gluten-free baking flour blend. The texture will be very similar to the original recipe.
- → What's the best way to store leftover brownies?
Store in an airtight container at room temperature for up to 4 days. For longer storage, refrigerate for up to a week or freeze individual squares wrapped in plastic wrap for up to 3 months.
- → Can I double this recipe?
Yes, you can double the recipe and bake in two 9x13 pans, or use a larger sheet pan. Keep in mind that baking time may need adjustment depending on the pan size and depth.
Conclusion
These classic fudgy brownies are everything a chocolate lover could want in a dessert. With their signature crackly top and impossibly rich center, they strike the perfect balance between cakey and fudgy. The beauty of this recipe lies in its simplicity – no fancy techniques or hard-to-find ingredients, just pure chocolate bliss. Whether you're baking for a party, a bake sale, or just because you need a chocolate fix, these brownies deliver every single time. They're best enjoyed slightly warm with a cold glass of milk, but honestly, they're amazing at any temperature.