
 pin it
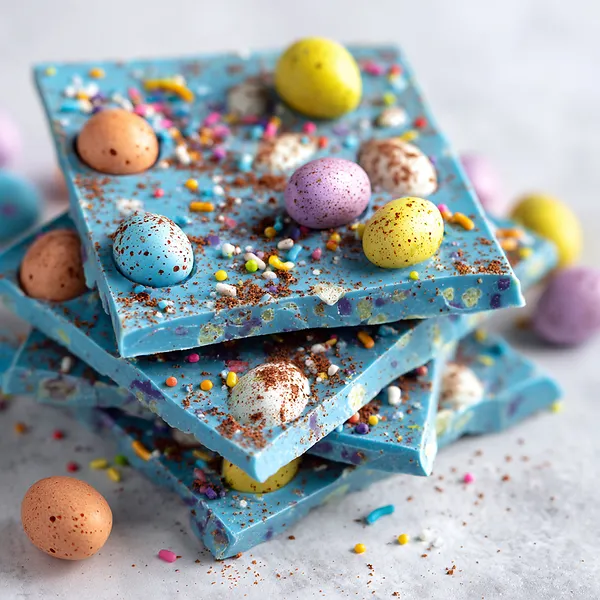
I first stumbled upon the idea of Easter bark when I was scrolling through springtime inspiration a few years ago, and something about that sky-blue color stopped me completely in my tracks. It reminded me of robin eggs and warm spring mornings, and I knew immediately I had to recreate it. White chocolate is the perfect canvas — it melts so smoothly and takes food coloring beautifully, transforming into this dreamy pastel blue that almost doesn't look real. The speckled mini candy eggs pressed into the surface give it that authentic Easter nest feeling, and the rainbow sprinkles scattered on top make it look festive and playful without any extra effort. Every time I make this, I'm genuinely amazed at how something so simple can look so stunning. The cocoa dust on top is my favorite little touch — it gives the bark a slightly artisan, handcrafted look that elevates the whole presentation. It's become one of those recipes I make every single year without question.
Why I love this recipe
I love this recipe because it proves you don't need to be a pastry chef to create something truly show-stopping. The color alone makes people stop and stare — that vivid sky blue is just so unexpected and beautiful on a dessert table. What really gets me is how customizable it is: you can switch the candy eggs for different seasonal candies, change the coloring for other holidays, or add crushed cookies for extra texture. It's also one of those rare treats that both kids and adults go equally crazy for, which makes it perfect for any Easter gathering. And honestly, the process of making it is just plain fun — melting the chocolate, watching it turn blue, pressing all the little eggs in — it feels more like art than cooking.
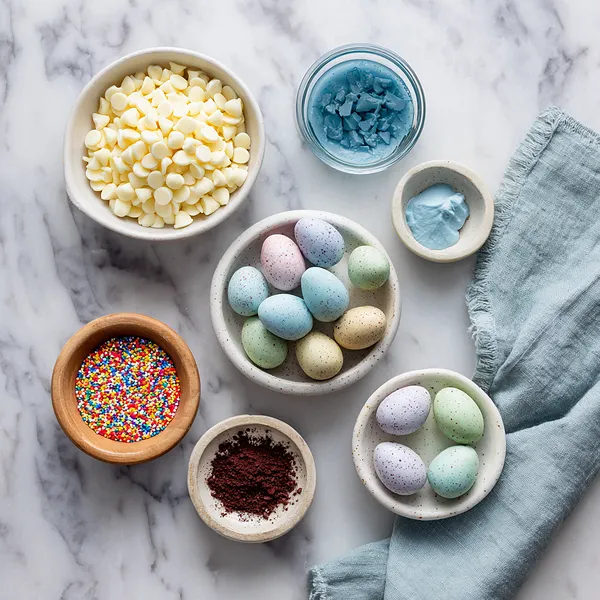
What You Need From Your Kitchen
- White Chocolate Chips: Melt slowly in the microwave in 30-second bursts, stirring between each until silky smooth and lump-free
- Sky Blue Oil-Based Food Coloring: Stir in gradually drop by drop until the chocolate reaches a vivid robin-egg blue shade
- Pastel Speckled Mini Candy Eggs: Press gently into the wet chocolate surface in a scattered, natural-looking pattern across the entire bark
- Rainbow Sprinkles: Scatter freely over the wet chocolate immediately after spreading for a festive and colorful topping
- Cocoa Powder: Dust lightly through a fine mesh sieve over the decorated bark to create a beautiful speckled artisan finish
- Coconut Oil: Stir into melted chocolate before coloring to create a smoother, glossier final texture
Let's Make These Together
- Line your baking sheet
- Lay a full sheet of parchment paper across your baking tray and smooth it flat. This prevents sticking and makes it easy to lift the finished bark off cleanly without breaking it. Set the tray on a flat, level surface ready to receive the chocolate.
- Melt your chocolate
- Place your white chocolate chips into a microwave-safe bowl and heat in 30-second intervals, stirring between each burst. Continue until the chocolate is completely smooth and glossy with no lumps remaining. Add a teaspoon of coconut oil here if you want an extra silky finish.
- Add that gorgeous blue color
- Drop a few drops of sky blue oil-based food coloring into your melted chocolate and stir thoroughly. Keep adding and stirring until you reach that stunning robin-egg blue that makes this bark so iconic. Remember — always oil-based, never water-based!
- Spread it on the tray
- Pour the blue chocolate onto your prepared parchment and use an offset spatula or the back of a large spoon to spread it into an even rectangular layer about a quarter inch thick. Work confidently — the chocolate will begin to set as it cools.
- Decorate with eggs and sprinkles
- While the chocolate is still wet and glossy, press your pastel speckled mini candy eggs across the surface in a casual scattered pattern. Then shower the rainbow sprinkles over the top generously for that festive spring look.
- Dust with cocoa and refrigerate
- Hold a fine mesh sieve above the bark and tap cocoa powder lightly across the entire surface to create the signature speckled Easter egg effect. Then slide the tray into the refrigerator and let it set completely for at least 30 minutes.
- Break and enjoy!
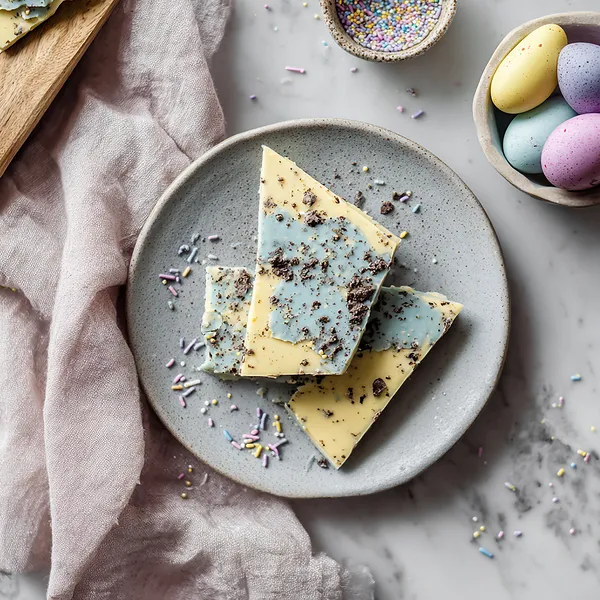
- Once fully hardened, lift the parchment and use your hands to snap the bark into beautiful irregular pieces. Arrange them on a platter, gift them in a cellophane bag, or just eat one immediately — you've earned it!
 pin it
Switch Things Up
The first time I made this, I was honestly just trying to use up a bag of white chocolate chips before Easter. I melted them down, stirred in the blue coloring, and the moment that gorgeous robin's-egg blue appeared in the bowl I got so excited I called my sister in. We ended up pressing every candy egg we had into the surface and going completely overboard with sprinkles — and honestly? It was perfect. Now it's a tradition I look forward to every spring, and the batch never lasts more than a day.
Perfect Pairings
Easter Blue Bark pairs beautifully with a warm mug of vanilla chai latte or a light strawberry lemonade for a festive springtime spread. Serve it alongside pastel sugar cookies, a fruit platter of strawberries and pineapple, or a bowl of whipped cream dip for an Easter dessert table that looks absolutely stunning. It also pairs wonderfully with a scoop of vanilla bean ice cream if you want to turn it into an indulgent dessert plate.
 pin it
Frequently Asked Questions
- → Can I use regular food coloring instead of oil-based?
No — regular water-based food coloring will cause white chocolate to seize up and become grainy and unusable. Always use oil-based or powder food coloring specifically designed for chocolate.
- → What kind of candy eggs work best for this recipe?
Any small pastel candy-coated chocolate eggs work beautifully. Robin eggs malt balls, Cadbury mini eggs, or any speckled candy egg variety all give that perfect Easter aesthetic on the blue chocolate surface.
- → How long does Easter Blue Bark stay fresh?
Stored in an airtight container at room temperature, the bark will stay fresh for up to one week. Refrigerated, it lasts up to two weeks. Avoid storing near strong-smelling foods as chocolate absorbs odors easily.
- → Can I make this ahead of time for Easter?
Absolutely! This bark is actually ideal for making a day or two ahead. It sets beautifully, holds its decoration well, and can be stored in a cool dry place until you are ready to serve or gift it.
- → Why did my chocolate turn lumpy when I added coloring?
This happens when water-based coloring is used or when any moisture gets into the melted chocolate. Make sure your bowl and utensils are completely dry and always use oil-based food coloring to avoid seizing.
- → Can I use dark or milk chocolate instead of white?
You can use milk or dark chocolate for the base, but the blue food coloring will not show up on darker chocolate. The iconic sky-blue color is only achievable with white chocolate or white candy melts as the base.
Conclusion
This Easter Blue Bark is pure springtime joy in candy form. It's the kind of recipe that requires almost no effort but delivers the biggest visual wow at any Easter gathering. Whether you're gifting it, serving it at brunch, or sneaking a piece straight from the pan — this one's an absolute keeper every single spring.