
 pin it
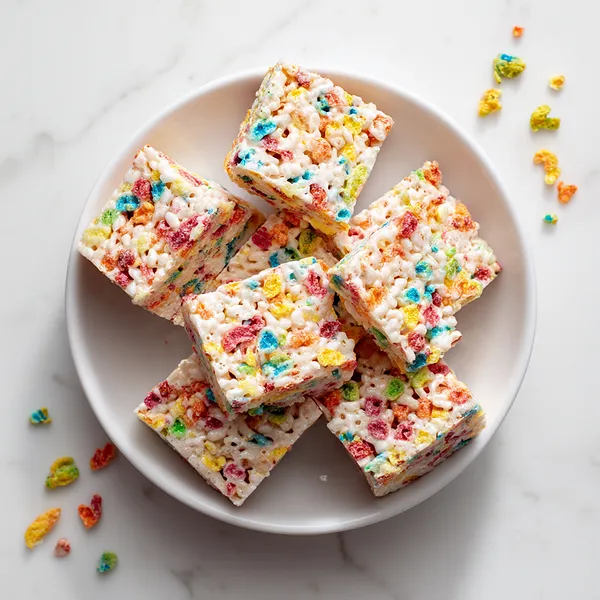
I'll never forget the first time I encountered Fruity Pebbles treats at a friend's birthday party when I was younger. I'd grown up making classic rice krispie treats with my mom, but seeing them transformed with colorful cereal was like discovering magic. The rainbow swirls throughout each bar were mesmerizing, and the subtle fruity flavor added a whole new dimension to the familiar marshmallow base. Years later, when I started making them myself, I realized just how simple they were to create. The process is almost meditative - melting the butter until it sizzles, watching the marshmallows slowly puff and melt into a silky mixture, then folding in the cereal and seeing it transform into something beautiful. What I love most is how the Fruity Pebbles maintain their crunch even after being coated in marshmallow, creating this perfect textural contrast. Every bite is a little different depending on which cereal pieces you get - some bites are more fruity, others more marshmallowy. The treats set up with a slightly chewy texture that's incredibly satisfying. They're substantial enough to feel like a real dessert but light enough that you can easily enjoy two or three squares without feeling too full.
Why I love this recipe
This recipe holds a special place in my heart because it represents pure, uncomplicated joy. In a world where recipes can be intimidating and complex, this one reminds me that sometimes the simplest treats are the most beloved. I love how forgiving this recipe is - you really can't mess it up, which makes it perfect for cooking with kids or for those days when you just want something sweet without any stress. The visual impact of these treats is incredible; those bright pops of color against the white marshmallow base make them look like professional confections, but they require absolutely no baking skill. I appreciate how versatile they are too - you can make them for a child's birthday party, a casual potluck, or even dress them up for baby showers by cutting them into fun shapes. What really makes me love this recipe is the memories it creates. Every time I make these, someone's face lights up with childhood nostalgia or excitement. There's something universally appealing about cereal treats that transcends age. Plus, they come together so quickly that you can make them on a whim when unexpected guests arrive or when you need a last-minute contribution to an event.
What You Need From Your Kitchen
- Butter: Melt it completely before adding marshmallows for smooth mixing
- Marshmallows: Use fresh marshmallows and melt them slowly over medium heat
- Fruity Pebbles cereal: Measure out 6 cups and have it ready in a large bowl
- Vanilla extract: Add after removing from heat to preserve its flavor
- Parchment paper: Line your pan for easy removal and cutting
Let's Make These Together
- Prep your workspace
- Start by lining your 9x13 inch baking pan with parchment paper, leaving some overhang on the sides for easy removal later. You can also generously butter the pan if you prefer. Measure out all your ingredients and have them within reach - this recipe moves quickly once you start, so being prepared is key. Place your Fruity Pebbles in a large bowl that's big enough to accommodate mixing.
- Melt the base
- Place your large pot on the stove over medium heat and add the butter. Let it melt completely, swirling the pan occasionally to ensure even melting. Once the butter is fully melted, add all the marshmallows at once. Stir constantly with your spatula, making sure to scrape the bottom and sides of the pot. The marshmallows will begin to puff up and slowly melt into the butter. Keep stirring until the mixture is completely smooth with no lumps remaining, which should take about 3-5 minutes.
- Add the flavor boost
- As soon as your marshmallow mixture is smooth and silky, remove the pot from the heat immediately. This is crucial because you don't want to overcook the marshmallows or they'll become tough. Quickly stir in your vanilla extract and a pinch of salt. The vanilla adds a lovely depth of flavor, while the salt helps balance the sweetness and brings out the fruity notes of the cereal.
- Combine and coat
- Working quickly, pour the hot marshmallow mixture over your Fruity Pebbles cereal in the large bowl. Using your rubber spatula, fold and stir the mixture, making sure every single piece of cereal gets coated in that gooey marshmallow goodness. You'll see the white marshmallow mixture become beautifully colored by the cereal. Keep mixing until you don't see any dry cereal pieces - everything should be evenly coated and colorful.
- Press and finish
- Dump the entire mixture into your prepared pan. Here's a pro tip: butter your hands or use a piece of parchment paper to press down on the mixture. This prevents sticking and makes the job much easier. Press firmly and evenly across the entire pan, making sure to get into the corners and create an even thickness throughout. The surface should be relatively smooth and compact. Let the treats sit at room temperature for at least 30 minutes to set up properly. Once cooled, lift them out using the parchment overhang, place on a cutting board, and cut into 12 equal squares using a sharp knife.
 pin it
Switch Things Up
I first made these treats on a rainy Sunday afternoon when my niece came over for a visit. She'd been begging to help me bake something, and I wanted something fun, colorful, and most importantly, foolproof. As soon as I pulled out the Fruity Pebbles, her eyes lit up - that cereal has always been her favorite. We melted the marshmallows together, and she was mesmerized watching them puff up and turn gooey. When we mixed in the cereal and saw all those rainbow colors swirling together, she couldn't stop giggling with excitement. The hardest part was waiting for them to set before cutting into them. Now, whenever she visits, these are the first thing she asks to make. Sometimes we add mini chocolate chips or use different cereals to switch things up, but the Fruity Pebbles version remains her absolute favorite.
Perfect Pairings
These colorful treats pair wonderfully with a cold glass of milk for dunking, or hot chocolate for a cozy dessert experience. For parties, serve them alongside vanilla ice cream or whipped cream for an extra indulgent treat. They also make a fantastic companion to fresh fruit like strawberries or banana slices, which add a fresh element to balance the sweetness. For a fun kids' party spread, pair them with other nostalgic treats like chocolate chip cookies, brownies, or fruit punch. They're also delicious crumbled over ice cream sundaes or used as a crunchy topping for yogurt parfaits.
 pin it
Frequently Asked Questions
- → Can I use other cereals instead of Fruity Pebbles?
Absolutely! This recipe works wonderfully with Rice Krispies for the classic version, Cocoa Pebbles for a chocolate twist, Lucky Charms for extra marshmallows, or any crispy cereal you love. Just keep the measurements the same.
- → Why did my treats turn out hard instead of chewy?
This usually happens when the marshmallow mixture is cooked too long or at too high a temperature. The key is to melt the marshmallows just until smooth over medium heat, then remove from heat immediately. Overcooked marshmallows will create hard, crunchy treats.
- → How should I store these treats and how long do they last?
Store your Fruity Pebbles treats in an airtight container at room temperature for up to 3 days. You can also wrap individual squares in plastic wrap for easy grab-and-go snacks. Don't refrigerate them as this can make them hard and stale.
- → Can I make these treats ahead of time for a party?
Yes! These treats are perfect for making ahead. You can prepare them up to 2 days in advance and store them in an airtight container. They actually slice more cleanly when they've had time to fully set, so making them the day before is ideal.
- → My mixture is too sticky to press into the pan - what should I do?
The mixture will always be sticky, but there are tricks to make it manageable. Butter your hands generously before pressing, or use a piece of buttered parchment paper to press down on the mixture. You can also lightly spray your spatula with cooking spray to help spread the mixture more easily.
- → Can I double this recipe?
Yes, you can easily double the recipe. Just use a larger pot for melting the marshmallows and butter, and press the mixture into a larger pan or use two 9x13 inch pans. All the ingredient ratios remain the same when doubling.
Conclusion
These Fruity Pebbles treats are the perfect combination of nostalgia and fun. They're incredibly easy to make, requiring just five ingredients and about 15 minutes of your time. The colorful cereal transforms ordinary marshmallow treats into something truly special that both kids and adults will love. They're perfect for birthday parties, bake sales, or just a fun weekend activity with the family. Store them in an airtight container for up to three days, though they rarely last that long in our house!