
 pin it
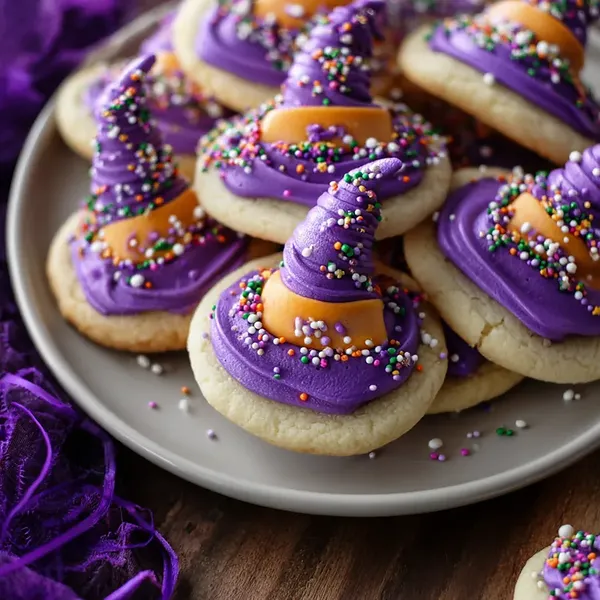
I first encountered these magical cookies at my friend Sarah's Halloween party three years ago, and I knew immediately I had to learn the secret behind their enchanting appearance. The moment I bit into one, the tender, vanilla-scented cookie crumbled perfectly in my mouth while the rich, creamy purple frosting added just the right amount of sweetness. What really captured my heart was the attention to detail - each witch hat perfectly positioned, every sprinkle seemingly placed with intention. When Sarah shared her recipe with me, I discovered it was actually a family tradition passed down from her grandmother, with each generation adding their own creative twist. The original recipe called for simple white frosting, but Sarah's mom introduced the purple color scheme in the 80s, and Sarah herself added the witch hat toppers. Now when I make these cookies, I feel connected to that lineage of bakers, each one adding their own magic to create something truly special. The process itself is meditative - rolling the dough, cutting perfect circles, watching the cookies puff up in the oven, and finally decorating each one like a tiny canvas. These aren't just cookies to me; they're edible art pieces that bring joy to everyone who sees them.
Why I love this recipe
What I absolutely adore about this recipe is how it transforms a simple sugar cookie into something extraordinary with just a few creative touches. The purple frosting isn't just visually stunning - it actually tastes incredible with a hint of vanilla that complements the cookie base perfectly. I love how forgiving this recipe is; if your frosting swirls aren't perfect, they still look charmingly handmade, and if you go overboard with sprinkles (like I always do), it just adds to the festive chaos. The texture contrast is divine - that soft, tender cookie giving way to the smooth, creamy frosting, with little pops of crunch from the sprinkles. But beyond the taste and texture, I love how these cookies make people feel. There's something about their whimsical appearance that brings out the kid in everyone, regardless of age. I've served these at adult parties where sophisticated guests suddenly become giggly and playful, taking photos of their cookies before eating them. The recipe also allows for so much creativity - you can experiment with different colored frostings, various sprinkle combinations, or even different shaped cutters. Most importantly, these cookies create moments of pure joy, whether you're making them with children who get frosting everywhere or surprising coworkers with a batch during Halloween season. They're proof that sometimes the most magical things come from the simplest ingredients combined with a little imagination.
What You Need From Your Kitchen
- All-purpose flour: Sift before measuring for lighter cookies and mix gently to avoid tough texture
- Unsalted butter: Let come to room temperature naturally for best creaming results with sugar
- Granulated sugar: Cream thoroughly with butter until mixture becomes pale and fluffy for tender cookies
- Large egg: Use at room temperature and beat in completely to bind ingredients together
- Vanilla extract: Add pure vanilla for best flavor and mix in after egg incorporation
- Powdered sugar: Sift to remove lumps before making frosting for smoothest texture
- Heavy cream: Use cold cream and add gradually to achieve perfect frosting consistency
- Purple food coloring: Add drop by drop until desired color is reached, gel works better than liquid
- Orange candy melts: Melt carefully in microwave in 30-second intervals to prevent burning
- Rainbow sprinkles: Apply immediately after frosting while still wet for best adhesion
Let's Make These Together
- Prepare the cookie dough
- Start by creaming your softened butter with granulated sugar until the mixture becomes light and fluffy - this usually takes about 3-4 minutes with an electric mixer. The key here is patience; proper creaming creates the tender texture we're after. Beat in your egg and vanilla extract until everything is well combined, then gradually mix in your dry ingredients until you have a soft, cohesive dough that holds together without being sticky.
- Chill and roll the dough
- Wrap your dough tightly in plastic wrap and let it chill in the refrigerator for at least an hour. This step is crucial because it firms up the butter, preventing your cookies from spreading too much during baking. Once chilled, roll the dough on a lightly floured surface to about 1/4 inch thickness, turning it occasionally to prevent sticking.
- Cut and bake perfect cookies
- Use round cookie cutters to create uniform shapes, placing them about 2 inches apart on parchment-lined baking sheets. Bake at 350°F for 10-12 minutes, watching carefully - you want the edges to be just set but not golden, with centers still looking slightly soft. They'll finish cooking on the hot pan after you remove them from the oven.
- Create magical purple frosting
- While your cookies cool completely, beat together softened butter, powdered sugar, and heavy cream until you achieve a smooth, pipeable consistency. Add your purple food coloring gradually - a little goes a long way, and you can always add more. The frosting should be thick enough to hold decorative swirls but smooth enough to spread easily across your cookies.
- Decorate with Halloween magic
- This is where the real fun begins! Pipe or spread your purple frosting onto each cooled cookie, creating swirls and patterns that catch the light. Immediately sprinkle with rainbow nonpareils while the frosting is still wet - they'll stick better this way. Finish by adding your witch hat decorations, pressing them gently into the frosting to secure them in place.
 pin it
Switch Things Up
Last Halloween, I decided to surprise my nieces with homemade cookies instead of store-bought treats. I'll never forget their faces when they saw these purple beauties cooling on my kitchen counter - pure magic! What started as a simple baking project turned into an afternoon of decorating chaos, with purple frosting somehow ending up on the ceiling (don't ask how). The girls insisted on adding extra sprinkles to every single cookie, creating these wonderfully messy masterpieces that tasted even better because of the love baked into them. Now it's become our annual tradition, and they've already started asking when we're making this year's batch. Sometimes the best recipes aren't just about the ingredients - they're about the memories you create while making them.
Perfect Pairings
These witch hat cookies pair beautifully with a steaming mug of hot chocolate topped with whipped cream and a sprinkle of cinnamon. For adult gatherings, serve them alongside spiced apple cider or even a Halloween-themed cocktail like a purple punch. They also make excellent companions to vanilla ice cream for a festive dessert platter, or pair them with other Halloween treats like candy corn and chocolate-covered pretzels for a complete spooky spread. The sweet, buttery flavor also complements sharp cheddar cheese surprisingly well if you're creating a Halloween charcuterie board with both sweet and savory elements.
 pin it
Frequently Asked Questions
- → Can I make the cookie dough ahead of time?
Absolutely! The cookie dough can be made up to 2 days ahead and stored wrapped in the refrigerator, or frozen for up to 3 months. Just let it come to room temperature slightly before rolling if it gets too hard to work with.
- → Why did my cookies spread too much during baking?
This usually happens when the dough wasn't chilled long enough, the butter was too warm, or the oven temperature was too low. Make sure to chill the dough for at least an hour and verify your oven temperature with a thermometer.
- → How can I get the purple frosting color just right?
Use gel food coloring instead of liquid for more vibrant colors without thinning the frosting. Start with just a small amount and gradually add more until you reach your desired shade - you can always make it darker but can't easily make it lighter.
- → What's the best way to store these decorated cookies?
Store in a single layer in an airtight container at room temperature for up to 5 days. If you need to stack them, place parchment paper between layers to prevent the decorations from getting damaged.
- → Can I use different colors or decorations?
Definitely! This recipe is very versatile - try orange and black for classic Halloween colors, or adapt the decorations for other holidays. You can also use different shaped cookie cutters and adjust the decorations accordingly.
- → My frosting is too thick/thin, how do I fix it?
If it's too thick, add heavy cream one tablespoon at a time until you reach the right consistency. If it's too thin, gradually add more powdered sugar until it thickens up. Room temperature ingredients mix better than cold ones.
Conclusion
These Halloween Witch Hat Cookies are the perfect blend of spooky and sweet, guaranteed to cast a delicious spell on anyone who tries them. The combination of tender sugar cookies with vibrant purple frosting creates a magical treat that's as fun to make as it is to eat. Whether you're hosting a Halloween party or just want to add some festive flair to your kitchen, these cookies deliver both visual impact and incredible taste. The decorative elements make each cookie feel like a tiny work of art, while the classic sugar cookie base ensures they'll disappear faster than a witch on a broomstick. Get ready to create some seriously magical memories with every single bite!