
 pin it
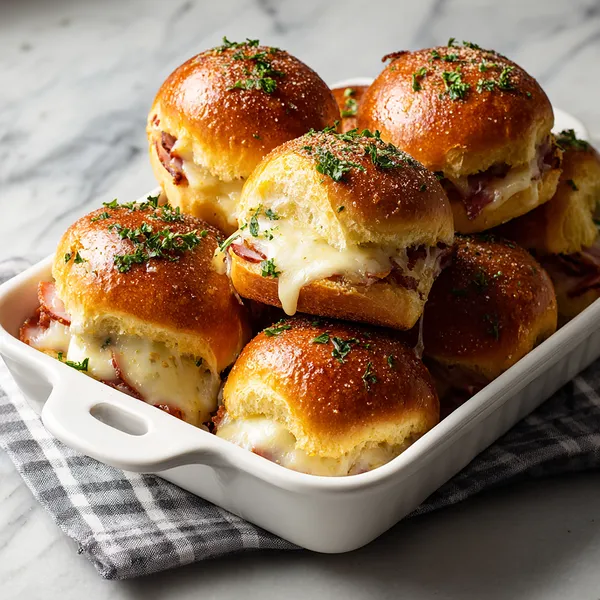
I stumbled upon ham and cheese sliders during a particularly busy week when I needed something quick but impressive for unexpected guests. Growing up, my mom always made elaborate appetizers that took hours, so I was amazed that something this simple could be so incredibly delicious. These sliders are essentially a genius hack – you take a whole tray of Hawaiian rolls, slice them horizontally while keeping them connected, and layer on quality deli ham and Swiss cheese. The real magic happens with the butter mixture that gets brushed generously over the top before baking. As they bake, the butter seeps down through the rolls, the cheese melts into gooey perfection, and the tops get beautifully golden and slightly crispy. What I love most is the texture contrast – the soft, slightly sweet Hawaiian rolls against the savory ham and creamy melted cheese, all tied together with that buttery, garlicky, slightly tangy glaze. They're served as a connected sheet that you can pull apart, which makes them feel communal and fun. The poppy seeds add a subtle nutty flavor and a professional bakery look that makes people think you spent way more time on them than you actually did.
Why I love this recipe
This recipe holds a special place in my heart because it proves that cooking doesn't have to be complicated to be absolutely delicious. I love how it brings people together – there's something about pulling apart warm, connected sliders that creates this shared experience at the table. The recipe is incredibly forgiving, which means it's perfect for beginner cooks but satisfying enough that even experienced home chefs appreciate it. I'm obsessed with the buttery garlic glaze because it transforms simple ingredients into something that tastes like it came from a gourmet deli. The make-ahead aspect is another huge win – you can assemble these hours in advance and just pop them in the oven when guests arrive. They're endlessly customizable too, so I never get bored making them. Sometimes I add a layer of caramelized onions, sometimes I use different cheese combinations, and occasionally I'll throw in some sliced pickles for extra tang. But most of all, I love this recipe because it never fails to make people happy. There's something universally appealing about warm bread, melted cheese, and savory ham that just hits the spot every single time.
What You Need From Your Kitchen
- Hawaiian Sweet Rolls: Keep them connected as one sheet and slice horizontally for the perfect slider base with that signature soft, slightly sweet texture
- Deli Ham: Use quality deli ham sliced medium thickness, and fold each slice in half to create substantial layers without overwhelming the roll
- Swiss Cheese: Layer the slices evenly across all rolls to ensure every bite has melted cheese, or substitute with your favorite cheese variety
- Unsalted Butter: Melt it completely before mixing with seasonings to create a smooth, brushable glaze that soaks into the rolls
- Dijon Mustard: Whisk into the melted butter for a tangy depth that balances the richness and adds that classic deli flavor
- Poppy Seeds: Sprinkle generously in the butter mixture for visual appeal and a subtle nutty flavor that enhances the overall taste
Let's Make These Together
- Prepare Your Baking Setup
- Start by preheating your oven to 350°F and preparing a 9x13 inch baking dish with non-stick spray. This ensures your sliders will release easily after baking and makes cleanup a breeze.
- Slice and Build Layers
- Using a sharp serrated knife, carefully slice the entire sheet of connected Hawaiian rolls horizontally, keeping both halves intact. Place the bottom half in your baking dish, then layer on the ham slices followed by the Swiss cheese. Top with the remaining roll half, creating a complete slider sandwich sheet.
- Create the Magic Butter Glaze
- In a small bowl, whisk together your melted butter with Dijon mustard, poppy seeds, garlic powder, and onion powder until everything is well combined. This flavorful mixture is what transforms simple ingredients into something spectacular.
- Brush and Bake to Perfection
- Generously brush the butter mixture all over the tops of the rolls, making sure to coat every surface. Cover with foil and bake for 15 minutes, then remove the foil and continue baking for 5-7 minutes more until golden brown. The result is beautifully glazed, perfectly melted sliders that are ready to devour.
 pin it
Switch Things Up
I first made these sliders for a last-minute football watch party, and honestly, I was skeptical about how such simple ingredients could create something special. But the moment I pulled that baking dish out of the oven and saw those golden, glistening tops, I knew I had a winner. The smell alone had everyone gathering in the kitchen before I could even finish garnishing them. I watched as my friends pulled them apart, the cheese stretching in those perfect strings, and the compliments started rolling in immediately. One friend literally said it was the best thing she'd eaten all month. Now I make these constantly – sometimes I'll add a layer of caramelized onions, or swap the Swiss for sharp cheddar when I'm feeling adventurous. They've become my signature contribution to any gathering, and I always get requests to bring them. The recipe is so forgiving that I've even taught my teenage nephew to make them, and he's become the slider king among his friends.
Perfect Pairings
These sliders pair beautifully with crispy sweet potato fries or a simple green salad with tangy vinaigrette to balance the richness. For a complete party spread, serve them alongside creamy coleslaw and pickle spears for that classic deli-style experience. They also work wonderfully with tomato soup for a comforting meal, or pair them with potato chips and veggie sticks for a casual gathering. If you're serving these for brunch, consider adding fresh fruit salad and hash browns to round out the menu.
 pin it
Frequently Asked Questions
- → Can I make these sliders ahead of time?
Yes! You can assemble the sliders completely, brush with the butter mixture, cover tightly with plastic wrap, and refrigerate for up to 24 hours before baking. When ready to serve, bake as directed, adding about 5 extra minutes to the covered baking time since they'll be cold from the refrigerator.
- → What other types of cheese work well in these sliders?
While Swiss cheese is traditional, you can use provolone, cheddar, Gruyere, pepper jack for a spicy kick, or even a combination of cheeses. Muenster and Havarti also melt beautifully and provide great flavor.
- → Can I freeze ham and cheese sliders?
Yes, you can freeze these sliders either before or after baking. To freeze unbaked, assemble completely and wrap tightly in plastic wrap and aluminum foil. Freeze for up to 3 months. Bake from frozen, adding about 10 extra minutes to the baking time. For baked sliders, cool completely, wrap tightly, and freeze for up to 2 months. Reheat in a 300°F oven for 15-20 minutes.
- → How do I prevent the rolls from getting soggy?
The key is not over-saturating the rolls with the butter mixture. Brush generously but don't drench them. Also, avoid adding wet ingredients like tomatoes. If you want to add condiments like mayonnaise or additional mustard, serve them on the side for guests to add after baking.
- → What can I serve with ham and cheese sliders?
These sliders pair wonderfully with potato salad, coleslaw, pasta salad, chips and dip, fresh vegetables with ranch, fruit salad, or soup. For a complete party spread, consider adding pickles, olives, and other finger foods.
- → Can I use regular dinner rolls instead of Hawaiian rolls?
Yes, you can use any soft dinner rolls or slider buns. However, Hawaiian rolls are recommended because their slight sweetness and soft, pillowy texture create the perfect contrast with the savory ham and cheese. If using regular rolls, consider adding a teaspoon of honey to the butter mixture to mimic that sweet-savory balance.
Conclusion
These ham and cheese sliders are the ultimate crowd-pleaser that combines simplicity with incredible flavor. The buttery garlic glaze transforms ordinary ingredients into something truly special, creating a dish that's perfect for any gathering. Whether you're hosting a game day party, bringing a dish to a potluck, or just feeding hungry family members, these sliders deliver every single time. The best part is how easily you can customize them with different cheeses or add-ins to make them your own.