
 pin it
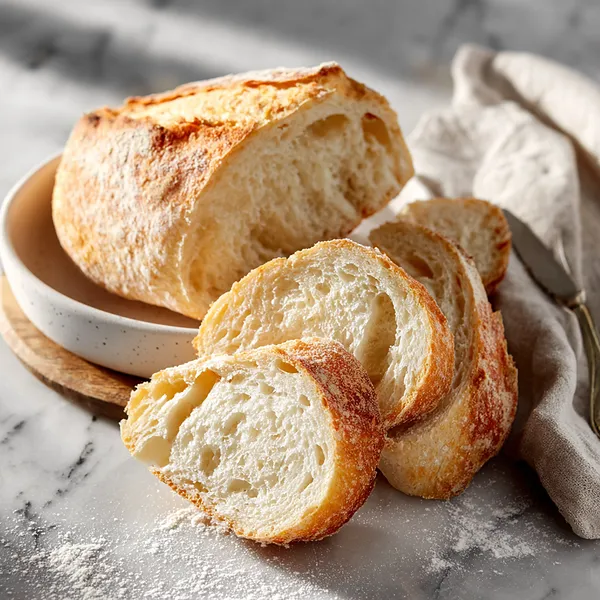
I first encountered authentic French bread during a college trip to Paris, where I wandered into a tiny boulangerie near the Seine. The baker handed me a still-warm baguette, and that first bite changed everything I thought I knew about bread. The contrast between the shatteringly crisp crust and the tender, hole-filled interior was a revelation. For years after returning home, I searched for bread that could match that experience, but nothing came close. That's when I decided to learn how to make it myself. This recipe is the result of countless trials, adjustments, and learning from my mistakes. What I love most is how it transforms simple ingredients – flour, water, yeast, and salt – into something extraordinary through time and technique. The dough starts sticky and rough but becomes smooth and elastic as you knead it. Watching it double in size during the first rise feels like witnessing a small miracle every single time. The scoring technique, that diagonal slash across the top, isn't just decorative; it allows the bread to expand properly and creates that rustic, artisan look. And that final step, brushing the loaves with water and baking them in a hot oven, creates steam that gives you that coveted crispy crust. This isn't just bread; it's a connection to centuries of baking tradition, and now it's yours to master.
Why I love this recipe
This French bread recipe holds a special place in my heart for so many reasons. First, it's proof that you don't need to be a professional baker or have expensive equipment to create something truly spectacular. Just a bowl, your hands, and an oven are enough. I love how forgiving the dough is – even if your kitchen is a bit cool or warm, the bread still turns out beautifully. There's something deeply satisfying about working with yeast and watching the dough come alive and grow. It reminds me that baking is as much science as it is art. The aroma that fills my home while this bread bakes is worth the effort alone; it's warm, comforting, and makes everyone ask, "What are you making?" But beyond all that, I love how this recipe brings people together. Whether I'm breaking bread with family over Sunday dinner or gifting a fresh loaf to a neighbor, it creates moments of connection and joy. There's also an element of pride in serving bread I made from scratch – it shows care and effort in a way that store-bought never can. And honestly, the taste is incomparable. That crispy, crackly crust that shatters when you bite into it, revealing the soft, airy interior with those perfect irregular holes? It's absolutely worth every minute of rising time and every bit of flour on your countertop.
What You Need From Your Kitchen
- All-purpose flour: Forms the structure of the bread; you can substitute up to half with bread flour for a chewier texture
- Active dry yeast: Leavens the bread and creates those beautiful air pockets; make sure it's fresh and not expired
- Warm water: Activates the yeast and hydrates the flour; temperature should be around 110°F
- Olive oil: Adds flavor and helps create a tender crumb while keeping the dough from sticking
- Sugar: Feeds the yeast and helps with browning of the crust
Let's Make These Together
- Activate the Yeast
- Begin by combining your warm water with sugar and yeast in a large bowl. The sugar acts as food for the yeast, helping it wake up and start working. After stirring gently, set the bowl aside for about 5-10 minutes. You'll know the yeast is active when you see a foamy, bubbly layer forming on top – this is exactly what you want! If nothing happens, your yeast might be expired or your water was too hot or too cold. This step is crucial because it ensures your bread will rise properly.
- Combine and Knead
- Once your yeast mixture is nice and foamy, add the olive oil and salt, then start incorporating your flour gradually. Begin with three cups and add more as needed – the dough should be slightly sticky but manageable. Turn it out onto a floured surface and start kneading. This is where the magic happens! As you knead, you're developing the gluten strands that give bread its structure and chewiness. Push the dough away with the heel of your hand, fold it back over itself, give it a quarter turn, and repeat. After about 8-10 minutes of kneading, the dough will transform from rough and shaggy to smooth and elastic. It's quite the workout, but so worth it!
- Let It Rise
- Place your beautifully kneaded dough into a lightly oiled bowl, turning it to coat all sides with oil. This prevents it from drying out and makes it easier to remove later. Cover the bowl with a clean kitchen towel or plastic wrap and find a warm, draft-free spot in your kitchen. The ideal temperature for rising is around 75-80°F. Over the next 45-60 minutes, the yeast will feast on the sugars in the dough, producing carbon dioxide gas that makes the dough expand. You're looking for the dough to double in size. This rising period is when the bread develops much of its flavor and texture, so don't rush it!
- Shape and Prep for Baking
- After the first rise, it's time to punch down your dough – literally give it a good punch to deflate it and release all those gas bubbles. This redistributes the yeast and gives you a more even crumb in the final bread. Divide the dough in half and shape each piece into a long loaf. To do this, pat each portion into a rectangle, then roll it up tightly from one long side, pinching the seam closed. Place your shaped loaves on a parchment-lined baking sheet with plenty of space between them. Cover them loosely and let them rise again for about 30 minutes. This second rise allows the dough to relax and puff up one more time before baking.
- Score and Bake
- Preheat your oven to 375°F and set up your steam system by placing a shallow pan on the bottom rack. Just before baking, take a very sharp knife or bread lame and make 3-4 diagonal cuts across the top of each loaf, about a quarter-inch deep. These cuts aren't just decorative – they give the bread a controlled place to expand and prevent random splitting. Brush the loaves with water, then carefully pour hot water into the pan on the bottom rack (this creates steam for that crispy crust). Bake for 20-25 minutes until the loaves are golden brown and sound hollow when tapped on the bottom. The hardest part is waiting for them to cool before slicing!
 pin it
Switch Things Up
I'll never forget the first time I made this French bread on a rainy Sunday afternoon. I was skeptical that something so simple could rival my favorite bakery, but the moment I pulled those golden loaves from the oven, I was hooked. The crust crackled as it cooled, and I couldn't resist tearing off a piece while it was still warm. That first bite – crusty exterior giving way to soft, pillowy bread – was pure magic. Now it's become my go-to recipe whenever I want to impress dinner guests or just treat myself to something special. I've experimented with different flours, added herbs to the dough, and even shaped it into rolls. Each variation has been delicious, but there's something about the classic version that keeps me coming back. The process itself has become almost meditative – the kneading, the watching it rise, the anticipation as it bakes. And the best part? My kitchen smells like a French boulangerie for hours afterward!
Perfect Pairings
This French bread is incredibly versatile and pairs beautifully with so many dishes. Serve it alongside classic French onion soup, where you can use slices as the perfect vessel for melted Gruyère cheese. It's also ideal for mopping up the rich sauce from coq au vin or beef bourguignon. For lighter fare, slice it thin for crostini topped with tomato bruschetta or herbed goat cheese. The bread makes excellent sandwiches – try it with roasted vegetables and pesto, or go classic with ham and brie. Don't forget breakfast: toasted slices with jam and butter, or turned into decadent French toast, are absolutely divine. A cheese board isn't complete without fresh French bread, and it's perfect for dipping into olive oil with herbs or a good balsamic vinegar.
 pin it
Frequently Asked Questions
- → Can I use instant yeast instead of active dry yeast?
Yes! You can substitute instant yeast for active dry yeast in equal amounts. The main difference is that instant yeast can be mixed directly into the flour without the activation step, though you can still proof it if you want to verify it's active. The rising time might be slightly faster with instant yeast.
- → Why didn't my bread rise properly?
Several factors can prevent proper rising: expired or dead yeast, water that was too hot (which killed the yeast) or too cold (which didn't activate it), insufficient rising time, or a too-cold environment. Make sure your yeast is fresh, your water is around 110°F, and the dough rises in a warm, draft-free spot.
- → Can I make this dough ahead of time?
Absolutely! After the first rise, you can punch down the dough, cover it tightly, and refrigerate it for up to 24 hours. This slow fermentation actually develops more complex flavors. When ready to bake, let the dough come to room temperature for about 30 minutes, then shape, let rise, and bake as directed.
- → How do I know when the bread is fully baked?
The bread should be golden brown on top and sound hollow when you tap the bottom of the loaf. If you have an instant-read thermometer, the internal temperature should be around 190-200°F. If the top is browning too quickly but the inside isn't done, tent the loaves loosely with aluminum foil.
- → Can I add herbs or cheese to this recipe?
Yes! This is a great base recipe for variations. Add dried herbs like rosemary, thyme, or Italian seasoning to the dough during mixing (start with 1-2 tablespoons). For cheese, add 1/2 to 1 cup of shredded cheese after the first rise when shaping. Just be aware that add-ins can affect rising time and texture slightly.
- → Why is my crust not crispy?
A crispy crust requires steam during baking. Make sure you're using the water pan method and brushing the loaves with water before baking. Also, don't cover the bread while it cools – moisture will soften the crust. If you want an even crispier crust, brush the loaves with water 2-3 times during the first 10 minutes of baking.
Conclusion
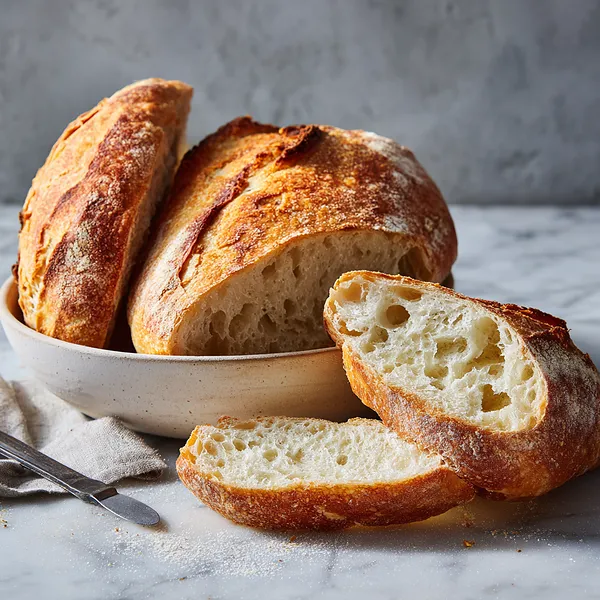
This homemade French bread recipe proves that bakery-quality results are absolutely achievable in your own kitchen. The combination of a hot oven and a simple steam technique creates that signature crispy crust we all love, while the dough's proper rising time ensures a perfectly airy interior. Whether you're serving it alongside a hearty stew, making sandwiches, or simply enjoying it warm with butter, this bread elevates any meal. Once you master this straightforward technique, you'll find yourself baking fresh bread regularly – it's that rewarding and delicious!