 pin it
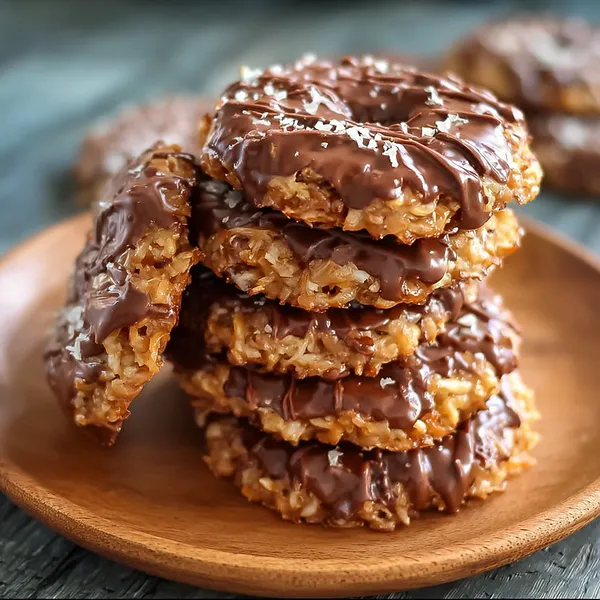
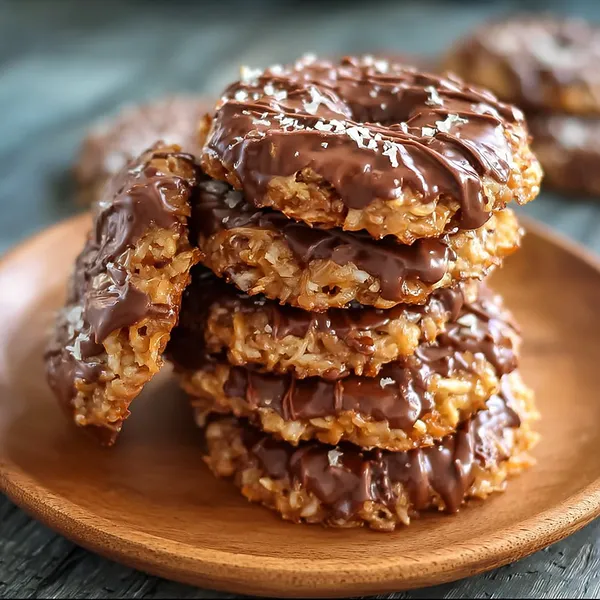
I first encountered Samoas cookies when I was eight years old, and a Girl Scout knocked on our door with those iconic green boxes. That first bite was pure magic - the combination of textures and flavors was unlike anything I'd tasted before. The way the chocolate melted on your tongue, followed by the chewy caramel and crunchy coconut, all supported by that buttery cookie base - it was perfection. For years, I'd stock up during cookie season, rationing them throughout the year. This recipe recreates that childhood favorite with even better results. The homemade version has a richer, more buttery shortbread base that holds up beautifully to the toppings. The caramel is made from scratch, giving it a deeper, more complex flavor than the commercial version. The toasted coconut adds a nutty dimension that really elevates the whole experience. When you drizzle that chocolate on top, you're creating little pockets of pure chocolate that burst in your mouth. These cookies capture everything I loved about the original while adding that special touch that only homemade baking can provide.
Why I love this recipe
What I love most about this recipe is how it transforms simple ingredients into something truly spectacular. There's something deeply satisfying about making a beloved commercial cookie from scratch and having it turn out even better. The process itself is therapeutic - rolling out the dough, cutting perfect circles, toasting the coconut until it's golden and fragrant, watching the caramel bubble and turn that perfect amber color. Each step builds anticipation for the final product. I also love how customizable these are. Want more chocolate? Add more. Prefer extra coconut? Go for it. The recipe is forgiving and adaptable to your preferences. These cookies also make incredible gifts - package them in a pretty box, and you've got something better than anything from a store. What really gets me though is seeing people's faces when they bite into one. There's always that moment of surprise, followed by pure joy. It reminds me why I love baking - creating happiness through food. Plus, making these means I never have to wait for Girl Scout cookie season again!
What You Need From Your Kitchen
- All-purpose flour: Forms the base of the shortbread cookie dough
- Shredded coconut: Toast until golden and mix into the caramel for that signature texture
- Heavy cream: Creates a smooth, rich caramel sauce when combined with sugar and butter
- Semi-sweet chocolate chips: Melt for dipping cookie bottoms and drizzling on top
- Unsalted butter: Use in both the cookie dough and caramel for rich flavor
- Granulated sugar: Sweetens the cookies and creates the caramel base
Let's Make These Together
- Prepare the shortbread dough
- Start by creaming your butter and sugar together until it's light and fluffy - this is the foundation of a tender, buttery cookie. Once you've mixed in the vanilla and flour, you'll have a soft, pliable dough that's perfect for rolling. Roll it out evenly to about 1/4 inch thick and use your cookie cutters to create those classic donut shapes. The key here is to work quickly so the dough doesn't warm up too much.
- Bake to golden perfection
- Pop those cookie rings into a preheated 350°F oven and watch them carefully. You want them just golden on the edges - overbaking will make them too crispy. They should come out firm enough to hold the toppings but still have that classic shortbread tenderness. Let them cool completely before moving to the next step.
- Toast the coconut
- This step is crucial for developing that deep, nutty flavor. Spread your coconut evenly on a baking sheet and keep a close eye on it as it toasts. Stir it every few minutes to ensure even browning. When it's golden brown and your kitchen smells amazing, it's ready. This toasted coconut is what gives the cookies their signature flavor.
- Create the caramel coconut topping
- Making caramel can seem intimidating, but just take it slow. Melt the sugar until it's a beautiful amber color, then carefully add your butter and cream. The mixture will bubble up dramatically, so be careful. Once it's smooth and silky, fold in that gorgeous toasted coconut. This is where the magic happens - the combination of sweet caramel and nutty coconut is absolutely divine.
- Assemble and chocolate-coat
- Spread that warm coconut caramel generously over each cookie, making sure to get it right to the edges. Once it's set, dip the bottoms in melted chocolate and drizzle more on top. Get creative with your drizzle pattern - this is where you can make them uniquely yours. Let everything set up completely, and you'll have cookies that look and taste better than the originals.
 pin it
Switch Things Up
I remember the first time I decided to make these at home - it was during a random Tuesday when I was craving Samoas but Girl Scout cookie season was months away. I thought, how hard could it be? Turns out, toasting the coconut is the game-changer nobody tells you about. The smell that filled my kitchen was absolutely intoxicating. My neighbor actually knocked on the door asking what I was baking! The caramel part was a bit nerve-wracking at first because I was worried about burning it, but once I got the hang of it, I felt like a candy-making pro. The best part was drizzling the chocolate on top - I may have gotten a little artistic with it. When I finally bit into that first cookie, still slightly warm, I knew I'd never go back to waiting for cookie season. Now I make these for every gathering, and people always ask for the recipe.
Perfect Pairings
These Samoas cookies pair beautifully with a hot cup of coffee or espresso - the bitterness balances the sweetness perfectly. For an indulgent dessert experience, serve them alongside vanilla ice cream or with a glass of cold milk. They also complement a cheese board surprisingly well, particularly when paired with sharp cheddar or creamy brie. For a grown-up treat, try them with a glass of dessert wine or Irish cream liqueur. They're also fantastic crumbled over yogurt parfaits or used as a topping for chocolate mousse.
 pin it
Frequently Asked Questions
- → Can I use store-bought caramel instead of making it from scratch?
While you can use store-bought caramel sauce, homemade caramel provides a richer, more complex flavor and better texture. If you do use store-bought, heat it gently and fold in the toasted coconut before spreading on the cookies.
- → How long do these cookies stay fresh?
These Samoas cookies will stay fresh for up to one week when stored in an airtight container at room temperature. Make sure to separate layers with parchment paper to prevent sticking. You can also freeze them for up to 3 months.
- → Can I make these gluten-free?
Yes! You can substitute a 1:1 gluten-free flour blend for the all-purpose flour in the cookie base. Make sure your blend contains xanthan gum for the best texture. The rest of the recipe remains the same.
- → Why did my caramel crystallize?
Caramel crystallizes when sugar crystals form during cooking. To prevent this, avoid stirring once the sugar starts to melt, and make sure your pan and utensils are completely clean. You can also add a tablespoon of corn syrup to help prevent crystallization.
- → Can I use dark chocolate instead of semi-sweet?
Absolutely! Dark chocolate will give the cookies a more sophisticated, less sweet flavor profile. You can also use milk chocolate if you prefer something sweeter. Feel free to experiment with different chocolate types to find your perfect combination.
- → Do I need to cut out the center of the cookies?
The traditional Samoas shape has a hole in the center, but you can make them as solid round cookies if that's easier. The donut shape allows for more caramel-to-cookie ratio and creates that iconic look, but solid cookies work just as well.
Conclusion
These homemade Samoas cookies are the perfect treat for any occasion. They combine buttery shortbread, sweet caramel, toasted coconut, and rich chocolate in every bite. Making them from scratch allows you to control the quality of ingredients and create a fresher, more flavorful version than store-bought. They're perfect for gift-giving, parties, or simply satisfying your sweet tooth. Store them in an airtight container for up to a week, though they rarely last that long!
