
 pin it
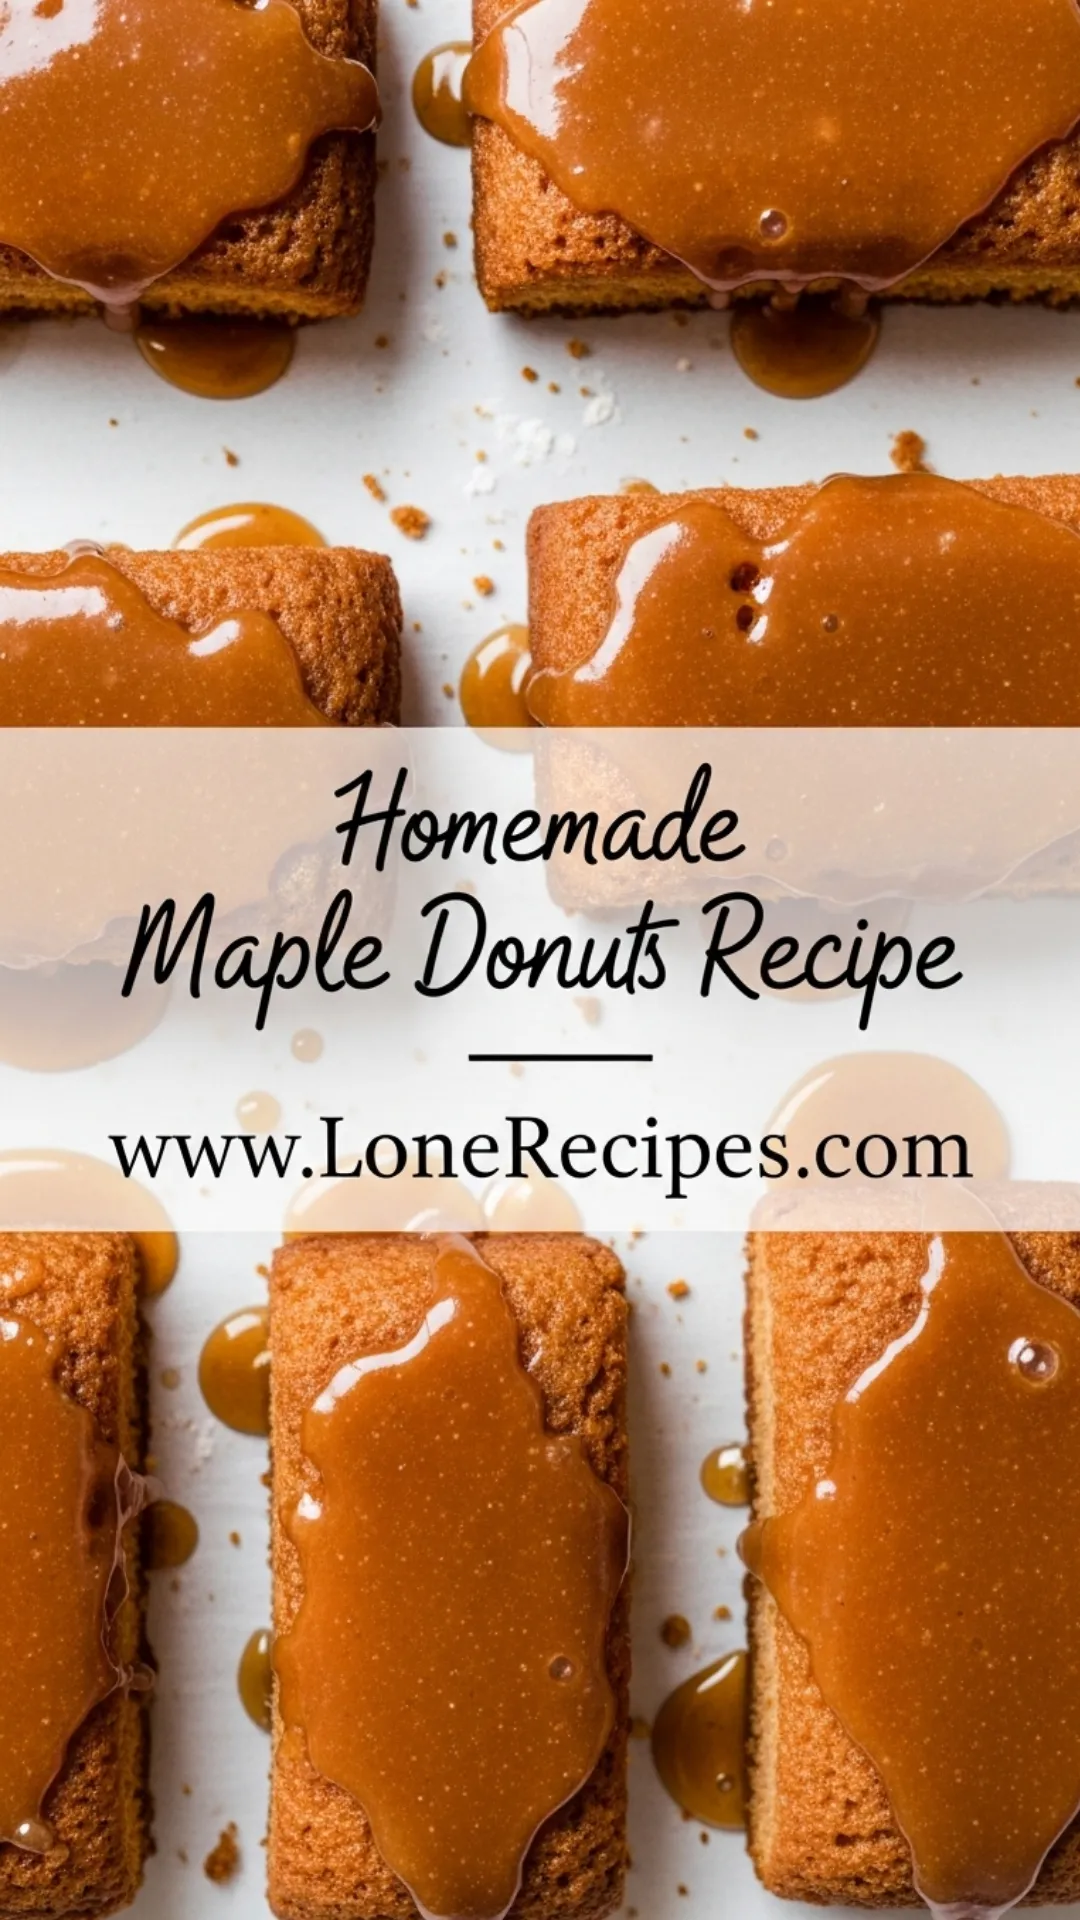
I first discovered the magic of baked donut bars during a cozy autumn morning when I was experimenting in my kitchen. The idea came to me while staring at a bottle of pure maple syrup and wondering how to capture that perfect pancake-breakfast flavor in a handheld treat. These bars have that wonderful cake-donut texture that's neither too dense nor too light - just perfectly tender and satisfying. The real star is the maple glaze that I've perfected over countless batches. It's glossy enough to catch the light beautifully but thick enough to coat each bar generously. What I love most is how the glaze seeps slightly into the cake, creating these amazing pockets of concentrated maple sweetness. The bars have become my go-to recipe when I want to impress guests or treat my family to something special. Every bite delivers that nostalgic comfort of a classic donut shop experience, but with the satisfaction of knowing you made it from scratch with love.
Why I love this recipe
This recipe holds a special place in my heart because it perfectly captures the essence of cozy weekend mornings. There's something magical about the way these bars fill the house with the warm scent of vanilla and maple while they bake. I love how forgiving this recipe is - even if the glaze isn't perfectly smooth or the bars aren't identical in size, they still taste absolutely incredible. The texture is what really sets these apart from regular donuts; they're substantial enough to feel satisfying but light enough that you can easily enjoy two without feeling overwhelmed. What touches my heart most is watching my family's faces when I place a fresh batch on the table. The recipe reminds me that the best treats aren't always the most complicated ones - sometimes simple ingredients combined with a little patience and love create the most memorable moments. These bars have been present at birthday mornings, lazy Sunday brunches, and countless coffee dates with friends, making them more than just a recipe - they're a vessel for creating sweet memories.
What You Need From Your Kitchen
- All-purpose flour: Forms the base structure of the donut bars
- Granulated sugar: Sweetens the donut and helps create tender texture
- Melted butter: Adds richness and moisture to the bars
- Whole milk: Provides moisture and helps create the cake-like texture
- Pure maple syrup: The star ingredient that gives the glaze its distinctive flavor
- Heavy cream: Creates a smooth, glossy glaze consistency
- Powdered sugar: Forms the base of the maple glaze coating
Let's Make These Together
- Prepare Your Workspace
- Start by preheating your oven to 375°F and generously greasing your 9x13 inch baking pan. This ensures your donut bars won't stick and will release easily after baking. Gather all your ingredients and measuring tools to make the process smooth and enjoyable.
- Create the Perfect Batter
- In your largest mixing bowl, whisk together the flour, sugar, baking powder, and salt until evenly distributed. In a separate bowl, combine the melted butter, milk, eggs, and vanilla, whisking until the mixture is completely smooth and unified.
- Combine with Care
- Pour your wet ingredients into the dry mixture and gently fold together using a spatula or wooden spoon. Mix just until the ingredients are combined - you should still see a few small lumps, which is perfect for tender donuts.
- Bake to Golden Perfection
- Spread the batter evenly in your prepared pan and slide it into the preheated oven. Bake for 12-15 minutes, checking with a toothpick for doneness. The bars should spring back lightly when touched and pull slightly from the edges of the pan.
- Create the Maple Magic
- While your donuts cool, whisk together the powdered sugar, maple syrup, heavy cream, and butter until you achieve a smooth, pourable consistency. The glaze should coat the back of a spoon but still drizzle easily when lifted.
 pin it
Switch Things Up
I remember the first time I made these donut bars, I was craving something between a donut and a cake but didn't want to deal with frying. The smell of maple syrup warming in the kitchen took me right back to childhood pancake breakfasts. What started as an experiment became our family's most requested weekend treat. My kids now help me drizzle the glaze, and watching their faces light up when they see that golden coating cascade down the sides never gets old. These bars have become our special Saturday morning tradition, and honestly, they taste even better when made with little helping hands.
Perfect Pairings
These maple donut bars pair beautifully with a steaming cup of freshly brewed coffee or rich hot chocolate. For a decadent brunch spread, serve them alongside crispy bacon or breakfast sausage to balance the sweetness. They also complement fresh berries wonderfully - try serving with strawberries or blueberries for a pop of tartness. A glass of cold milk is always a classic pairing, especially for the kids.
 pin it
Frequently Asked Questions
- → Can I make these ahead of time?
Yes! You can bake the donut bars up to 2 days ahead and store them covered. Add the glaze just before serving for the best appearance and texture.
- → What if I don't have pure maple syrup?
Pure maple syrup is essential for the authentic flavor, but in a pinch, you can substitute with 3 tablespoons honey plus 1/4 teaspoon maple extract.
- → Can I freeze these donut bars?
The unglazed bars freeze well for up to 3 months. Thaw completely before glazing. Glazed bars don't freeze as successfully.
- → Why are my donut bars dense?
Dense bars usually result from overmixing the batter or using too much flour. Mix just until ingredients are combined and measure flour by spooning it into the cup.
- → How do I know when the glaze consistency is right?
The perfect glaze should coat the back of a spoon and drizzle in a steady ribbon when lifted. If too thick, add cream; if too thin, add powdered sugar.
Conclusion
These maple donut bars bring bakery-quality sweetness right to your kitchen. The tender crumb paired with that glossy maple glaze creates the perfect balance of textures and flavors. They're ideal for weekend brunches, special occasions, or whenever you need a comforting homemade treat. Store them covered for up to three days, though they're best enjoyed fresh from the oven when the glaze is still slightly warm.