
 pin it
I first discovered mug brownies during college when my roommate made one at 2 AM during a study session. I was completely skeptical – how could something made in a microwave possibly taste like a real brownie? But watching her mix everything together in less than three minutes and then pull out a perfectly cooked, aromatic chocolate brownie changed my perspective entirely. The recipe is deceptively simple: you combine dry ingredients in a microwave-safe mug, add wet ingredients, stir until just combined, and microwave for about 90 seconds. What emerges is a warm, fudgy brownie with a texture somewhere between a traditional brownie and a molten lava cake. The key is not overmixing the batter and not overcooking it – you want that center to stay slightly gooey. Over the years, I've made this recipe hundreds of times, tweaking and perfecting it. I've learned that the quality of cocoa powder really matters, and adding a pinch of instant coffee enhances the chocolate flavor without making it taste like coffee. This recipe has saved me countless times when unexpected guests arrive or when I simply need an emergency chocolate fix.
Why I love this recipe
What I absolutely love about this mug brownie is the instant gratification factor. In our fast-paced world, being able to satisfy a chocolate craving in five minutes flat feels almost magical. There's no guilt about making a whole pan of brownies and then eating too many – this is perfectly portioned for one person. I also appreciate how forgiving this recipe is; even if your measurements aren't exact, it still turns out delicious. The cleanup is minimal – just one mug and a spoon, which means more time enjoying the brownie and less time doing dishes. I love how customizable it is too. Some days I add peanut butter chips, other times I swirl in some Nutella, and occasionally I'll add a few marshmallows on top for the last 10 seconds of cooking. It's become my go-to recipe for teaching kids how to cook because it's safe, quick, and the results are immediately rewarding. The look of pride on a child's face when they make their first successful mug brownie is priceless. This recipe has genuinely brought joy to my life and to countless friends and family members I've shared it with.
What You Need From Your Kitchen
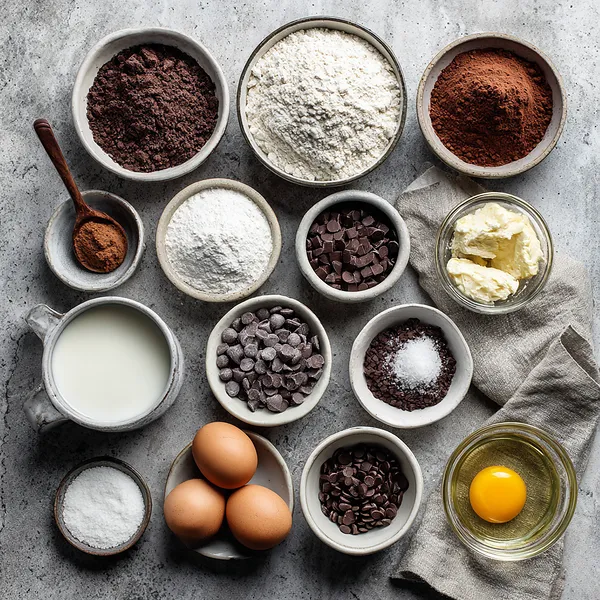
- All-purpose flour: Forms the structure of the brownie, providing the base texture
- Unsweetened cocoa powder: Provides rich chocolate flavor and dark color to the brownie
- Granulated sugar: Sweetens the brownie and helps create a tender, moist texture
- Egg: Binds ingredients together and adds richness and structure
- Milk: Adds moisture and helps create a smooth, fudgy texture
- Vegetable oil: Keeps the brownie moist and tender, prevents dryness
- Chocolate chips: Create pockets of melted chocolate throughout for extra indulgence
- Vanilla extract: Enhances the chocolate flavor and adds depth
Let's Make These Together
- Combine dry ingredients in mug
- Start by grabbing your favorite microwave-safe mug that holds at least 12 ounces. Add the flour, sugar, cocoa powder, and a pinch of salt directly into the mug. Using a fork, stir these dry ingredients together thoroughly, making sure there are no clumps of cocoa powder hiding in the mixture. This step is important because it ensures even distribution of the cocoa throughout your brownie. Take about 15-20 seconds to really mix this well – you want a uniform brown color with no streaks of white flour visible.
- Mix in wet ingredients
- Now crack your egg directly into the mug with the dry ingredients. Add the milk, vegetable oil, and vanilla extract. Here's where the magic happens – use your fork to vigorously stir everything together, scraping the bottom and sides of the mug to incorporate all the flour. Mix for about 20-30 seconds until you have a smooth, glossy chocolate batter with no dry pockets remaining. The batter should be thick but pourable, similar to pancake batter. Don't worry about overmixing too much at this stage – just make sure everything is well combined.
- Fold in chocolate chips
- Sprinkle your chocolate chips into the batter and gently fold them in with your fork, making sure they're distributed throughout. If you like, save a few chips to press into the top of the batter – they'll create a beautiful melted chocolate topping. The chocolate chips will melt during cooking and create those amazing pockets of gooey chocolate that make this brownie so irresistible. You can use any type of chocolate chips you prefer: semi-sweet, milk chocolate, dark chocolate, or even white chocolate chips for variety.
- Microwave until just set
- Place your mug in the center of the microwave and cook on high power. The exact time will depend on your microwave's wattage – start with 1 minute and 30 seconds. Watch through the microwave window as the brownie rises and cooks. It's done when the top looks set but still appears slightly glossy and moist in the center. The edges should pull away from the mug slightly. Remember, it's better to slightly undercook than overcook – the brownie will continue to cook a bit from residual heat after you remove it. If it needs more time, add it in 10-second increments.
- Cool briefly and enjoy
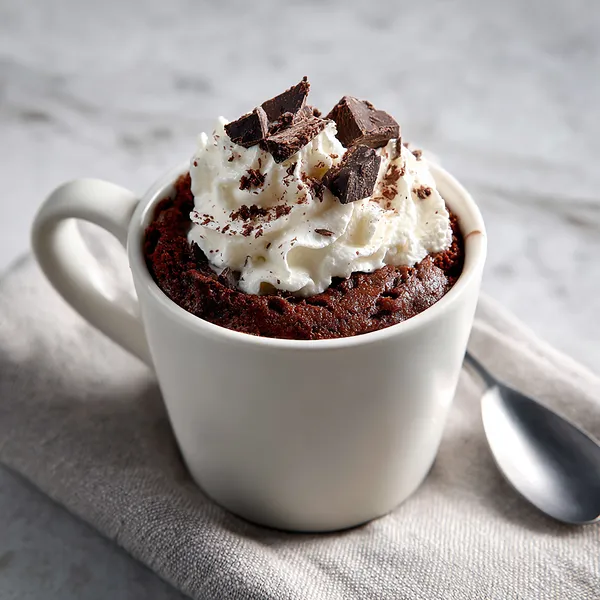
- Using oven mitts or a kitchen towel, carefully remove the hot mug from the microwave and place it on a heat-safe surface. Let it sit for 2-3 minutes – this cooling time allows the texture to set properly and makes it safe to eat. The brownie will firm up slightly as it cools but will still be wonderfully warm and gooey in the center. Now's the time to add your favorite toppings: a dollop of whipped cream, a scoop of vanilla ice cream, a drizzle of chocolate sauce, or simply enjoy it as is. Grab a spoon and dig in directly from the mug!
 pin it
Switch Things Up
I remember the first time I made this mug brownie – it was finals week, and I was desperate for chocolate but too tired to even think about turning on the oven. I threw the ingredients together somewhat skeptically, not really believing it would work. When I pulled that mug out of the microwave and saw the brownie had risen perfectly, I was amazed. That first spoonful was life-changing – warm, gooey, intensely chocolatey. Now it's become my signature move when friends come over unexpectedly. I'll casually ask if they want dessert, disappear for five minutes, and come back with fresh, warm brownies. They always think I'm some kind of kitchen wizard. The best variation I've tried? Adding a spoonful of peanut butter in the center before microwaving. It creates this incredible molten peanut butter core.
Perfect Pairings
This mug brownie pairs beautifully with a scoop of vanilla ice cream melting into the warm chocolate, creating a homemade brownie sundae experience. For a more sophisticated touch, serve it alongside a shot of espresso or hot coffee – the bitter notes complement the sweet chocolate perfectly. If you want to make it extra indulgent, drizzle some salted caramel sauce over the top or add fresh raspberries for a tart contrast. A cold glass of milk is the classic pairing that never fails. For adult gatherings, a small pour of Irish cream liqueur over the warm brownie creates an impressive boozy dessert.
 pin it
Frequently Asked Questions
- → Can I make this brownie without eggs?
Yes, you can substitute the egg with 3 tablespoons of applesauce, mashed banana, or a flax egg (1 tablespoon ground flaxseed mixed with 3 tablespoons water, let sit 5 minutes). The texture will be slightly different but still delicious. The applesauce version tends to be more cake-like, while the banana version adds a subtle banana flavor.
- → Why did my brownie overflow in the microwave?
This happens when the mug is too small or the microwave power is too high. Always use a mug that holds at least 12 ounces to give the brownie room to rise. If your microwave is very powerful (1000+ watts), reduce the cooking time by 10-15 seconds. You can also try cooking at 80% power for a slightly longer time to prevent overflow.
- → How can I make the brownie more fudgy or more cake-like?
For a fudgier texture, reduce the cooking time by 10-15 seconds and let it rest for a full 3 minutes after cooking. The center will be gooier and more molten. For a cake-like texture, cook for an additional 10-15 seconds until the top is completely set and dry to the touch. You can also add an extra tablespoon of flour for a more cake-like consistency.
- → Can I double this recipe to serve two people?
It's better to make two separate mug brownies rather than doubling in one larger container. Microwave cooking doesn't scale up well, and a larger portion won't cook evenly – the edges will overcook while the center stays raw. Making two individual mugs ensures both people get a perfectly cooked brownie, and it only takes an extra minute of prep time.
- → What can I add to customize this basic recipe?
The possibilities are endless! Try adding a spoonful of peanut butter or Nutella in the center before cooking for a molten core. Mix in chopped nuts, dried fruit, or different types of chips (butterscotch, white chocolate, mint). Add a pinch of instant coffee to enhance the chocolate flavor, or try cinnamon or cayenne pepper for a Mexican hot chocolate version. You can also swirl in caramel sauce or jam before cooking.
- → How do I know when the brownie is perfectly done?
The brownie is done when the top looks set and has risen in the mug, but still appears slightly moist and glossy in the very center. The edges should pull away from the mug sides slightly. If you insert a toothpick in the center, it should come out with a few moist crumbs, not wet batter. Remember it will continue cooking from residual heat after removal, so slightly underdone is better than overdone.
Conclusion
This microwave mug brownie is the ultimate solution for instant chocolate satisfaction. Whether you're studying late at night, need a quick dessert after dinner, or just want something sweet without the commitment of baking a whole batch, this recipe has you covered. The beauty lies in its simplicity and speed – no fancy equipment needed, just a mug and a microwave. The texture is perfectly fudgy with a slightly crispy top, and those melted chocolate chips create pockets of molten chocolate throughout. Top it with whipped cream, ice cream, or enjoy it straight from the mug.