
 pin it
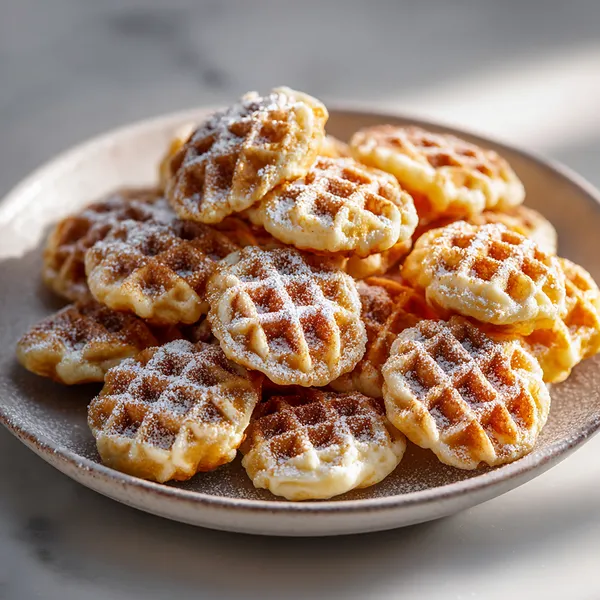
I first came across mini waffle cookies at a little bakery during a trip, and I remember picking one up thinking it was just going to be a regular waffle. The moment I bit into it, I was completely caught off guard — it was crispy like a cookie, rich and buttery like shortbread, but with all those beautiful waffle ridges that gave it this incredible texture in every single bite. I stood there finishing three more before I even thought about asking for the recipe. When I got home, I was determined to recreate that magic, and after a few trial batches I landed on this version which honestly might be even better than the original. The batter is simple — just butter, sugar, eggs, flour, vanilla, and a little baking powder — but the result is something genuinely special. The waffle iron does all the heavy lifting, pressing the batter into those gorgeous golden rounds with crispy edges and a lightly soft center. A dusting of powdered sugar on top is all you need. These have become one of my most-requested recipes, and every single time I make them they remind me of that first happy bite at that little bakery.
Why I love this recipe
What I love most about this recipe is how completely effortless it is without ever feeling like a compromise. You get this beautiful, bakery-quality result from the simplest pantry ingredients and about thirty-five minutes of your time. There is something deeply satisfying about pressing that batter into the waffle iron and watching it transform into these perfect golden rounds — it feels like a little magic trick every time. I also love how versatile they are: dress them up with ice cream and berries for a dinner party dessert, or keep them plain and stack them in a jar for snacking all week. The texture is truly the star — that crispy outer grid with the slightly chewy buttery center is genuinely addictive. And the fact that they are portion-controlled little bites means you can grab one or two without any guilt, though I will be honest, stopping at two is a serious challenge.
What You Need From Your Kitchen
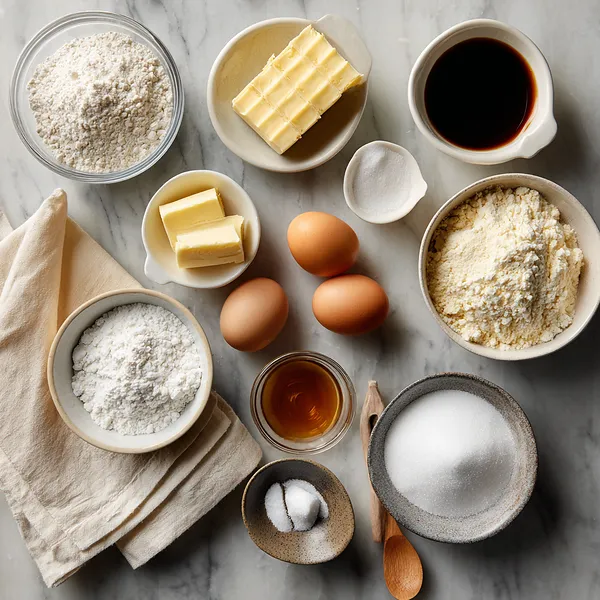
- Unsalted Butter: Cream at room temperature with sugar to form the rich, tender base of the cookie batter
- All-Purpose Flour: Sift with baking powder and salt to create the structure of the waffle cookies
- Eggs: Beat in one at a time to bind the batter and add richness and lift
- Granulated Sugar: Cream with butter until fluffy to sweeten and help create the golden crispy exterior
- Vanilla Extract: Stir into the wet mixture to add warm, fragrant depth of flavor
- Baking Powder: Whisk into the flour to give the cookies a light, slightly airy texture inside
- Powdered Sugar: Dust generously over the cooled cookies just before serving for a classic finishing touch
Let's Make These Together
- Cream butter and sugar until fluffy
- Place your softened butter and granulated sugar into a large bowl and beat them together with a hand mixer on medium speed for about 2 to 3 minutes. You are looking for the mixture to turn pale, light, and fluffy — this is what gives the cookies their delicate texture. Do not rush this step; proper creaming makes a noticeable difference in the final result.
- Beat in eggs and vanilla
- Crack in your eggs one at a time, mixing well after each one so the batter stays smooth and does not curdle. Add the vanilla extract and give everything a final mix until the batter looks glossy and uniform. It should smell amazing already.
- Fold in the dry ingredients
- In a separate bowl, whisk together the flour, baking powder, and salt, then gently fold this into your wet batter using a spatula. Stir just until no dry streaks remain — overmixing at this stage can make the cookies tough, so keep it gentle and brief.
- Heat and grease the waffle iron
- Preheat your mini waffle iron until it is hot — you can test it by flicking a tiny drop of water onto the surface; if it sizzles, you are ready. Brush or spray the plates lightly with butter or non-stick spray to ensure the cookies release cleanly every time.
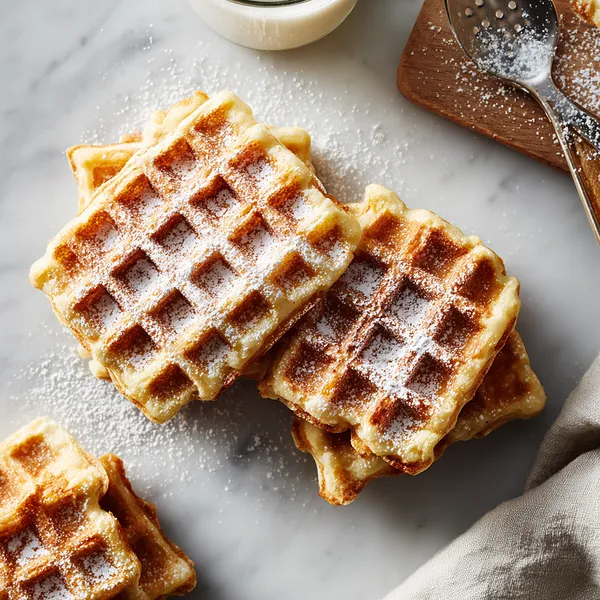
- Press and cook the cookies golden
- Drop about one tablespoon of batter per section onto your heated iron, close the lid, and let them cook for 2 to 3 minutes without peeking. You will notice the steam slowing down — that is your cue they are nearly done. Open to reveal beautiful, golden, grid-pressed cookies.
- Cool on rack and dust with sugar
- Use a fork to carefully lift each cookie onto a wire rack. Give them at least 5 minutes to cool completely — they will firm up into perfectly crispy rounds as they rest. Once cooled, use a fine sieve to dust them with powdered sugar and serve immediately or store in an airtight jar.
 pin it
Switch Things Up
The first time I made these, I was looking for something quick to bring to a casual get-together and did not want to show up empty-handed. I had all the ingredients already in my pantry, which honestly made this feel like destiny. I mixed everything up in one bowl, fired up my mini waffle iron, and within twenty minutes the whole counter was covered in these little golden beauties. I dusted them with powdered sugar and packed them up, and they were completely gone before the night was over. Now I make them almost every week — sometimes I add a pinch of cinnamon to the batter, sometimes a little lemon zest. They are endlessly flexible and always a hit.
Perfect Pairings
These Mini Butter Waffle Cookies pair beautifully with a hot cup of coffee or a creamy latte for a classic morning treat. They also shine alongside a scoop of vanilla ice cream for an easy dessert, or served with a small bowl of Nutella or strawberry jam for dipping. For a more indulgent spread, pair them with whipped cream and fresh berries for a stunning brunch platter that looks like you spent hours in the kitchen.
 pin it
Frequently Asked Questions
- → Can I use a regular full-size waffle iron instead of a mini one?
Yes, you can use a full-size waffle iron, but the cooking time may be slightly longer and you will want to use more batter per section. Keep in mind the cookies will be larger and may take 3 to 4 minutes to cook through. The mini waffle iron is recommended for that classic bite-sized cookie shape.
- → Can I make the batter ahead of time?
Absolutely. You can prepare the batter up to 24 hours in advance and store it covered in the refrigerator. Give it a quick stir before using and let it sit at room temperature for about 10 minutes so it loosens up slightly before pressing.
- → Why are my waffle cookies sticking to the iron?
Sticking is usually caused by insufficient greasing or opening the iron before the cookies are fully cooked. Make sure to grease the iron well before each batch and wait until the steam has mostly stopped before opening the lid. Never force the iron open early.
- → Can I make these gluten-free?
Yes, you can substitute the all-purpose flour with a 1:1 gluten-free flour blend. Results may vary slightly in texture depending on the brand, but most quality gluten-free blends work very well in this recipe. Avoid using almond flour or coconut flour as direct substitutes as they behave very differently.
- → How do I keep them crispy after storing?
The key to keeping these cookies crispy is making sure they are completely cooled before storing, and using a truly airtight container. Avoid storing them in the refrigerator as moisture will soften them. If they do lose some crispiness, pop them in a toaster oven at 300°F for 3 to 4 minutes to bring the crunch back.
- → Can I add chocolate chips or other mix-ins?
Yes, small mix-ins like mini chocolate chips, finely chopped nuts, or a pinch of citrus zest work beautifully in this batter. Avoid large chunks as they can prevent the waffle iron from closing properly and may cause uneven cooking. Fold mix-ins in gently at the very end just before cooking.
Conclusion
These Mini Butter Waffle Cookies are the kind of recipe that becomes a household staple after just one batch. They are quick, simple, and absolutely delicious with that golden crispy exterior and soft buttery center. Whether you serve them at a gathering, pack them in a lunchbox, or enjoy them with your morning coffee, they never disappoint. Store any leftovers in an airtight container and they stay fresh for days — if they last that long!