
 pin it
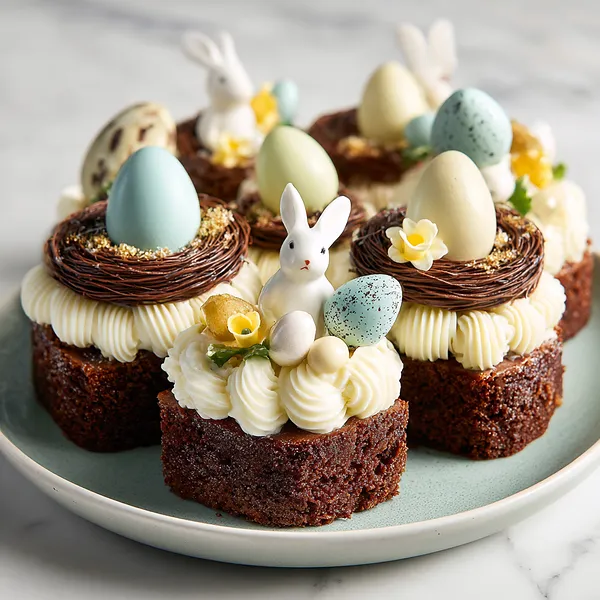
I first encountered these gorgeous miniature cakes at an Easter brunch hosted by a neighbor who happened to be a trained pastry chef. She brought out a tiered stand loaded with these tiny, perfect little cakes, each one topped with a chocolate nest and the sweetest little white chocolate bunny I had ever seen. I stood there genuinely speechless — they looked like something out of a high-end patisserie window. The chocolate sponge was deeply rich but not overly dense, and the cream cheese frosting had this gorgeous light tang that balanced the sweetness perfectly. The milk chocolate nest on top was piped so delicately it looked like real twigs. I went home that same evening and spent three hours trying to recreate them, and after a few attempts, I finally nailed it. Now they are an annual tradition in my home every spring without fail.
Why I love this recipe
What I love most about these Mini Easter Layer Cakes is how they manage to be both visually stunning and genuinely delicious at the same time — which is surprisingly rare in the world of decorated desserts. The chocolate sponge is moist and rich with deep cocoa flavor, the cream cheese frosting adds a perfectly balanced tangy sweetness, and the milk chocolate nest gives every bite a satisfying snap. But beyond the taste, I love that these cakes tell a story. Each element — the bunny, the egg, the little yellow flower — feels intentional and joyful, like a tiny edible spring garden. I also love how personal they are. Each guest gets their own individual cake, their own little nest, their own bunny. There is something deeply satisfying about that kind of thoughtful, individual presentation that a slice of regular cake just cannot replicate.
What You Need From Your Kitchen
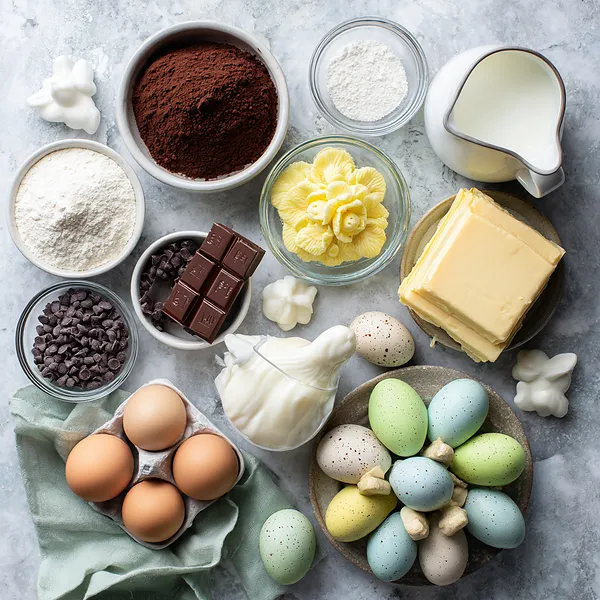
- Cocoa Powder: Sifted and whisked into the dry ingredients to create a rich, deeply chocolatey sponge base.
- Cream Cheese: Softened and whipped with powdered sugar and heavy cream to form a tangy, luscious frosting for layering and piping.
- Heavy Whipping Cream: Beaten into the cream cheese mixture to create a light, stable frosting that holds its shape when piped.
- Milk Chocolate Chips: Melted and piped in a nest pattern on top of each mini cake to create the signature Easter nest decoration.
- White Chocolate Bunny Figurines: Placed inside the chocolate nest as the festive Easter centerpiece topper for each individual cake.
- Pastel Speckled Sugar Eggs: Nestled alongside the bunny figurine inside the chocolate nest to complete the spring Easter theme.
- Unsalted Butter: Melted and combined with wet ingredients to give the chocolate sponge its moist, tender crumb.
Let's Make These Together
- Prep and mix the chocolate batter
- Preheat your oven to 350°F (175°C) and line your baking pan. Whisk all dry ingredients together in a large bowl, then combine the wet ingredients separately and fold them together until a smooth, glossy batter forms. Pour into the pan and spread evenly.
- Bake and cool completely
- Bake the sponge for 22–25 minutes until a toothpick comes out clean. This step is crucial — let the cake cool fully on a wire rack before attempting to cut rounds. Cutting a warm sponge will cause it to crumble and lose its shape.
- Cut your mini cake rounds
- Using your round cutter, press firmly and evenly through the cooled sponge to cut as many circles as possible. Remember you need two rounds per finished cake, so plan accordingly and cut from the edges first to maximize your yield.
- Whip the cream cheese frosting
- Beat the cream cheese until silky smooth, gradually add the powdered sugar, then stream in the heavy cream while beating on high. Keep going until the frosting is thick, fluffy, and holds firm peaks — this takes about 3–4 minutes and is worth every second.
- Layer and pipe the rosettes
- Assemble each mini cake by spreading frosting between the two chocolate layers, then use your star piping tip to pipe a beautiful ring of rosettes around the top edge of the cake, leaving the center open for the chocolate nest.
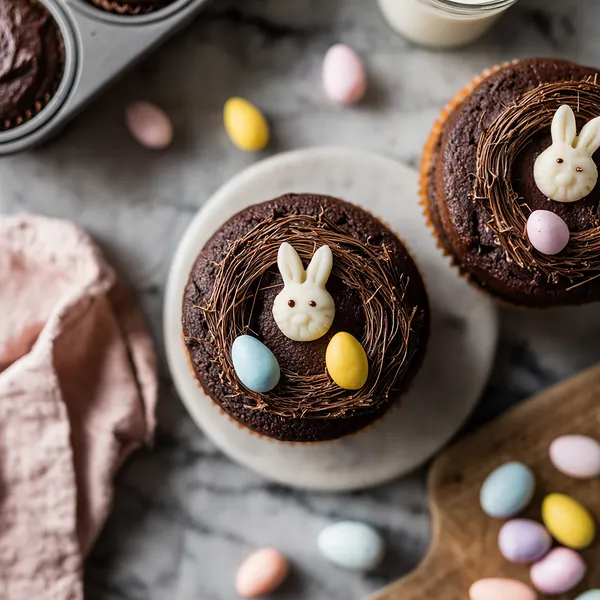
- Pipe the chocolate nest and decorate
- Melt the milk chocolate and pipe a delicate nest shape in the center of each cake. Let it set briefly, then place your white chocolate bunny, pastel sugar egg, and yellow sugar flower inside. Finish with a gentle dusting of edible gold dust and refrigerate until serving.
 pin it
Switch Things Up
The first time I made these, I accidentally over-whipped the cream cheese frosting and it became almost mousse-like — honestly? It was even better. Lighter, fluffier, and the rosettes held their shape perfectly on top of the chocolate nest. Now I always whip it a little longer on purpose. Also, if you can't find white chocolate bunny figurines, white chocolate-dipped strawberries shaped into bunnies work absolutely beautifully and taste incredible.
Perfect Pairings
These Mini Easter Layer Cakes pair wonderfully with a warm cup of Earl Grey tea or a cold glass of fresh-squeezed lemonade. For a festive spread, serve alongside a fruit platter with strawberries and blueberries, pastel-colored macarons, and a light sparkling rosé for the adults. The chocolate and cream cheese flavors also complement a rich hot chocolate or an iced mocha beautifully.
 pin it
Frequently Asked Questions
- → Can I make these mini cakes a day in advance?
Absolutely! You can bake the sponge, cut the rounds, and assemble the layered cakes with frosting up to 24 hours ahead. Store covered in the refrigerator and add the chocolate nest and decorations — bunny, egg, and flowers — on the day you plan to serve them for the freshest look.
- → What size cookie cutter should I use for the rounds?
A 2.5 to 3-inch round cookie cutter works best for a well-proportioned mini layer cake. If your cutter is too small, the layers can look stacked and unstable. If you don't have a cookie cutter, the open end of a large round glass works just as well.
- → Can I use store-bought frosting instead of making it from scratch?
You can, though homemade cream cheese frosting is highly recommended here — it pipes much more cleanly and has a better flavor and texture than most canned frostings. If you're short on time, a good quality store-bought cream cheese frosting will still work for the filling layer.
- → Where can I find white chocolate bunny figurines?
White chocolate bunny figurines are widely available in supermarkets, baking supply stores, and online retailers in the weeks leading up to Easter. Alternatively, you can mold your own using white chocolate and small silicone bunny molds, or substitute with white chocolate-dipped strawberries shaped to resemble bunnies.
- → How do I prevent the chocolate nest from breaking when placing it on the cake?
The easiest trick is to pipe the chocolate nest directly onto a small square of parchment paper, let it set fully in the refrigerator for 10–15 minutes, then carefully slide a thin spatula underneath and transfer it to the top of the cake. This gives you much more control than piping directly onto the frosting.
- → Can I make these gluten-free?
Yes! Simply substitute the all-purpose flour with a 1:1 gluten-free baking flour blend. Make sure your cocoa powder, baking powder, and all decorative elements are certified gluten-free as well. The texture may be very slightly different but the cakes will still be delicious and hold their shape well.
Conclusion
These Mini Easter Layer Cakes are the ultimate spring showstopper — rich, chocolatey, creamy, and impossibly cute. Whether you're hosting an Easter brunch or simply want to bring a little magic to your dessert table, these individual cakes deliver on every level. Make them ahead, refrigerate, and top with the decorations just before serving for the freshest, most impressive result.