
 pin it
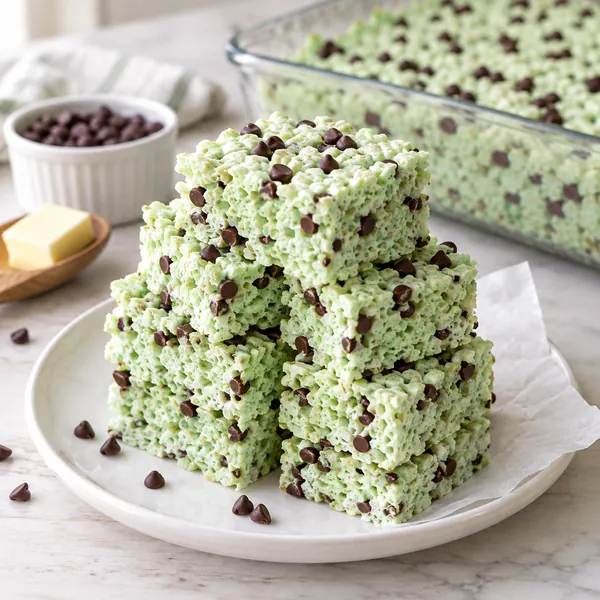
The first time I made these I was chasing that cool, minty flavor I remembered from an old ice cream truck bar and wanted it in a hand-held, nostalgic snack. I dyed the marshmallow mixture a pale green and stirred in peppermint extract, then nervously folded in the chocolate chips, worried they'd melt. They didn't. They became tiny pockets of bittersweet surprise in every bite.
What makes my version different is the balance and timing. I use a modest hit of peppermint extract rather than overpowering oil, and I add the chocolate chips off the heat so they stay intact and glossy. The green is gentle, not neon, and the marshmallow is melted until silky, then mixed quickly so the cereal stays crisp. A sprinkling of extra chips on top gives a pretty, rustic finish I love.
You can expect a soft but slightly crisp square with an airy marshmallow chew and cool mint notes that play against the chocolate. They come together in about thirty minutes total, are hands-on for just a few minutes, and set fast enough to slice the same day. These are the kind of treats I make when I want something quick, festive, and reliably adored by adults and kids alike.
Why I love this recipe
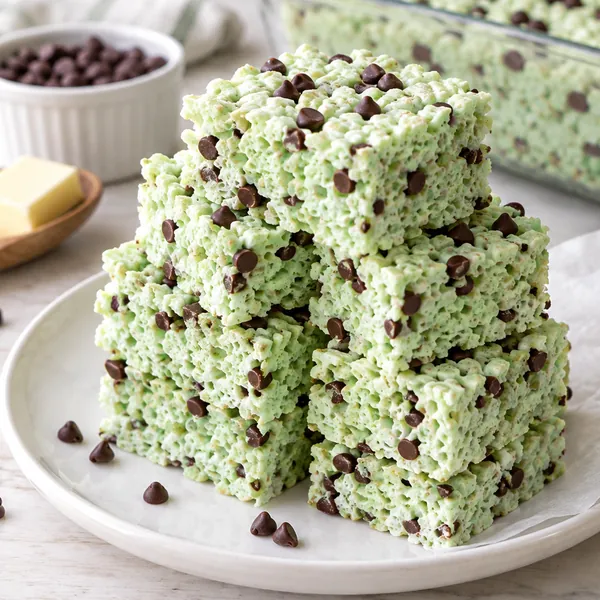
These treats sit in that sweet spot between nostalgia and grown-up flavor. The texture is what hooks people first: marshmallow syrup that binds the crispy cereal but doesn't turn into a dense block. Bite through and you get airy chew, an initial crisp snap from the cereal, and a melt of marshmallow that carries the peppermint. The mini chocolate chips hold their shape, adding tender bursts of chocolate rather than a single uniform sweetness.
Timing is forgiving. The marshmallows come together in minutes, and the whole batch needs just enough time to cool to room temperature before slicing. They are budget-friendly because the ingredient list is short and pantry-friendly: cereal, marshmallows, butter, extract and chips. Leftovers keep for several days at room temperature in a sealed container without losing that lovely chew. These bars please a crowd at bake sales, potlucks, or after-school snack duty, and they store well for a few days so you can make them ahead for gatherings without last-minute fuss.
What You Need From Your Kitchen
- Unsalted butter: Melts with marshmallows and adds richness without extra saltiness.
- Mini marshmallows: Melt until glossy; they create the sticky binder for the cereal.
- Rice crispy cereal: Add once marshmallow is glossy to keep the cereal crisp and airy.
- Peppermint extract: Use a teaspoon; strong extract can quickly overpower the marshmallow.
- Green gel food coloring: Gel gives even color with fewer drops and no extra liquid.
- Mini chocolate chips: Fold in off the heat so chips stay whole and not melted.
- Salt: A small pinch lifts sweetness and deepens the mint and chocolate.
- Parchment paper: Lining the pan prevents sticking and lets you lift the slab out easily.
Let's Make These Together
- Prep the pan
- Line a 9x13 inch pan with parchment paper, leaving an overhang to lift the slab later. Lightly butter the parchment or spray with nonstick spray so the treats release cleanly when cooled and you can lift them without breaking.
- Melt butter and marshmallows
- In a large heavy saucepan over low to medium-low heat, melt the butter then add the marshmallows. Stir constantly until the mixture becomes smooth and glossy, about 3 to 4 minutes; the visual cue is a completely melted, shiny syrup with no marshmallow lumps.
- Add color and flavor
- Remove the pan from the heat and quickly stir in peppermint extract, a pinch of salt, and green gel food coloring. The mixture should be evenly tinted and smell noticeably minty but not medicinal before you fold in the cereal.
- Fold in cereal and chips
- Stir the rice cereal into the marshmallow syrup until every flake is coated. Fold in most of the mini chocolate chips off the heat so they retain shape. The mix is ready when it holds together and the cereal is evenly coated with no dry pockets.
- Press into the pan
- Transfer to the prepared pan and press firmly and evenly with a buttered spatula or piece of parchment. Pressing too hard removes the air; aim for even density and a smooth top. Sprinkle the remaining chips over the surface and press gently to adhere.
- Cool and slice
- Let the slab cool at room temperature for 20 to 30 minutes until it firms but is still slightly pliable. Use the parchment overhang to lift it out, then slice into 12 squares. The visual cue for readiness is a matte surface and squares that hold their shape when cut.
 pin it
Switch Things Up
I often tweak these depending on the occasion. For a lighter mint note, substitute half the peppermint extract with vanilla and increase the chips slightly so the chocolate comes forward. If you prefer a more intense mint, use an extra two drops of peppermint oil but mix it into a teaspoon of melted butter first so it disperses evenly and never overwhelms.
For a sturdier, slightly fudgier chew, swap half the mini marshmallows for a cup of marshmallow creme and reduce the stirring time slightly to keep more air. Chocolate lovers can fold in chopped dark chocolate bars instead of chips; the larger chunks melt a little and create ribbons of chocolate. For a holiday twist, swirl in a few crushed candy cane pieces after pressing the slab for a crunchy peppermint finish, but only if you want a more pronounced peppermint crunch rather than a smooth chip bite.
Perfect Pairings
These squares are fun alongside a simple hot drink. A cup of strong coffee or an Americano balances the sweetness and makes the mint pop; for kids, a cold glass of milk is classic and keeps everything nostalgic. They also pair well with a light mint tea or a sparkling water with lime to cut richness. For party platters, arrange these with plain Rice Krispie squares and a few thin chocolate-dipped biscotti so guests can pick their level of indulgence.
 pin it
Frequently Asked Questions
- → Can I make these without food coloring?
Yes. The treats will taste identical without color; omit the green gel and use the marshmallow mixture plain for a classic look. If you still want a hint of color use one or two drops of gel rather than a heavy dose to avoid changing flavor balance.
- → Will the chocolate chips melt if I stir them in hot marshmallow?
They can soften if the mixture is too hot. Stir most chips in off the heat after the marshmallow syrup is removed from the burner, and reserve a handful to sprinkle on top so they remain intact and glossy.
- → How do I keep the treats from becoming too dense?
Work quickly and avoid over-pressing into the pan. Press evenly but gently so air remains trapped in the cereal; that airy texture is what keeps the squares light rather than dense.
- → Can I use regular marshmallows instead of mini?
Yes, regular marshmallows work fine. Chop them roughly or measure by weight or volume equivalence. They will melt just the same; the key is melting until smooth and glossy for an even coating.
- → How should I store leftovers?
Store in an airtight container at room temperature for up to three days to preserve chewiness. Put parchment between layers to prevent sticking. Refrigeration can dry them out and is not recommended for best texture.
- → Can I freeze these squares?
Wrap each square individually in plastic wrap and freeze in a sealed container for up to two months. Thaw at room temperature for about 30 minutes before serving so chips and marshmallow return to their intended texture.
Conclusion
Simple, quick, and a little playful, these Mint Chocolate Chip Rice Krispie Treats are one of my go-to celebratory bakes. They require minimal babysitting, store well for a couple of days, and travel easily for potlucks. Make them the way the recipe suggests the first time, then experiment with extract levels, chip types, or a cookie cutter for shapes. I hope they become a staple in your snack rotation as they have in mine.