
 pin it
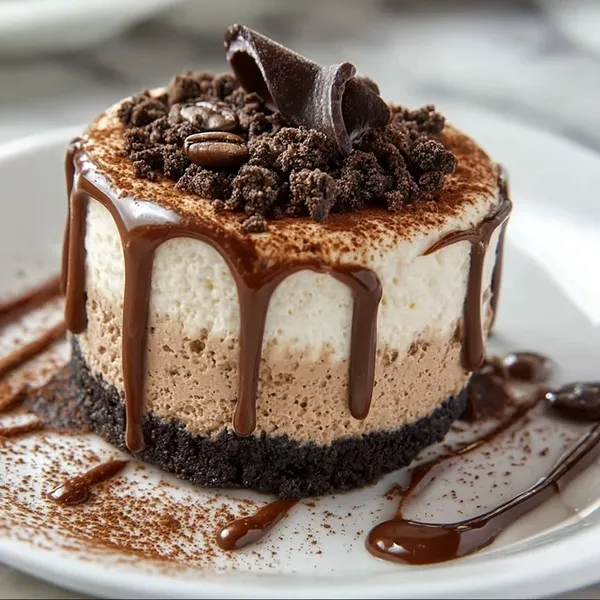
I remember the first time I encountered a mocha cheesecake at a trendy café downtown, and I was absolutely mesmerized by how the barista's two favorite things - coffee and dessert - came together so perfectly. That experience inspired me to create my own version at home. This recipe starts with a simple Oreo cookie crust that provides the perfect chocolatey foundation. The filling is where the magic happens - I blend cream cheese with instant espresso powder, creating this incredibly smooth, coffee-infused base that's not too sweet but absolutely divine. The addition of whipped cream makes it lighter than traditional cheesecake, giving it an almost mousse-like quality that melts on your tongue. I love taking my time with the chocolate drizzle, letting it cascade down the sides naturally for that professional bakery look. The finishing touches of chocolate shavings and whole espresso beans aren't just for show - they give you little hints of the intense flavors within. Every time I slice into this beauty and see those distinct layers, I feel like a pastry chef!
Why I love this recipe
I absolutely love this recipe because it combines my two greatest weaknesses - coffee and cheesecake - into one stunning dessert that never fails to impress. The fact that it's no-bake means I can make it even on the hottest summer days without heating up my kitchen, which is a huge win. There's something incredibly satisfying about creating such an elegant-looking dessert with relatively simple techniques. The coffee flavor is pronounced but not overwhelming, making it perfect for both coffee enthusiasts and those who just enjoy a subtle mocha taste. I also appreciate how versatile this recipe is - I've made it for fancy dinner parties and casual weekend gatherings, and it always gets rave reviews. The make-ahead nature is another reason I adore it; I can prepare it the night before and just add the garnishes before serving. Watching people's reactions when they take that first creamy, coffee-infused bite brings me so much joy. Plus, the combination of textures - from the crunchy Oreo base to the silky filling to the rich chocolate drizzle - creates such an exciting eating experience that keeps you coming back for more!
What You Need From Your Kitchen
- Oreo Cookies: Crushed into fine crumbs for the chocolate cookie crust base
- Cream Cheese: Softened to room temperature and beaten until smooth for the main filling
- Instant Espresso Powder: Dissolved into the cream cheese mixture to create the mocha flavor
- Heavy Whipping Cream: Whipped to stiff peaks and folded into filling for light, mousse-like texture
- Chocolate Sauce: Drizzled over the top for decoration and extra chocolate flavor
- Chocolate Shavings: Used as garnish along with espresso beans for elegant presentation
Let's Make These Together
- Create the Cookie Crust Base
- Begin by processing your Oreo cookies into fine, uniform crumbs. The key here is to get them as fine as possible so they bind well with the butter. Once you've achieved that sandy texture, drizzle in your melted butter and mix thoroughly until every crumb is coated. Press this mixture firmly into your springform pan, using the bottom of a glass or measuring cup to really compact it. Pop it in the fridge to firm up while you work on the star of the show - that luscious mocha filling.
- Prepare the Mocha Filling
- This is where the magic happens! Beat your room-temperature cream cheese until it's silky smooth - no lumps allowed here. Gradually add in your powdered sugar, espresso powder, and vanilla, mixing until everything is perfectly incorporated. The espresso powder should completely dissolve, infusing that gorgeous coffee flavor throughout. Take your time with this step; the smoother your base, the better your final texture will be.
- Fold in Whipped Cream
- In a separate bowl, whip your cold heavy cream until you see those beautiful stiff peaks forming. This is what gives your cheesecake that incredible light, mousse-like quality that makes it so irresistible. Now comes the gentle part - fold this whipped cream into your coffee mixture in three batches. Use a rubber spatula and employ a gentle folding motion, cutting through the center and bringing the bottom up and over. You want to maintain all that wonderful airiness you just created.
- Assemble and Chill
- Pour your dreamy mocha filling over your chilled crust, using a spatula to spread it evenly and smooth the top. Give the pan a few gentle taps on the counter to release any trapped air bubbles. Cover it carefully with plastic wrap and let it chill in the refrigerator for at least 4 hours, though overnight is even better. Patience is key here - you want that filling to be completely set and firm before you add your gorgeous garnishes.
- Final Touches and Presentation
- Once your cheesecake is perfectly set, it's time for the fun part! Carefully release it from the springform pan. Drizzle that glossy chocolate sauce over the top, letting it naturally run down the sides for that professional bakery look. Scatter your chocolate shavings and crushed cookie crumbs artistically on top, place a few whole espresso beans for that elegant touch, and finish with a delicate dusting of cocoa powder. When you slice into this beauty, you'll reveal those stunning layers that look as incredible as they taste!
 pin it
Switch Things Up
I first made this mocha cheesecake on a rainy Sunday afternoon when I was craving something sweet but didn't want to turn on the oven. I had leftover espresso from the morning and a package of Oreos in the pantry - it felt like fate! As I whipped the cream cheese with the coffee, the aroma filled my kitchen and I knew I was onto something special. When I took that first bite after it set, the smooth coffee-infused filling paired with the chocolate cookie crust was pure magic. Now, I make it whenever I need to impress guests or when I want to treat myself to something truly decadent. The best part? Watching everyone's eyes light up when they take their first bite. I've experimented with different toppings over time - crushed toffee bits work wonderfully too - but the classic chocolate drizzle and espresso beans remain my favorite. It's become my signature dessert, and friends actually request it by name now!
Perfect Pairings
This Mocha Cheesecake pairs beautifully with a freshly brewed cappuccino or a glass of cold brew coffee to enhance the espresso notes. For a more indulgent experience, serve it alongside a small scoop of vanilla bean ice cream or a dollop of freshly whipped cream. If you're serving this at a dinner party, it works wonderfully after a lighter main course like grilled salmon or roasted chicken. A dessert wine such as a tawny port or coffee liqueur like Kahlúa makes an elegant accompaniment. For a complete coffee-themed dessert spread, consider serving it with biscotti or chocolate-dipped shortbread cookies on the side.
 pin it
Frequently Asked Questions
- → Can I make this cheesecake ahead of time?
Absolutely! This cheesecake is actually perfect for making ahead. You can prepare it up to 2 days in advance and store it covered in the refrigerator. Just wait to add the chocolate drizzle and garnishes until about an hour before serving for the best presentation. This makes it an ideal dessert for dinner parties and special occasions.
- → Can I use regular coffee instead of espresso powder?
While instant espresso powder provides the most concentrated coffee flavor without adding extra liquid, you can use strong brewed coffee or regular instant coffee as a substitute. If using brewed coffee, reduce it to about 2 tablespoons and decrease the cream slightly to maintain the right consistency. Keep in mind the coffee flavor may be less intense.
- → How do I prevent cracks in my no-bake cheesecake?
The beauty of this no-bake cheesecake is that cracks aren't typically an issue since you're not baking it! However, to ensure a smooth top, make sure all your ingredients are at room temperature before mixing, fold the whipped cream gently to maintain airiness, and smooth the top well before refrigerating. The chocolate drizzle also helps hide any imperfections.
- → Can I freeze this mocha cheesecake?
Yes, this cheesecake freezes beautifully! Wrap individual slices or the whole cheesecake tightly in plastic wrap and then aluminum foil. It will keep in the freezer for up to 2 months. Thaw overnight in the refrigerator before serving. Add the chocolate drizzle and garnishes after thawing for the best appearance and texture.
- → What can I substitute for Oreo cookies in the crust?
You can use any chocolate sandwich cookies, chocolate graham crackers, or even plain graham crackers mixed with 2 tablespoons of cocoa powder. Chocolate wafer cookies also work wonderfully. Just make sure you have about 2 cups of crumbs total when crushed. Each option will give you a slightly different flavor profile but all work well with the mocha filling.
- → Why is my cheesecake filling too soft?
If your filling isn't setting properly, it could be due to a few reasons: the cheesecake hasn't chilled long enough (give it the full 4 hours minimum), the whipped cream wasn't whipped to stiff peaks, or the cream cheese wasn't beaten smooth enough initially. Make sure to refrigerate it overnight if possible, and ensure your cream cheese is full-fat for the best results.
Conclusion
This Mocha Cheesecake Delight is the ultimate dessert for coffee and chocolate lovers alike. The no-bake method makes it accessible for any skill level, while the sophisticated flavors and presentation make it perfect for special occasions. The combination of the crunchy Oreo base, velvety mocha filling, and rich chocolate drizzle creates a symphony of textures and tastes that will leave your guests impressed. Whether you're celebrating a birthday, hosting a dinner party, or simply treating yourself to something special, this cheesecake delivers restaurant-quality results right from your own kitchen.