
 pin it
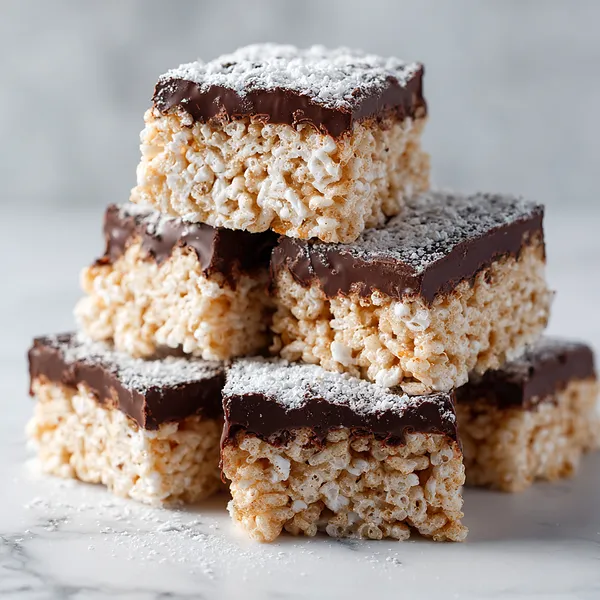
I first discovered this magical combination at my neighbor's potluck three years ago. She brought these unassuming squares dusted in powdered sugar, and I honestly didn't expect much. One bite changed everything. The crispy texture of the rice cereal combined with the rich chocolate and creamy peanut butter coating was unlike anything I'd tasted before. The powdered sugar added this sweet, melt-in-your-mouth finish that tied everything together perfectly. I immediately asked for the recipe, and she laughed, telling me it was the easiest thing she'd ever made. Since then, I've made these treats hundreds of times, tweaking the recipe here and there until it was absolutely perfect. What I love most is how versatile they are – you can add different mix-ins like mini marshmallows, crushed cookies, or even a pinch of sea salt on top. The no-bake nature means you can make them year-round without worrying about heating up your kitchen. They're my secret weapon for impressing people with minimal effort.
Why I love this recipe
This recipe holds a special place in my heart for so many reasons. First, it's foolproof – I've never had a batch fail, which is rare for me! Second, it brings people together. I can't count how many times I've made these for gatherings and watched kids and adults alike hover around the platter, sneaking 'just one more.' There's something about that combination of textures and flavors that's universally appealing. I also love that it's a recipe I can make with my children. They're old enough to help measure ingredients, stir the chocolate, and of course, shake the treats in the powdered sugar bag. It's become one of our bonding activities. Beyond that, these treats are incredibly practical. They store well, travel easily, and can be made in bulk for parties or packaged individually for lunch boxes. The fact that they require no baking means I can whip them up on the hottest summer days or when I'm short on time. Most importantly, every time I make them, they bring smiles and satisfaction. That's what good food is all about.
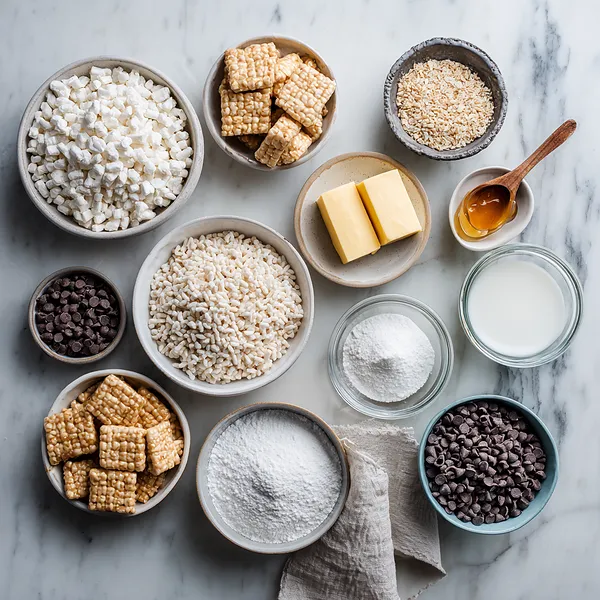
What You Need From Your Kitchen
- Rice Krispies Cereal: Use the original variety for authentic flavor and texture, measure accurately for proper ratio
- Chocolate Chips: Semi-sweet or milk chocolate both work well, ensure they're fresh for smooth melting
- Peanut Butter: Creamy style works best for smooth coating, avoid natural varieties as they may separate
- Butter: Use unsalted butter to control sweetness, bring to room temperature for easier melting
- Vanilla Extract: Pure vanilla extract enhances the chocolate flavor beautifully
- Powdered Sugar: Sift if clumpy for even coating, this creates the signature muddy buddy look
Let's Make These Together
- Prepare Your Workspace
- Start by gathering all your ingredients and equipment. Measure out the rice krispies cereal into a large bowl that gives you plenty of room to mix. Line your baking pan with parchment paper, leaving some overhang on the sides so you can easily lift the treats out later. This preparation step ensures everything goes smoothly once you start working with the melted chocolate.
- Create the Chocolate Coating
- Combine the chocolate chips, peanut butter, and butter in a microwave-safe bowl. Microwave the mixture in 30-second bursts, stirring thoroughly after each interval. This gradual heating prevents the chocolate from burning and ensures a silky smooth consistency. Once completely melted and combined, stir in the vanilla extract. The mixture should be glossy and pourable.
- Coat the Cereal
- Pour your warm chocolate mixture over the rice krispies cereal in the large bowl. Using a rubber spatula, gently fold the cereal into the chocolate, working from the bottom up to ensure every piece gets coated. Be gentle to avoid crushing the cereal, but thorough enough that no piece is left uncoated. The mixture will look rich and glossy at this stage.
- Add the Powdered Sugar
- Transfer all the chocolate-coated cereal into a large resealable plastic bag. Add the powdered sugar all at once, then seal the bag completely. Shake the bag vigorously, using both hands, until every piece of cereal is completely covered in a white, powdery coating. This is the fun part where muddy buddy magic happens!
- Set and Serve
- Pour the powdered sugar-coated treats into your prepared pan and press down firmly with clean hands or a spatula to create an even, compact layer about 1 inch thick. Place the pan in the refrigerator for at least 30 minutes to allow everything to set properly. Once firm, lift out using the parchment overhang and cut into squares. Enjoy immediately or store in an airtight container.
 pin it
Switch Things Up
I first made these on a particularly busy Saturday when I promised my kids homemade treats but realized I had forgotten to preheat the oven. Panic mode! Then I remembered the bag of rice krispies in the pantry and the chocolate chips I always keep stocked. What started as a kitchen emergency turned into our family's new favorite dessert. Now, every weekend, my kids ask if we can make the 'powdered sugar treats' together. They love shaking the squares in the bag with powdered sugar – it's become our little tradition. The best part is watching their faces light up when they take that first bite and the chocolate coating cracks to reveal the crispy interior. These treats have saved me countless times when unexpected guests drop by or when we need a last-minute dessert for school events.
Perfect Pairings
These Muddy Buddy Rice Krispie Treats pair wonderfully with a cold glass of milk or a hot cup of coffee for the adults. For a party spread, serve them alongside fresh fruit like strawberries or banana slices to balance the sweetness. They also complement vanilla ice cream beautifully – try crumbling one over a scoop for an incredible texture contrast. For game day or movie night, arrange them on a platter with popcorn, pretzels, and other finger foods. During holidays, they make excellent additions to cookie platters and dessert tables.
 pin it
Frequently Asked Questions
- → Can I use a different type of cereal?
While rice krispies work best for the classic texture, you can experiment with other cereals like corn flakes or cheerios. However, the texture and final result will be different. Rice krispies provide the perfect crispy-yet-tender bite that makes these treats so special.
- → How do I prevent the treats from being too hard?
The key is not to overpack them when pressing into the pan. Press firmly enough to hold together, but don't compress them too much. Also, make sure not to overcook the chocolate mixture, as this can make the final product harder. If they do turn out too hard, let them sit at room temperature for 10-15 minutes before serving.
- → Can I make these without peanut butter?
Absolutely! You can substitute the peanut butter with almond butter, cashew butter, sunflower seed butter for a nut-free option, or even cookie butter for a different flavor profile. Each alternative will give a slightly different taste, but all work wonderfully with the chocolate and cereal.
- → How long do these treats stay fresh?
When stored in an airtight container at room temperature, these treats will stay fresh and crispy for up to 5 days. For longer storage, you can refrigerate them for up to 2 weeks or freeze for up to 2 months. Just make sure they're in a well-sealed container to prevent them from absorbing moisture and becoming soggy.
- → Why is my powdered sugar coating clumpy?
This usually happens if the chocolate mixture is too warm when you add the powdered sugar, causing it to melt and clump. Make sure to let the chocolate-coated cereal cool for 2-3 minutes before adding to the bag with powdered sugar. Also, ensure your powdered sugar is fresh and lump-free before using.
- → Can I add other mix-ins to these treats?
Yes! This recipe is very versatile. You can add mini chocolate candies, mini marshmallows, crushed cookies, pretzel pieces, or even dried fruit to the mixture before coating with powdered sugar. Just keep the total volume of add-ins to no more than 1 cup to maintain the proper texture and balance.
Conclusion
These Muddy Buddy Rice Krispie Treats are the perfect marriage of classic rice krispie treats and the beloved muddy buddy snack. They're crunchy, sweet, chocolatey, and absolutely irresistible. The no-bake aspect makes them ideal for hot summer days or when you want a quick dessert without heating up the kitchen. Kids and adults alike will love these treats, and they're perfect for sharing at gatherings, bake sales, or keeping in an airtight container for whenever the sweet tooth strikes. Make a batch today and watch them disappear!