
 pin it
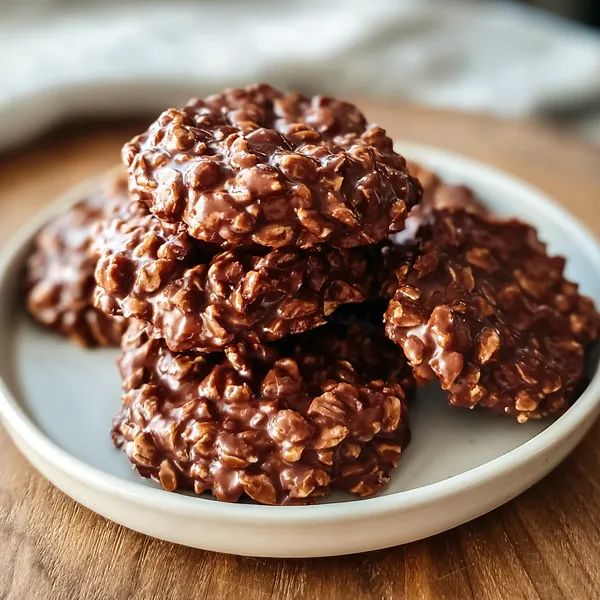
I first discovered no-bake cookies at a church potluck when I was about ten years old. A neighbor brought a huge platter of these glossy chocolate treats, and I was instantly hooked. The texture was unlike any cookie I'd tried before - chewy, dense, and incredibly satisfying. When I asked for the recipe, she smiled and told me it was one of the easiest desserts I'd ever make. She was right! Years later, I still make these cookies regularly, and they never fail to impress. What I love most is how forgiving they are - as long as you bring the mixture to a full boil and time it correctly, they set up perfectly every time. The combination of cocoa and peanut butter creates this incredible depth of flavor, while the oats provide substance and texture. They're rustic and homey, with that beautiful glossy finish that makes them look almost professional. I've made these for bake sales, birthday parties, and casual weeknight desserts, and they always disappear quickly.
Why I love this recipe
There are so many reasons why this recipe has earned a permanent spot in my kitchen repertoire. First, the speed - from start to finish, you're looking at about 15 minutes, including cooling time. That's faster than most boxed cookies! Second, these cookies are incredibly versatile. You can customize them with different nut butters, add coconut, throw in some chopped nuts, or even mix in mini chocolate chips for extra indulgence. Third, they're foolproof. Unlike traditional cookies that can burn or spread too much, these either set or they don't - and as long as you follow the boiling time, they'll set perfectly. Fourth, there's something magical about making cookies without an oven. It feels almost like cheating, but in the best way possible. Finally, these cookies have this nostalgic, comforting quality that takes me back to simpler times. They remind me of childhood, of helpful neighbors, and of the joy that comes from sharing something sweet and homemade with the people you love.
What You Need From Your Kitchen
- Quick-cooking oats: Form the base and provide chewy texture to the cookies
- Granulated sugar: Sweetens and helps create the binding syrup when boiled
- Cocoa powder: Gives rich chocolate flavor throughout
- Peanut butter: Adds creaminess, protein, and classic flavor pairing with chocolate
- Butter: Creates richness and helps bind ingredients together
- Milk: Helps dissolve sugar and creates the smooth base mixture
- Vanilla extract: Enhances overall flavor and adds depth
Let's Make These Together
- Prepare your workspace
- Before you start cooking, line your baking sheets with parchment paper and have all your ingredients measured and ready. This recipe moves quickly once you start, so having everything prepared in advance will make the process smooth and stress-free. Set out your oats, peanut butter, and vanilla in separate bowls or measuring cups for easy access.
- Create the chocolate base
- Combine the sugar, milk, butter, and cocoa powder in your saucepan over medium-high heat. Stir constantly as the butter melts and everything comes together into a smooth mixture. Keep stirring to prevent scorching on the bottom of the pan. Once the mixture reaches a full rolling boil with bubbles covering the entire surface, start your timer for exactly 90 seconds and maintain that boil while continuing to stir.
- Mix in remaining ingredients
- The moment your timer goes off, remove the pan from heat immediately. This timing is critical for proper setting. Working quickly, stir in the peanut butter and vanilla extract until they're completely smooth and incorporated into the hot chocolate mixture. The heat will melt the peanut butter easily. Then add all the oats at once and stir vigorously until every oat is coated with the glossy chocolate mixture.
- Shape and cool cookies
- Using a tablespoon or small cookie scoop, drop portions of the mixture onto your prepared baking sheets. Don't worry about making them perfectly round - they'll have a rustic, homemade appearance. Work as quickly as you can because the mixture starts to firm up as it cools. Once all cookies are dropped, simply let them sit undisturbed until they're completely cool and set, which takes about 30 minutes at room temperature.
 pin it
Switch Things Up
I remember the first time I made these cookies - it was during a power outage when I couldn't use my oven! I had promised my kids we'd bake together that afternoon, and I was scrambling for ideas. That's when I remembered my grandmother's no-bake cookie recipe tucked away in her old recipe box. We gathered around the stovetop with our ingredients, and the kids took turns stirring the bubbling chocolate mixture. They were amazed that we could make cookies without an oven! When we dropped spoonfuls onto the parchment paper and watched them set, their eyes lit up with excitement. Now, even when we have power, these are the cookies my kids request most often. Sometimes I'll swap the peanut butter for almond butter, or add in some shredded coconut for extra texture. We've even made them with butterscotch chips instead of cocoa for a fun variation. These cookies have become our family's rainy day tradition - quick, easy, and always delicious.
Perfect Pairings
These no-bake chocolate cookies pair wonderfully with a tall glass of cold milk or a hot cup of coffee. They're also fantastic alongside vanilla ice cream for an extra-indulgent dessert. For a fun twist, try serving them with fresh strawberries - the fruity brightness cuts through the rich chocolate beautifully. They make an excellent addition to any cookie platter, especially when paired with lighter treats like sugar cookies or lemon bars to balance out the richness.
 pin it
Frequently Asked Questions
- → Why didn't my no-bake cookies set properly?
The most common reason is not boiling the mixture long enough. The sugar needs to reach the soft-ball stage (around 235°F) to set properly. Make sure you bring the mixture to a full rolling boil and time it for exactly 90 seconds. If you're at high altitude, you may need to boil for an additional 15-30 seconds. Also, ensure you're using quick-cooking oats, not instant oats.
- → Can I make these cookies without peanut butter?
Yes! You can substitute any nut or seed butter you prefer. Almond butter, cashew butter, and sunflower seed butter all work well. Keep in mind that different nut butters have different consistencies, so your cookies might have a slightly different texture, but they'll still be delicious. For a nut-free version, sunflower seed butter is an excellent option.
- → How long do no-bake cookies stay fresh?
When stored in an airtight container at room temperature, these cookies will stay fresh for up to one week. You can also refrigerate them for up to two weeks, though they may become slightly harder when cold. For longer storage, freeze them in a freezer-safe container for up to three months. Just let them come to room temperature before eating for the best texture.
- → Can I add other ingredients to customize these cookies?
Absolutely! These cookies are very versatile. You can add 1/2 cup of shredded coconut, chopped nuts, mini chocolate chips, or even dried fruit to the mixture after adding the oats. Some people like to add a pinch of sea salt on top for a sweet-salty contrast. Just keep in mind that adding too many extras might affect how well the cookies set, so limit additions to about 1/2 cup total.
- → What if my cookies turned out too crumbly or grainy?
This usually happens when the mixture is boiled for too long, causing the sugar to crystallize. If this happens, there's unfortunately no way to fix that batch, but you can prevent it next time by being precise with your timing and keeping the heat at medium-high rather than high. Also, make sure to stir constantly during the boiling process to prevent hot spots. Using a candy thermometer can help - you're aiming for 235°F.
Conclusion
These no-bake chocolate cookies are the ultimate solution when you need a quick dessert without any fuss. They come together in minutes and deliver that perfect combination of chocolate and peanut butter that everyone loves. The best part? No oven means no heating up your kitchen, making these ideal for summer or anytime you want a sweet treat fast. Store them in an airtight container and they'll stay fresh and chewy for up to a week - though they rarely last that long in my house!