
 pin it
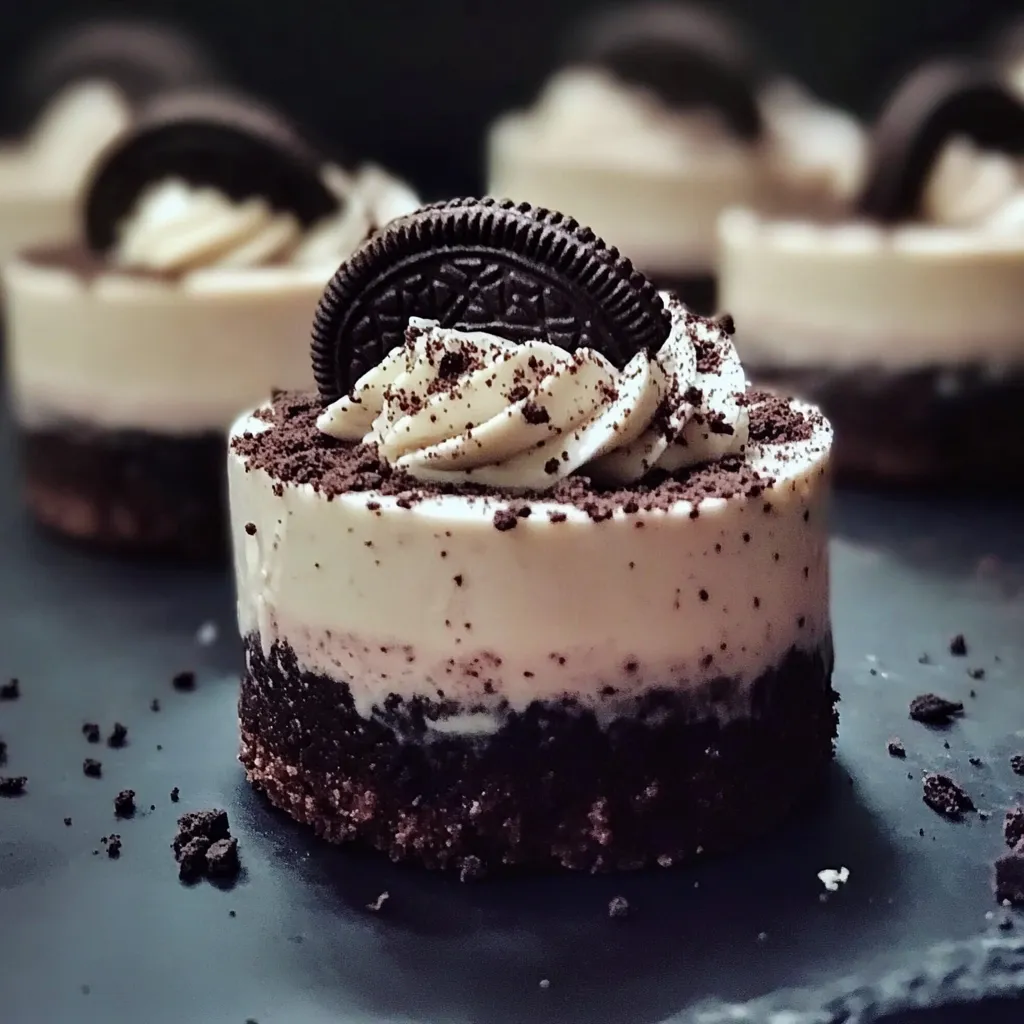
I absolutely love making these individual no-bake Oreo cheesecakes because they remind me of childhood treats but with an elegant, grown-up twist. The first time I encountered a similar dessert was at a fancy bakery, and I was amazed by how sophisticated something so simple could look. When I discovered I could make them at home without any baking, I was hooked! The process is so therapeutic - crushing those Oreos, whipping the cream to perfect peaks, and watching the layers come together. What I find most satisfying is how the crushed Oreo crust provides this incredible foundation that perfectly complements the silky smooth cheesecake layer. The addition of whipped cream on top makes each bite feel like a cloud of happiness. Every time I make these, I'm transported back to that first bakery experience, but now with the pride of knowing I created something just as beautiful and delicious in my own kitchen. The individual presentation makes everyone feel special, like they're getting their own personal dessert masterpiece.
Why I love this recipe
What I absolutely adore about this recipe is its perfect balance of simplicity and elegance. There's something magical about creating such a stunning dessert without turning on the oven even once! I love that it's completely foolproof - even if you're not confident in the kitchen, these will turn out beautifully every single time. The texture is what really gets me - that perfect contrast between the crunchy Oreo base and the incredibly smooth, creamy filling. It's like getting the best of both worlds in every single bite. I also appreciate how make-ahead friendly they are, which makes entertaining so much easier. The individual portions eliminate the stress of cutting and serving, and everyone gets their own perfect little dessert. But what I love most is watching people's reactions when they taste them - there's always this moment of surprise and delight when they realize how incredible something so simple can be. These cheesecakes have become my signature dessert, and I take so much pride in sharing them with friends and family. They represent everything I love about cooking: taking simple ingredients and transforming them into something that brings pure joy to others.
What You Need From Your Kitchen
- Oreo cookies: crush into fine crumbs for the base and reserve some for garnish
- Cream cheese: soften to room temperature and beat until smooth
- Heavy whipping cream: whip to stiff peaks for light texture
- Powdered sugar: blend into cream cheese for sweetness
- Melted butter: mix with cookie crumbs to bind the crust
- Vanilla extract: add to cream cheese mixture for enhanced flavor
Let's Make These Together
- Prepare the Cookie Crust
- Start by crushing your Oreo cookies into fine, even crumbs. You can use a food processor for quick results, or place the cookies in a sealed plastic bag and crush them with a rolling pin for a more hands-on approach. Mix these crumbs thoroughly with melted butter until the mixture holds together when pressed. Firmly press this mixture into the bottom of your individual serving glasses or ramekins, creating an even, compact layer that will serve as your delicious foundation.
- Create the Creamy Filling
- In a large bowl, beat your room-temperature cream cheese until it's completely smooth and free of any lumps. This is crucial for achieving that perfect, silky texture we're after. Gradually incorporate the powdered sugar and vanilla extract, beating continuously until the mixture is light, fluffy, and perfectly combined. Take your time with this step - it's what makes the difference between good and extraordinary cheesecake.
- Perfect the Whipped Cream
- Using a clean bowl and beaters, whip your heavy cream until you achieve stiff peaks. Watch carefully as you whip - you want firm peaks that hold their shape but aren't overbeaten into butter. Once you reach the perfect consistency, gently fold half of this whipped cream into your cream cheese mixture, being careful to maintain that light, airy texture that makes these cheesecakes so special.
- Assemble with Care
- Now comes the satisfying part - layering your creation! Spoon the cream cheese mixture evenly over each Oreo crust, creating smooth, level layers. Top each individual cheesecake with the remaining whipped cream, using a spoon or piping bag to create beautiful swirls and peaks. This is where your artistic flair can really shine through.
- Chill and Finish
- Place your assembled cheesecakes in the refrigerator for at least 4 hours, though overnight is even better. This chilling time allows all the flavors to meld together and the texture to set perfectly. Just before serving, add your final touches - a whole Oreo cookie as a crown and a sprinkle of cookie crumbs for that professional bakery look that will have everyone asking for your secret.
 pin it
Switch Things Up
I first discovered this recipe when I was desperately searching for a make-ahead dessert for my sister's birthday party. I had completely forgotten about dessert until the night before, and panic was setting in! That's when I remembered seeing these gorgeous individual cheesecakes online. I was skeptical about how good a no-bake cheesecake could actually be, but I was running out of options. To my absolute amazement, they turned out incredible! The texture was perfectly creamy, and the Oreo flavor was spot-on. Everyone at the party kept asking for the recipe, and I felt like such a culinary genius even though they were surprisingly simple to make. Now I make them regularly because they're foolproof and always get rave reviews. Sometimes I add a drizzle of chocolate sauce or switch up the cookie base with different flavors. The best part is watching people's faces light up when they take that first bite - pure joy every single time!
Perfect Pairings
These Oreo cheesecakes pair beautifully with a variety of beverages and accompaniments. Serve them with freshly brewed coffee or espresso to complement the cookie flavors, or try them with cold milk for a nostalgic touch. For special occasions, pair with champagne or a sweet dessert wine. You can also serve alongside fresh berries like strawberries or raspberries to add a pop of color and a hint of tartness that balances the rich sweetness. A drizzle of chocolate or caramel sauce makes them even more decadent for chocolate lovers.
 pin it
Frequently Asked Questions
- → Can I make these cheesecakes ahead of time?
Absolutely! These no-bake cheesecakes are perfect make-ahead desserts. You can prepare them up to 2 days in advance and store them covered in the refrigerator. In fact, they often taste even better after sitting overnight as the flavors have more time to meld together.
- → What can I substitute for heavy cream?
While heavy cream gives the best texture, you can substitute with whipped topping like Cool Whip if needed. However, the texture won't be quite as rich and creamy. For a lighter version, you can use half heavy cream and half Greek yogurt, though this will change the flavor profile slightly.
- → Can I use different types of cookies for the crust?
Yes! While Oreos are classic, you can experiment with other sandwich cookies like chocolate chip cookies, graham crackers, or even vanilla wafers. Just make sure to adjust the butter quantity as needed - some cookies may require more or less butter to bind properly.
- → How long do these cheesecakes last in the refrigerator?
These individual cheesecakes will stay fresh in the refrigerator for up to 4-5 days when properly covered. Make sure to cover them with plastic wrap or store in airtight containers to prevent them from absorbing other flavors from the fridge.
- → Can I freeze these no-bake cheesecakes?
Yes, you can freeze them for up to 3 months. Wrap each individual cheesecake tightly in plastic wrap and then place in a freezer-safe container. Thaw in the refrigerator for several hours before serving. The texture may be slightly different after freezing, but they'll still be delicious.
- → Why is my cheesecake filling too runny?
This usually happens when the cream cheese isn't fully softened, the cream isn't whipped to proper peaks, or the mixture hasn't been chilled long enough. Make sure your cream cheese is at room temperature, whip the cream to stiff peaks, and allow adequate chilling time for the best results.
Conclusion
These no-bake Oreo cheesecakes are the perfect dessert for any occasion. They're incredibly easy to make, requiring no baking skills whatsoever, yet they look absolutely professional. The combination of the crunchy Oreo crust with the smooth, creamy filling creates a delightful texture contrast that everyone will love. Make them ahead of time for parties or special dinners - they actually taste even better after chilling overnight. Your friends and family will be impressed by these elegant individual treats!