
 pin it
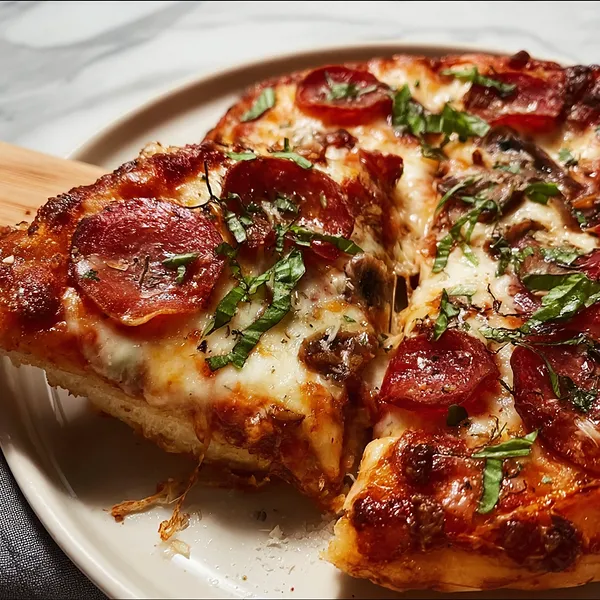
I first discovered the magic of no-yeast pizza dough during a spontaneous dinner party when I realized I'd forgotten to start my traditional pizza dough hours earlier. Desperate and out of time, I searched for alternatives and stumbled upon this brilliant self-rising flour method. I was immediately intrigued by how the Greek yogurt acts as both a binding agent and adds subtle tanginess to the dough. The recipe called for just two main dough ingredients, which seemed too good to be true. As I kneaded the mixture, I noticed the dough had a different texture than yeast-based doughs – slightly more elastic and forgiving. Rolling it out was surprisingly easy, and it didn't fight back like temperamental yeast dough sometimes does. I topped it generously with tangy pizza sauce, handfuls of shredded mozzarella, classic pepperoni, earthy sliced mushrooms, and finished with fresh basil leaves after baking. The pizza emerged from the oven with a gorgeous golden-brown crust, cheese bubbling at the edges, and the pepperoni slightly crisped. When I sliced into it, I was thrilled to see the crust had the perfect thickness – not too thin, not too thick – with just the right amount of chew. My guests were shocked when I revealed it was made without yeast, and several asked for the recipe before dessert was even served. Since that evening, this has become my reliable pizza method, especially when time is tight but cravings are high.
Why I love this recipe
What I absolutely love about this no-yeast pizza recipe is how it removes every excuse I used to have for not making homemade pizza. There's no planning ahead, no waiting for dough to proof, and no worrying about whether the yeast is still active. The simplicity of mixing just flour and yogurt into a workable dough feels almost like a kitchen magic trick. I appreciate that the dough is incredibly forgiving – even if you're not an experienced baker, you'll succeed with this recipe. The texture of the finished crust strikes the perfect balance between crispy edges and a tender center, and the subtle tang from the Greek yogurt adds an unexpected depth of flavor that store-bought crusts simply can't match. I also love the versatility – I've made this dough for classic pepperoni pizzas, white pizzas with ricotta and spinach, and even dessert pizzas with Nutella and strawberries. It's become my go-to recipe for involving kids in the kitchen since the dough comes together so quickly and they can participate in every step. The fact that I can go from craving to eating in about 40 minutes makes this recipe a true weeknight hero. Most importantly, this pizza genuinely tastes like you spent hours on it, and there's tremendous satisfaction in serving something this delicious that required so little effort.
What You Need From Your Kitchen
- Self-rising flour: Forms the base of the dough; provides structure and rise without yeast
- Greek yogurt: Binds the dough together and adds subtle tanginess while keeping it moist
- Pizza sauce: Spread evenly over the dough as the flavorful base layer
- Mozzarella cheese: Shred and sprinkle generously for that classic melty, stretchy pizza texture
- Pepperoni: Arrange slices evenly across the pizza for savory, slightly spicy flavor
- Mushrooms: Slice thinly and distribute over the cheese for earthy flavor and texture
- Fresh basil: Tear and scatter over the hot pizza after baking for aromatic freshness
Let's Make These Together
- Create the Quick Dough
- Start by preheating your oven to 425°F so it's perfectly hot when you're ready to bake. In your largest mixing bowl, combine the self-rising flour and Greek yogurt. The mixture will look shaggy at first, but don't worry – just keep mixing with a wooden spoon until it starts coming together. Once it forms a rough ball, get your hands in there and knead it right in the bowl or on a clean countertop. The dough should become smooth and elastic after just a few minutes of kneading. If it's sticking to everything, dust with a tiny bit more flour.
- Shape Your Pizza Base
- Dust your work surface with a light coating of flour to prevent sticking. Place your dough ball in the center and use your rolling pin to roll it out into your desired shape – a classic 12-inch circle works perfectly, but a rectangle fits nicely on a standard baking sheet too. Once you've achieved your desired thickness and shape, carefully transfer the dough to a pizza pan or parchment-lined baking sheet. Take your olive oil and brush it around the outer edges of the dough – this creates that beautiful golden, crispy crust we all love. Don't skip pricking the center with a fork; this prevents annoying air bubbles from puffing up during baking.
- Layer on the Delicious Toppings
- Now comes the fun part – building your pizza! Start with the pizza sauce, spreading it evenly across the dough with the back of a spoon, making sure to leave that half-inch border around the edges untouched. Next, shower the sauce with shredded mozzarella cheese, being as generous as your heart desires. Arrange your pepperoni slices across the cheese – I like to make sure every future slice will have plenty. Scatter the sliced mushrooms over everything, then finish with a sprinkle of Italian seasoning and a light touch of salt and pepper for that extra flavor boost.
- Bake to Golden Perfection
- Slide your beautiful creation into the preheated oven and set a timer for 20 minutes, but start checking at around 18 minutes. You're looking for a golden-brown crust, cheese that's melted and bubbling with those gorgeous browned spots, and edges that look crispy and inviting. Every oven is different, so use your eyes and nose – when it smells absolutely irresistible and looks golden, it's ready. Once it reaches pizza perfection, carefully remove it from the oven.
- Add Final Touches and Enjoy
- Let your pizza rest for just 2-3 minutes after coming out of the oven – this brief wait helps the cheese set slightly and makes slicing much easier. While it's cooling, tear or roughly chop your fresh basil leaves and scatter them generously over the hot pizza. The residual heat will release their aromatic oils. If you're feeling fancy, drizzle just a touch more olive oil over the top. Now grab your pizza cutter and slice it into 6-8 pieces, depending on how hungry everyone is. Serve immediately while the cheese is still stretchy and the crust is at peak crispiness.
 pin it
Switch Things Up
I remember the first time I made this no-yeast pizza on a random Tuesday evening when I was craving pizza but didn't want to order delivery. I was skeptical that a dough without yeast could actually work, but I had all the ingredients on hand and decided to give it a shot. As I mixed the self-rising flour with Greek yogurt, I was amazed at how quickly it came together into a smooth, workable dough. The kids watched curiously as I rolled it out on my marble countertop, and their eyes lit up when I let them arrange the pepperoni slices. While it baked, the kitchen filled with that irresistible pizza aroma. When I pulled it out of the oven, the crust was perfectly golden and the cheese was bubbling. That first bite proved me wrong about yeast being essential. The crust had the perfect chew with crispy edges, and everyone at the table agreed it was better than delivery. Now it's our go-to Friday night tradition, and each family member gets to create their own section with their favorite toppings.
Perfect Pairings
This no-yeast pizza pairs beautifully with a crisp Caesar salad or a simple arugula salad dressed with lemon vinaigrette to cut through the richness of the cheese. For beverages, try a cold Italian lager, sparkling water with lemon, or a medium-bodied red wine like Chianti. If you're serving this for a party, consider making garlic knots with leftover dough, or serve alongside buffalo wings and mozzarella sticks for a complete pizzeria experience. A light tomato soup also makes an excellent companion, especially during cooler months.
 pin it
Frequently Asked Questions
- → Can I make this pizza dough without Greek yogurt?
While Greek yogurt works best for this recipe due to its thick consistency and tangy flavor, you can substitute with regular plain yogurt or sour cream in a pinch. Just make sure to drain any excess liquid from regular yogurt first, or you may need to add a bit more flour to achieve the right dough consistency.
- → Why is my no-yeast pizza dough too sticky?
Dough stickiness can vary based on the moisture content of your yogurt and humidity in your kitchen. If your dough is too sticky to work with, simply add flour one tablespoon at a time while kneading until it becomes manageable. The dough should be slightly tacky but not sticking to your hands or the work surface.
- → Can I freeze this pizza dough for later?
Yes! After mixing the dough, you can wrap it tightly in plastic wrap and freeze it for up to 3 months. When you're ready to use it, thaw it overnight in the refrigerator, then let it come to room temperature for about 30 minutes before rolling. You can also freeze already-topped unbaked pizzas and bake them straight from frozen, adding 5-7 extra minutes to the baking time.
- → What if I don't have self-rising flour?
No problem! You can easily make your own self-rising flour by combining 2 cups of all-purpose flour with 3 teaspoons of baking powder and 1/2 teaspoon of salt. Mix these dry ingredients thoroughly before adding the yogurt, and proceed with the recipe as written.
- → How do I get a crispier crust?
For an extra crispy crust, try these tips: preheat your baking sheet or pizza stone in the oven before placing the pizza on it, brush the entire surface of the dough (not just the edges) with olive oil before adding toppings, or par-bake the crust for 5-7 minutes before adding sauce and toppings, then bake again until everything is melted and golden.
- → Can I make this pizza on the grill?
Absolutely! Preheat your grill to medium-high heat (around 400-450°F). Roll out the dough, brush both sides with olive oil, and place it directly on the grill grates. Grill for 2-3 minutes until the bottom is golden and has grill marks, flip it over, quickly add your toppings to the grilled side, close the lid, and cook for another 5-7 minutes until the cheese melts and the bottom is crispy.
Conclusion
This no-yeast pizza recipe has completely changed my weeknight dinner game. There's something incredibly satisfying about making pizza from scratch without the hassle of waiting for dough to rise. The self-rising flour and Greek yogurt combination creates a tender yet crispy crust that rivals any pizzeria. I love how customizable this recipe is – use your favorite toppings and make it your own. Whether you're feeding hungry kids after school or impressing dinner guests, this quick pizza delivers restaurant-quality results with minimal effort. Plus, there's nothing quite like the aroma of freshly baked pizza filling your kitchen.