
 pin it
I first encountered Orange Chicken at a small Chinese restaurant in college, and it was love at first bite. That perfect combination of crispy, tender chicken smothered in a glossy, sweet-tangy orange sauce was unlike anything I'd tasted before. For years, I thought it was too complicated to make at home – surely that crispy coating and that complex sauce required professional kitchen skills? But one rainy Saturday afternoon, I decided to give it a shot, and I discovered the wonderful secret: it's actually quite simple! The key is getting your chicken pieces evenly coated in cornstarch for that signature crunch, and making sure your oil is hot enough for frying. The sauce comes together in minutes with fresh orange juice, honey, soy sauce, and aromatics like ginger and garlic. When you toss that crispy chicken in the warm, fragrant sauce and watch it glisten, you'll feel like a culinary genius. I love how the sauce strikes that perfect balance – sweet from the honey and orange juice, savory from the soy sauce, with a subtle kick from fresh ginger. The texture contrast between the crispy exterior and juicy interior is what makes each bite so satisfying. Now it's one of my most-requested recipes, and I make it at least twice a month. There's something deeply satisfying about creating this takeout favorite at home, knowing exactly what goes into it, and serving it fresh and hot to people you love.
Why I love this recipe
I love this Orange Chicken recipe for so many reasons, but mainly because it delivers restaurant-quality results without the restaurant price tag or the long wait for delivery. There's something incredibly empowering about mastering a dish that most people assume can only come from a restaurant kitchen. Every time I make it, I'm reminded that cooking at home doesn't have to be boring or basic – you can create exciting, flavorful dishes that rival anything you'd order out. The recipe itself is wonderfully forgiving; even if your chicken pieces aren't perfectly uniform or your sauce is a little thicker or thinner than intended, it still turns out delicious. I also appreciate how quickly it comes together – 30 minutes from start to finish means I can make it on busy weeknights when I'm tempted to just order takeout. But beyond the practical aspects, I genuinely love the flavors. That bright, sunny orange sauce with its perfect balance of sweet and tangy makes me happy every single time. The aroma that fills my kitchen when I'm cooking the garlic and ginger is intoxicating. And the satisfaction of biting into that crispy coating to find tender, juicy chicken inside? Pure bliss. My family gets excited every time I announce we're having Orange Chicken for dinner, and that joy and anticipation they show makes the small effort totally worth it. Plus, I can feel good about serving them a meal where I know every ingredient, with no mystery additives or excessive sodium like some takeout versions have.
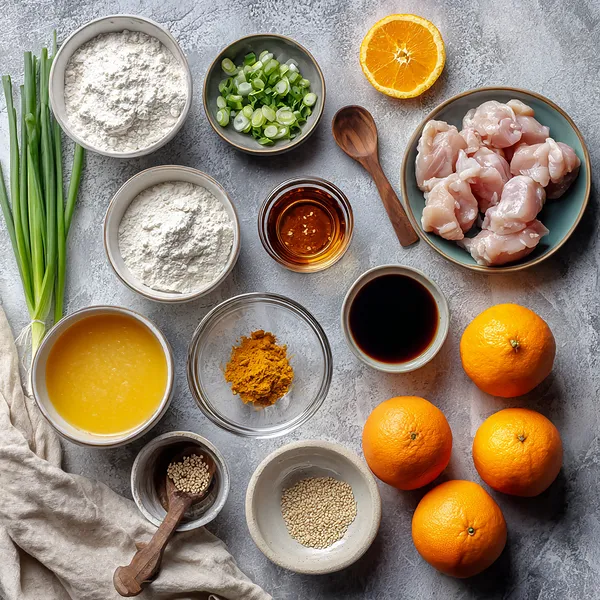
What You Need From Your Kitchen
- Chicken breast: Cut into uniform bite-sized pieces and pat completely dry for maximum crispiness
- Orange juice: Freshly squeezed for the best, brightest citrus flavor in the sauce
- Cornstarch: Creates the crispy coating on the chicken and thickens the sauce to perfect consistency
- Eggs: Beaten well to help the cornstarch coating adhere to each chicken piece
- Honey: Adds natural sweetness and helps create that signature glossy sauce texture
- Fresh ginger: Grated finely to infuse the sauce with warm, aromatic, slightly spicy notes
- Garlic: Minced fresh for savory depth that balances the sweetness of the sauce
Let's Make These Together
- Prep Your Chicken
- Start by cutting your chicken into uniform bite-sized pieces, roughly 1-inch cubes. This ensures even cooking. The most important step here is patting them completely dry with paper towels – moisture is the enemy of crispiness! Set up your coating station with beaten eggs in one bowl and cornstarch in another. Coat each piece thoroughly, pressing the cornstarch to help it stick.
- Get That Perfect Crispy Fry
- Heat your oil to 350°F in a large skillet or wok. Don't rush this step – proper oil temperature is crucial. Test with a small piece of chicken: it should sizzle immediately when it hits the oil. Fry in batches, giving each piece plenty of room. Overcrowding lowers the oil temperature and results in soggy chicken. Each batch takes about 6-8 minutes total to achieve that beautiful golden-brown color and crispy exterior.
- Create the Magic Sauce
- While your chicken is frying, whip up the orange sauce. Combine orange juice, honey, soy sauce, rice vinegar, ginger, and garlic in a saucepan. Bring it to a simmer and let those flavors marry together for a few minutes. Your kitchen will smell absolutely amazing at this point! The sauce should be fragrant and slightly reduced.
- Thicken to Perfection
- Add your cornstarch slurry to the simmering sauce, stirring constantly to prevent lumps. Watch as it transforms into a glossy, thick coating that will cling beautifully to your chicken. This step only takes 1-2 minutes, but it's what gives you that restaurant-quality shine. The sauce should coat the back of a spoon when it's ready.
- Bring It All Together
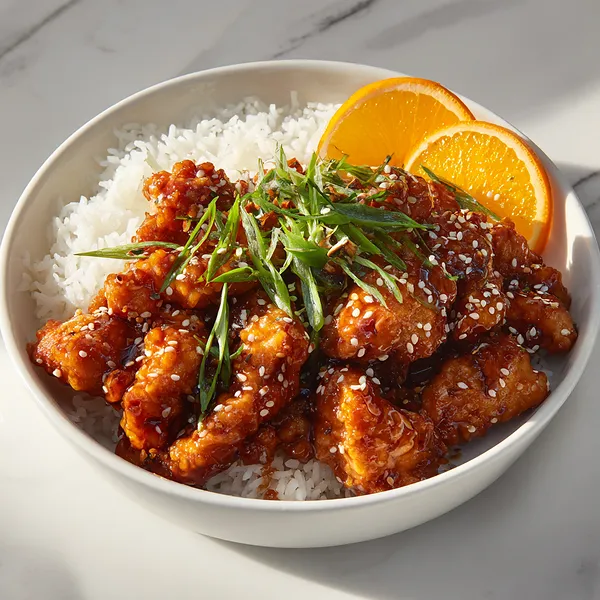
- Now for the best part – toss your perfectly crispy chicken in that gorgeous orange sauce until every piece is evenly coated. Work quickly while everything is hot. Serve immediately over fluffy rice, sprinkle with sesame seeds and green onions, and watch your family's faces light up when they take that first bite!
 pin it
Switch Things Up
I'll never forget the first time I decided to make Orange Chicken at home instead of ordering it. I was skeptical – could I really replicate that crispy, saucy perfection? But when I took that first bite, I was absolutely blown away. The chicken was even crispier than takeout, and the sauce was so much fresher and more flavorful. My kids literally cheered when they saw it on the table. Now, every Friday night is Orange Chicken night at our house. I've tweaked the recipe over time, sometimes adding a pinch of red pepper flakes for heat, other times squeezing in extra orange juice for more citrus punch. The best part? No more waiting for delivery or dealing with soggy chicken. This homemade version is ready faster than any delivery service could bring it to your door. Last month, I made a double batch for a potluck, and three different people asked me for the recipe. One friend even texted me the next day saying she'd already made it twice! There's something incredibly satisfying about creating restaurant-quality food in your own kitchen, and this Orange Chicken is the perfect recipe to prove you can do it.
Perfect Pairings
Orange Chicken pairs beautifully with a variety of sides that complement its sweet and tangy profile. Classic steamed white or brown rice is essential for soaking up that delicious sauce, but you can also try it over fried rice or noodles for variety. Steamed broccoli is my go-to vegetable side – its mild flavor and slight crunch balance the richness of the chicken perfectly. For a more complete Chinese-inspired feast, serve it alongside vegetable spring rolls, egg drop soup, or a crisp Asian cucumber salad with rice vinegar dressing. If you want to add more vegetables to the plate, sautéed snap peas, bok choy, or bell peppers work wonderfully. For drinks, I love pairing this with iced green tea or a light lager beer. The freshness cuts through the richness of the fried chicken beautifully.
 pin it
Frequently Asked Questions
- → Can I use chicken thighs instead of breast?
Absolutely! Boneless, skinless chicken thighs work wonderfully in this recipe. They're slightly more forgiving and won't dry out as easily. Just make sure to cut them into similar-sized pieces for even cooking. The cooking time remains the same.
- → How do I keep the chicken crispy when tossing it in sauce?
The key is to toss the chicken in the sauce right before serving and eat it immediately. If you want maximum crispiness, you can serve the sauce on the side for dipping instead. Another trick is to make sure your sauce isn't too thin – a properly thickened sauce coats without sogging.
- → Can I bake the chicken instead of frying?
Yes, for a healthier version, you can bake the coated chicken at 425°F for 20-25 minutes, flipping halfway through. Spray the chicken pieces lightly with cooking oil before baking. While it won't be quite as crispy as fried, it's still delicious and much lighter.
- → What can I substitute for rice vinegar?
If you don't have rice vinegar, you can use apple cider vinegar or white wine vinegar. Start with slightly less (about 1.5 tablespoons) as these can be more acidic, then adjust to taste. In a pinch, fresh lemon juice also works.
- → How long does leftover Orange Chicken keep?
Store leftovers in an airtight container in the refrigerator for up to 3 days. To reheat and restore some crispiness, place the chicken on a baking sheet and reheat in a 350°F oven for 10-15 minutes rather than microwaving. You may want to add a splash of water to the sauce when reheating as it thickens when cold.
- → Can I make this gluten-free?
Yes! Use tamari or coconut aminos instead of regular soy sauce, and make sure your cornstarch is certified gluten-free. The rest of the ingredients are naturally gluten-free. The result is just as delicious!
- → Why is my sauce too thin or too thick?
Sauce thickness can vary based on how much your orange juice reduces while simmering. If it's too thin, mix an additional teaspoon of cornstarch with a tablespoon of cold water and stir it in while simmering. If it's too thick, simply add water or orange juice a tablespoon at a time until you reach your desired consistency.
Conclusion
This Orange Chicken recipe proves that you don't need to order takeout to enjoy restaurant-quality Chinese food at home. With its perfectly crispy coating and that irresistible sweet-tangy orange sauce, this dish delivers all the flavors you crave in just 30 minutes. The beauty of making it yourself means you control the ingredients, can adjust the sweetness to your liking, and save money while impressing your family. Serve it over fluffy rice with some steamed broccoli on the side, and you've got a complete meal that'll have everyone asking for seconds. This recipe has become a weekly staple in my kitchen, and I'm confident it'll become one of yours too.