
 pin it
I first encountered this pie at a summer potluck thrown by a neighbor who was known for her legendary desserts. She set this thing down on the table and within minutes it was half gone — and I hadn't even had a slice yet. When I finally got a piece, I understood the frenzy completely. The crust had this perfect snap from the Oreos, the filling was impossibly smooth and peanut-buttery, and the whipped cream on top made every bite feel light despite how rich it was. I went home that night determined to figure out the recipe. After a few attempts, I landed on this version — and honestly, I think it might even be better than the original. It has become my go-to for birthdays, holidays, and honestly any excuse I can find to make it.
Why I love this recipe
I love this recipe because it delivers maximum wow factor with minimum effort — and that is a combination I will always champion in the kitchen. There is no baking involved, the ingredients are straightforward and easy to find, and the result looks like something from a high-end bakery. But beyond the convenience, it is the flavor that keeps me coming back. The contrast between the dark, crunchy Oreo crust and the silky, slightly salty peanut butter filling is genuinely addictive. And the whipped cream layer on top makes it feel indulgent without being overwhelming. Every single time I make this pie, every plate comes back empty — and that is all I need to know.
What You Need From Your Kitchen
- Oreo Cookies: Crushed into fine crumbs to form the buttery chocolate crust base of the pie
- Cream Cheese: Beaten until silky smooth to create the rich and tangy backbone of the peanut butter filling
- Creamy Peanut Butter: The star of the filling — gives the pie its bold, nutty, irresistible flavor
- Whipped Topping (Cool Whip): Folded into the filling for lightness and used generously on top for decoration
- Powdered Sugar: Sweetens the filling while keeping it perfectly smooth without any graininess
- Unsalted Butter: Melted and mixed into the Oreo crumbs to bind the crust and give it a rich flavor
- Heavy Cream: Whipped to stiff peaks and piped as elegant rosettes over the finished pie
Let's Make These Together
- Crush and press the Oreo crust
- Blitz your Oreos into fine crumbs, mix them with melted butter, then press the mixture firmly into a 9-inch pie dish, making sure to go up the sides evenly. Pop it in the freezer for 15 minutes to firm up while you work on the filling.
- Beat the cream cheese smooth
- Using an electric mixer, beat your softened cream cheese until it is completely lump-free and fluffy. This is the most important step — any lumps here will carry through the whole filling, so take your time and make it silky.
- Mix in peanut butter and sugar
- Add the peanut butter, powdered sugar, and vanilla extract to the cream cheese and beat everything together until you have a thick, creamy, uniform mixture that smells absolutely incredible.
- Fold in whipped topping and cookie pieces
- Gently fold in the whipped topping with slow, careful strokes to keep the filling airy. Stir in crushed Oreo pieces for little pockets of chocolate crunch throughout every bite.
- Fill the crust and chill
- Spoon the filling into your chilled crust, smooth the top, and refrigerate for at least 4 hours or overnight. The wait is the hardest part, but it is absolutely worth it for perfectly set, sliceable pie.
- Decorate and serve with flair
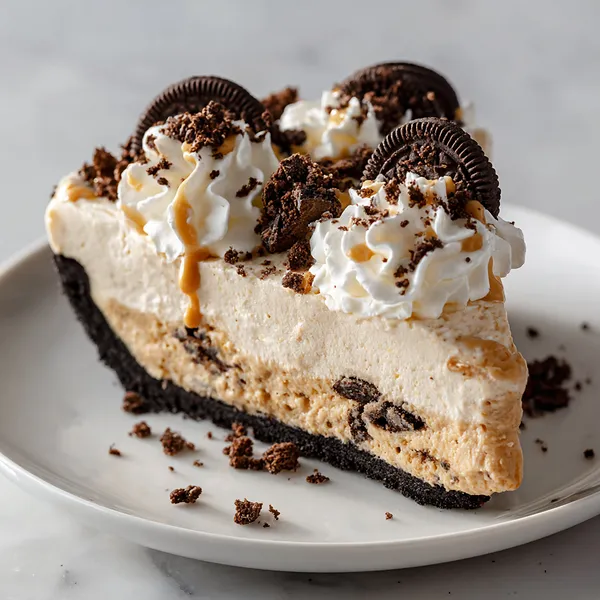
- Pipe whipped cream rosettes around the edge, scatter crushed Oreos over the center, and stand whole Oreos proudly in the cream. Slice with a hot knife and serve to very happy people.
 pin it
Switch Things Up
One time I swapped the classic Oreos in the crust for the peanut butter-filled Oreos, and the whole pie went to a completely different level of peanut butter intensity. I also folded in a swirl of melted dark chocolate into the filling before chilling — it created these gorgeous marbled streaks that looked stunning when sliced. Another fun twist: I crushed Reese's cups into the filling instead of plain Oreo crumbles. Every version turns out incredible, so don't be afraid to play around with it.
Perfect Pairings
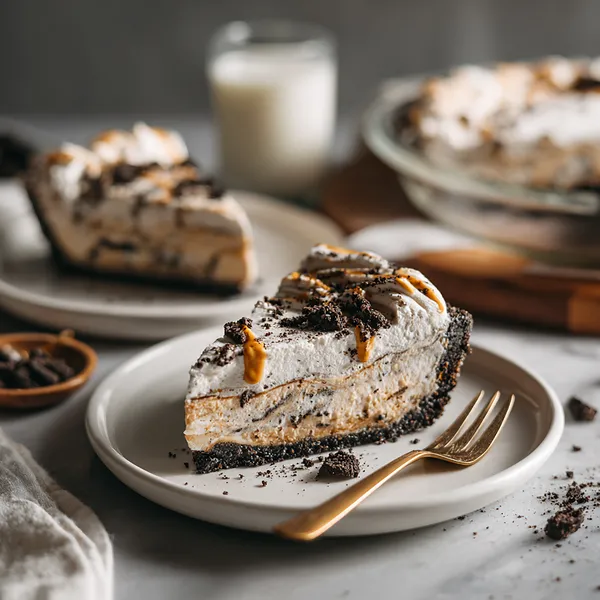
This pie pairs beautifully with a tall glass of cold whole milk — the classic combo that never gets old. For something a little more grown-up, a hot espresso or a scoop of vanilla bean ice cream alongside a slice is absolutely divine. If you're serving it at a party, consider pairing it with a fresh fruit platter featuring strawberries and bananas to balance the richness of the peanut butter filling.
 pin it
Frequently Asked Questions
- → Can I make this pie ahead of time?
Absolutely — in fact, making it the night before is ideal. The filling sets more firmly overnight and the flavors deepen, making each slice even better the next day. Just keep it covered in the fridge and add the whipped cream decoration right before serving.
- → Can I use homemade whipped cream instead of Cool Whip?
Yes, you can. Whip 1.5 cups of heavy cream with 3 tablespoons of powdered sugar to stiff peaks and use it in place of the Cool Whip. Just know that homemade whipped cream can weep slightly over time, so it is best consumed within a day or two.
- → Can I freeze the whole pie?
Definitely. Wrap the pie tightly in plastic wrap and then in aluminum foil and freeze for up to one month. Thaw it in the refrigerator for 3 to 4 hours before slicing. Add fresh whipped cream decorations after thawing for best presentation.
- → What peanut butter brand works best?
Standard creamy peanut butter like Jif or Skippy gives the best texture and flavor for this recipe. Avoid natural or drippy peanut butter as the oil separation can make the filling too loose and prevent it from setting properly.
- → Can I make this gluten-free?
Yes — simply substitute regular Oreos with a certified gluten-free chocolate sandwich cookie. The rest of the ingredients are naturally gluten-free, so the swap is simple and the result is just as delicious.
- → How do I get clean, beautiful slices?
Run a sharp knife under very hot water, dry it completely with a paper towel, then make your cut. Repeat the hot water wipe between every single slice. This melts through the filling cleanly and gives you those gorgeous, Pinterest-worthy slices every time.
Conclusion
This Peanut Butter Oreo Pie is the kind of dessert that earns a standing ovation without you ever turning on the oven. It's rich, creamy, and packed with layers of flavor that taste like pure comfort. Whether it's a weeknight treat or a party showstopper, this pie never fails to impress. Make it once and it will become a permanent fixture in your recipe rotation.