
 pin it
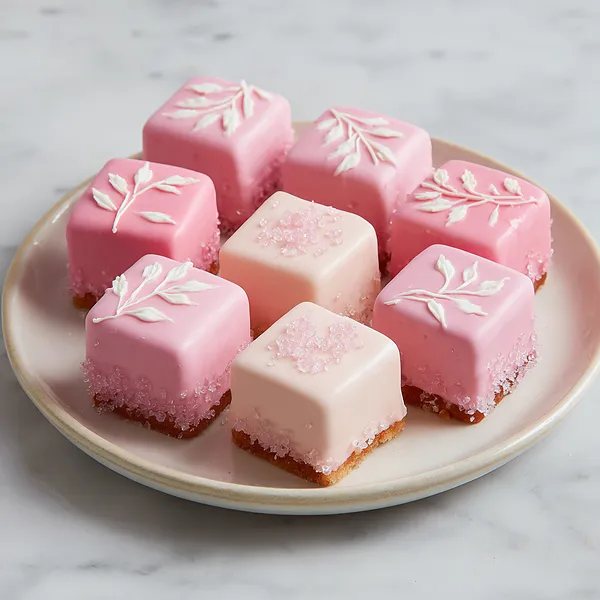
I still remember the first time I ever tasted a petit four — it was at a fancy afternoon tea and I was completely mesmerized by how something so small could hold so much elegance and flavor. That bite-sized square of moist almond sponge, coated in the smoothest fondant and decorated with the most intricate little design, felt like eating edible art. From that moment, I knew I had to learn how to make them myself. These Pink Petit Fours are my take on that classic French confection — buttery, delicate, and unmistakably beautiful. The almond flour in the sponge gives it a tender, slightly nutty crumb that pairs perfectly with the sweet vanilla fondant glaze. I tint the fondant in varying shades of blush and rose, which creates that stunning gradient effect you see on the plate. The white botanical designs piped on top take them from pretty to absolutely breathtaking. Every time I set a plate of these out, people genuinely stop and stare before they dare take one.
Why I love this recipe
What I love most about these Pink Petit Fours is that they manage to feel completely luxurious without requiring professional pastry training. Yes, they take a bit of patience — you have to let the sponge cool completely, cut the cubes with precision, and work carefully with the fondant — but the process itself is deeply satisfying and almost meditative. There's something so rewarding about transforming simple pantry ingredients into these jewel-like little cakes. I also love how versatile they are: change the fondant color and you instantly have a new theme for any occasion. The botanical piping detail, which looks intimidating, is actually achievable with a simple piping bag and a steady hand. And of course, the flavor — that combination of nutty almond sponge and sweet, silky fondant is simply irresistible. They're the kind of thing you make once and immediately want to make again.
What You Need From Your Kitchen
- Almond Flour: Adds a delicate nutty flavor and tender crumb to the sponge base — do not substitute with more all-purpose flour or the texture will be too dense.
- White Fondant: The star of the coating — warmed until silky smooth and tinted in shades of pink to create the glossy, jewel-like exterior of each petit four.
- Unsalted Butter: Creamed until pale and fluffy to create the light, moist structure of the almond sponge — always use room temperature butter for the best result.
- Eggs: Added one at a time to emulsify the batter and provide structure and richness to the sponge.
- Pink Gel Food Coloring: Used to tint the fondant into varying blush and rose shades — gel coloring is essential for vibrant color without thinning the fondant.
- White Royal Icing: Piped into intricate botanical leaf designs on top of each petit four for an elegant, artisan finishing touch.
- Pink Sanding Sugar: Sprinkled on while the royal icing is still wet to add sparkle, texture, and an extra flourish of pink color.
Let's Make These Together
- Cream butter and sugar
- In a large bowl, beat the softened unsalted butter and powdered sugar together with a hand mixer or stand mixer until the mixture is pale, light, and fluffy — this takes about 3-4 minutes on medium-high speed. This step is crucial for a tender, airy sponge, so don't rush it.
- Add eggs and extracts
- Beat in the eggs one at a time, making sure each is fully incorporated before adding the next. Then mix in the vanilla and almond extracts. The batter may look slightly curdled at this point — that's perfectly normal and will smooth out once the flour is added.
- Fold in dry ingredients
- Sift the all-purpose flour, almond flour, baking powder, and salt together, then fold them into the wet mixture in two additions using a spatula. Use gentle folding motions to preserve the airiness of the batter — overmixing will result in a tough sponge.
- Bake until golden
- Spread the batter evenly into your prepared 9x13 pan and bake at 350°F for 22-25 minutes. The top should be lightly golden and a toothpick should come out clean. Let it cool completely — patience here is key for clean cuts later.
- Cut into perfect cubes
- Trim the edges of the cooled sponge, then use a ruler and sharp knife to cut uniform 1.5-inch squares. Place them on a wire rack over parchment paper so the excess fondant can drip freely during glazing.
- Glaze with pink fondant
- Melt and warm your fondant until pourable, tint it in two or three different pink shades, and spoon it generously over each cube. The fondant should cascade down the sides like satin. Work quickly before it sets. Let them rest until the coating is firm to the touch.
- Pipe and garnish
- Fill your piping bag with white royal icing and pipe delicate botanical leaf designs onto each glazed petit four. Dust immediately with pink sanding sugar. Allow everything to set fully before arranging on your serving plate and presenting your masterpiece.
 pin it
Switch Things Up
The first time I made these, I was preparing a little something for a friend's bridal shower. I'd always admired petit fours at bakeries but assumed they were way too complicated for a home kitchen. I decided to give it a shot anyway, and the moment I poured that warm pink fondant over the first row of sponge cubes and watched it cascade down the sides like satin, I was completely hooked. The almond extract in the sponge gives it this subtle, sophisticated depth that makes every bite feel intentional. I played around with the pink shades — some paler, some deeper — and ended up with this beautiful mix that looked even better than I'd imagined. Try swapping in a hint of rosewater for extra floral elegance!
Perfect Pairings
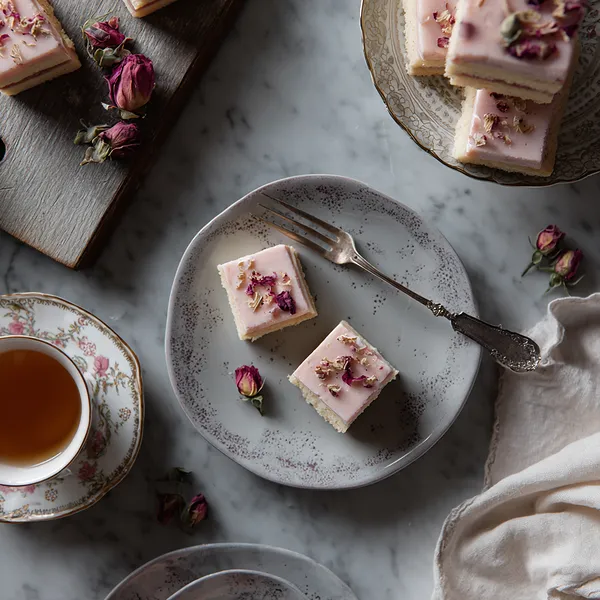
These Pink Petit Fours were made to be enjoyed alongside a cup of Earl Grey or chamomile tea — the floral notes complement the almond sponge beautifully. For a fuller dessert spread, pair them with fresh strawberries and clotted cream, or a light fruit sorbet. A glass of chilled rosé Champagne elevates them to full celebration status, making them perfect for bridal showers or afternoon tea parties.
 pin it
Frequently Asked Questions
- → Can I make these petit fours ahead of time?
Absolutely! In fact, petit fours are best made a day ahead. Bake the sponge and let it cool, then cut and glaze the next day. Once decorated, store them in a single layer in an airtight container at room temperature for up to 3 days.
- → Why is my fondant glaze dripping off instead of coating?
This usually means the fondant is too warm and thin. Let it cool slightly to around 95-100°F before pouring. If it's still too runny, let it thicken for a few minutes at room temperature, stirring gently, before attempting to glaze again.
- → Can I use store-bought fondant?
Yes! Store-bought rolled fondant works perfectly for this recipe. Simply melt it gently with a splash of heavy cream to reach a pourable consistency. Brands like Satin Ice or Wilton rolled fondant are both great options.
- → What can I use instead of almond flour?
If you have a nut allergy, you can substitute almond flour with an equal amount of all-purpose flour. The flavor will be slightly less complex, but the texture will still be delightful. You can also use hazelnut flour for a different but equally delicious nutty note.
- → How do I get clean, even cuts on the sponge?
The secret is to chill the sponge in the refrigerator for at least 30 minutes before cutting. A cold, firm sponge holds its shape much better under the knife. Use a long, sharp chef's knife and wipe the blade clean between each cut for the crispest edges.
- → Can I freeze petit fours?
You can freeze the unglazed sponge cubes wrapped tightly in plastic wrap for up to 2 months. Thaw them overnight in the refrigerator before glazing and decorating. It's best not to freeze the finished glazed petit fours as the fondant coating can weep when thawed.
Conclusion
These Elegant Pink Petit Fours are the kind of treat that makes any occasion feel like a celebration. Their delicate almond sponge, silky fondant coating, and hand-piped botanical designs come together to create something truly special. Whether you're hosting an afternoon tea, a baby shower, or just treating yourself, these little bites deliver big on flavor and beauty. Once you master this technique, you'll find yourself making them again and again.