
 pin it
I still remember the first time I made this Rainbow Ice Cream Cake. I was looking for something special to create for my friend's summer party that would wow everyone but wouldn't require turning on the oven in the heat. The vibrant layers immediately caught my eye in a food magazine, and I knew I had to try it. The process of carefully layering each color was almost meditative, and watching the cake come together was so satisfying. When I finally unveiled it at the party, there was an audible gasp from the guests. What I love most about this recipe is how it combines the childhood joy of ice cream cake with a sophisticated presentation that makes it appropriate for any celebration, from kids' birthdays to adult dinner parties.
Why I love this recipe
I absolutely adore this Rainbow Ice Cream Cake for so many reasons. First, it's incredibly versatile - you can customize the flavors and colors to suit any theme or preference. Second, despite its show-stopping appearance, it's relatively simple to make with no baking required, just some patience with the freezing process. The contrasting textures are another highlight: the crunchy cookie base, the creamy ice cream layers, and the smooth ganache topping create a perfect symphony in each bite. But what truly makes this recipe special to me is the joy it brings to people when they see it. There's something magical about cutting into those beautiful layers that instantly transforms any ordinary gathering into a celebration. Plus, you can make it days in advance, which is a lifesaver when hosting events. This dessert has become my signature dish for special occasions, and I love that it never fails to create wonderful memories around the table.
What You Need From Your Kitchen
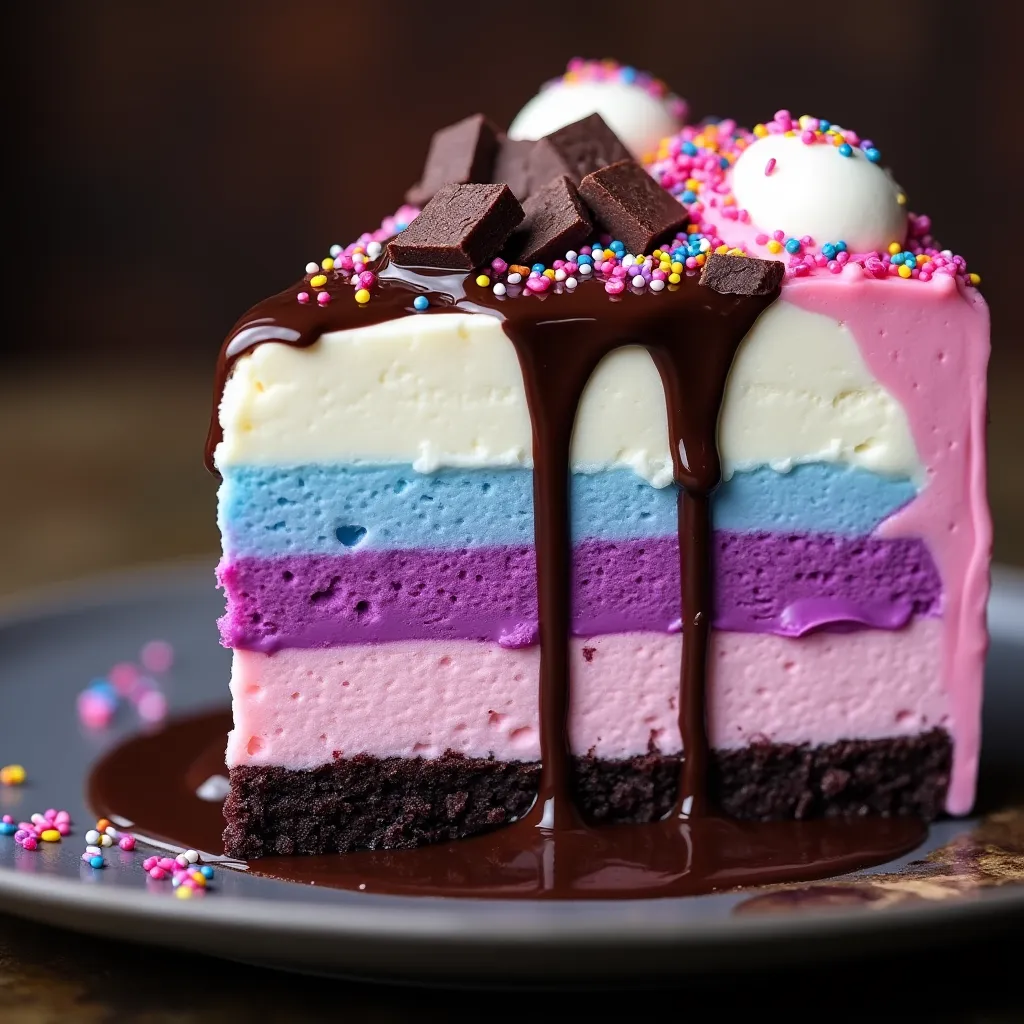
- Ice cream: Four different flavors create the colorful layers
- Chocolate cookie crumbs: Form the crunchy base layer
- Heavy cream and chocolate: Combined to make the glossy ganache topping
- Colorful sprinkles: Add festive decoration and crunch
- Brownie pieces: Provide rich chocolate flavor and decorative element
- White chocolate truffles: Create an elegant garnish on top
Let's Make These Together
- Prepare the base
- Start by mixing your cookie crumbs with melted butter until they resemble wet sand. Press this mixture firmly into your springform pan to create a solid foundation for your ice cream layers. The more firmly you pack it, the better it will hold together when sliced.
- Layer the ice cream
- Working with one flavor at a time, spread each softened ice cream in even layers. The key is patience - each layer needs to freeze completely before adding the next to avoid mixing colors. Use an offset spatula dipped in warm water for the smoothest results.
- Create the ganache
- The chocolate ganache is what takes this cake to the next level. The ratio of 1 cup cream to 8 oz chocolate creates the perfect consistency for dripping down the sides. Let it cool slightly before pouring so it's thick enough to create those beautiful drips.
- Add decorative elements
- Work quickly when adding sprinkles and toppings so they adhere to the ganache before it sets. Position the brownie pieces and white chocolate truffles strategically for the most visual impact.
- Slice and serve
- For perfect slices, dip your knife in hot water and wipe it clean between cuts. Allow the cake to soften slightly before serving for the best texture and flavor experience.
 pin it
Switch Things Up
I first made this cake for my daughter's 10th birthday party, and it was an instant hit! The kids were amazed by the vibrant colors, and the adults appreciated the nostalgia of an ice cream cake with a grown-up twist. I've since experimented with different ice cream flavors based on the season - mint chocolate chip and cookies and cream during the holidays, or mango and coconut for summer gatherings. Once I even created it with dairy-free ice cream alternatives for a friend with lactose intolerance, and it turned out just as beautiful and delicious.
Perfect Pairings
This Rainbow Ice Cream Cake pairs wonderfully with a shot of espresso for adults or a glass of cold milk for the little ones. For a more indulgent experience, serve with additional warm chocolate sauce on the side. Fresh berries make a great accompaniment, adding a touch of tartness to balance the sweetness. If you're serving this at a birthday celebration, a glass of champagne or sparkling cider complements the festive nature of this colorful dessert perfectly.
 pin it
Frequently Asked Questions
- → How far in advance can I make this cake?
You can make this cake up to a week in advance. After decorating, wrap it carefully in plastic wrap and then aluminum foil to prevent freezer burn. Remove it about 10 minutes before serving to allow it to soften slightly.
- → Can I use different ice cream flavors?
Absolutely! Feel free to customize the flavors to your preference or occasion. Just try to maintain contrasting colors for the visual impact. Chocolate, mint, strawberry, and mango make another beautiful combination.
- → Why is my ganache too runny?
If your ganache is too thin, it may be too warm or you might need more chocolate. Let it cool longer before pouring or add a bit more chopped chocolate. You can also refrigerate it briefly to thicken it slightly.
- → Can I make a smaller version of this cake?
Yes, you can use a 6-inch springform pan and reduce the amounts of ingredients by about half. The freezing times remain the same, but you'll use less ice cream for each layer.
- → How do I get clean slices when serving?
Dip a sharp knife in hot water, wipe it dry, and cut with a single downward motion. Clean and reheat the knife between each slice for the cleanest results. Let the cake soften slightly at room temperature for about 10 minutes before slicing.
- → Is there a dairy-free version of this recipe?
Yes! You can substitute with dairy-free ice cream alternatives, dairy-free butter for the crust, and use coconut cream instead of heavy cream for the ganache with dairy-free chocolate chips. The result is just as colorful and delicious.
Conclusion
This Rainbow Ice Cream Cake is the perfect showstopper dessert for any celebration. The beautiful layers of contrasting colors not only look spectacular but offer a delightful variety of flavors in each bite. The rich chocolate ganache topping adds a decadent touch that complements the sweetness of the ice cream layers. Make it ahead of time and keep it frozen until about 10 minutes before serving for the perfect texture.