
 pin it
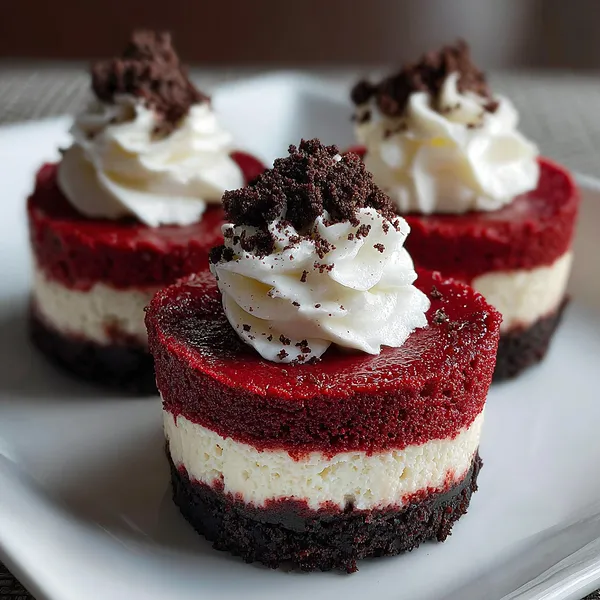
I'll never forget the first time I encountered a dessert that combined red velvet cake with cheesecake - it was at a fancy bakery in downtown, and I was completely mesmerized by the beautiful layers visible through the glass display case. The price tag was shocking, but I had to try it. One bite and I was hooked on the combination of tangy cream cheese, rich cocoa, and that signature red velvet flavor. I went home determined to recreate it, and after several experiments, these individual cheesecake cups were born. What I love most about this recipe is how it takes three classic desserts and transforms them into something entirely new and exciting. The chocolate cookie crust provides a sturdy base with intense chocolate flavor, while the cheesecake layer adds that signature tanginess that cuts through the sweetness. The red velvet layer is where the magic happens - it's moist, tender, and has that subtle cocoa flavor that makes red velvet so distinctive. Topped with billowy whipped cream and cookie crumbles, each bite offers multiple textures and flavors that work together in perfect harmony.
Why I love this recipe
What makes these Red Velvet Cheesecake Cups so special to me is how they manage to be both impressive and approachable at the same time. They look like something from a fancy bakery, but the recipe is actually quite forgiving and perfect for home bakers. I love that they're portioned individually, which means no messy slicing and serving - each person gets their own perfect dessert. The make-ahead nature is a lifesaver for entertaining; I can prepare them the day before and just add the whipped cream topping right before serving. The color combination is absolutely stunning - that vibrant red against the white cream and dark cookie base creates such a dramatic presentation. These cups are incredibly versatile too; I've made them for Valentine's Day, Christmas parties, birthday celebrations, and they're always a hit. The texture is what really gets me though - you get the crunch of the cookie crust, the smooth creaminess of the cheesecake, the soft tenderness of the red velvet, and the light airiness of the whipped cream all in one spoonful. It's a complete dessert experience that never fails to impress.
What You Need From Your Kitchen
- Chocolate sandwich cookies: Crush finely and mix with melted butter to create the crust base
- Cream cheese: Soften to room temperature and beat with sugar until smooth for the cheesecake layer
- Red velvet cake mix: Combine with buttermilk, oil, and eggs according to package directions for the cake layer
- Buttermilk: Use for the red velvet batter to create tender, moist cake
- Heavy whipping cream: Beat with powdered sugar until stiff peaks form for the topping
- Eggs: Use separately for both the cheesecake and red velvet layers
Let's Make These Together
- Create the Cookie Crust Foundation
- Begin by crushing your chocolate sandwich cookies until they're fine crumbs, then combine them with melted butter. Press this mixture firmly into the bottom of each lined muffin cup. This creates a sturdy, flavorful base that holds everything together and adds that essential chocolate element to complement the other layers.
- Craft the Creamy Cheesecake Layer
- Beat softened cream cheese with sugar until it's perfectly smooth and fluffy. This is where patience pays off - make sure there are no lumps. Add your vanilla and eggs, mixing gently. Pour this luscious mixture over your cookie crusts and bake until just set. The cheesecake layer provides that tangy richness that balances the sweetness of the red velvet.
- Layer on the Red Velvet Magic
- Prepare your red velvet cake batter, making sure it's smooth and well-combined. Once your cheesecake layer has cooled, carefully spoon the vibrant red batter over each cup. The red velvet brings that signature cocoa flavor and stunning color that makes these cups so visually impressive and delicious.
- Finish with Fluffy Whipped Cream
- After your cups have chilled completely, whip up fresh cream with powdered sugar until it forms stiff, glossy peaks. Pipe beautiful swirls on top of each cup and finish with a sprinkle of cookie crumbles. This final touch adds lightness and elegance, making each cup look professionally crafted.
 pin it
Switch Things Up
I first made these cheesecake cups for a holiday gathering, and they disappeared within minutes! Everyone kept asking for the recipe, amazed that something so elegant could be homemade. Now they've become my signature dessert. I love experimenting with different variations - sometimes I add a raspberry swirl to the cheesecake layer or use white chocolate shavings instead of cookie crumbles on top. My favorite twist is adding a tablespoon of espresso powder to the red velvet batter for a subtle mocha flavor that pairs beautifully with the cream cheese. I've also made mini versions in shot glasses for cocktail parties, which were a huge hit. The key I've learned is to let each layer chill properly before adding the next one - patience really pays off with these beauties. My kids love helping me crush the cookies for the crust and piping the whipped cream on top. It's become our special baking project together.
Perfect Pairings
These Red Velvet Cheesecake Cups pair wonderfully with a hot cup of freshly brewed coffee or a rich espresso that cuts through the sweetness. For a more indulgent experience, serve alongside a glass of sweet dessert wine like Port or a cream sherry. Fresh raspberries or strawberries on the side add a bright, tart contrast that complements the rich chocolate and cream cheese flavors. If you're serving these at a party, consider offering a chocolate fondue station with fresh fruit for dipping. A scoop of vanilla bean ice cream melting alongside one of these cups creates an absolutely decadent dessert experience. For the ultimate celebration, pair with champagne or a sparkling rosé.
 pin it
Frequently Asked Questions
- → Can I make these cheesecake cups ahead of time?
Absolutely! These cups are perfect for make-ahead entertaining. You can prepare them completely (without the whipped cream topping) up to 2 days in advance. Store them covered in the refrigerator, and add the fresh whipped cream topping just before serving. This actually helps the flavors develop and meld together beautifully.
- → Can I use homemade red velvet cake instead of a mix?
Yes, you can definitely use your favorite homemade red velvet cake recipe instead of a box mix. Just prepare the batter according to your recipe and use it in the same way. Keep in mind that homemade batters may have slightly different consistencies, so you might need to adjust baking time by a minute or two.
- → Why did my cheesecake layer crack?
Cheesecake cracks usually occur from overmixing the batter after adding eggs, or from overbaking. Make sure to mix just until the eggs are incorporated, and remove the cups from the oven when the centers are still slightly jiggly. They'll continue to set as they cool. The good news is that any cracks will be hidden by the red velvet and whipped cream layers!
- → Can I freeze these cheesecake cups?
Yes, these cups freeze beautifully! Freeze them without the whipped cream topping. Wrap each cup individually in plastic wrap, then place them in a freezer-safe container. They'll keep for up to 2 months. Thaw overnight in the refrigerator before adding fresh whipped cream and serving.
- → What can I substitute for buttermilk?
If you don't have buttermilk, you can make a quick substitute by adding 1 tablespoon of white vinegar or lemon juice to 1 cup of regular milk. Let it sit for 5 minutes until it curdles slightly, then use it in place of buttermilk in the red velvet cake batter.
- → How do I get clean, distinct layers?
The key to beautiful layers is patience! Make sure each layer is completely cooled before adding the next one. The cookie crust should be at room temperature before adding the cheesecake mixture, and the cheesecake layer should be completely cooled before adding the red velvet batter. Rushing this process can cause the layers to blend together.
- → Can I use a different flavor cake mix?
While red velvet is traditional and stunning, you can experiment with other flavors! Chocolate cake mix creates a triple chocolate experience, while vanilla or white cake mix offers a lighter option. Devil's food cake mix would also work beautifully for an extra rich chocolate version.
Conclusion
These Red Velvet Cheesecake Cups are the ultimate show-stopping dessert that combines three beloved classics into one incredible treat. The contrast of the dark cookie crust against the creamy cheesecake and vibrant red velvet creates a visual masterpiece that tastes even better than it looks. Perfect for Valentine's Day, Christmas, birthdays, or any celebration, these individual portions make serving and cleanup a breeze. Make them ahead and store in the refrigerator for up to three days, allowing the flavors to meld beautifully. Your family and friends will request these time and time again!