
 pin it
I remember the first time I encountered real aioli at a small Mediterranean restaurant during a summer vacation. The chef brought out this beautiful bowl of pale yellow sauce alongside grilled vegetables, and I was skeptical – it looked so simple. But that first taste completely changed my perspective on what a condiment could be. The garlic wasn't harsh or overpowering; it was sweet, mellow, and beautifully balanced with the richness of the emulsion. I spent years trying to recreate that experience at home, experimenting with raw garlic, but it was always too sharp. Then I discovered the secret: roasting the garlic first transforms it completely. The roasting process mellows the pungency and brings out incredible sweetness and depth. Now when I make this aioli, I'm transported back to that sunny afternoon, sitting on a terrace overlooking the sea. The beauty of this recipe is in its simplicity – just a handful of quality ingredients combined in the right way create something truly extraordinary. Every time I whisk that oil into the egg yolks and watch the mixture transform from liquid to creamy perfection, I feel like a kitchen magician.
Why I love this recipe
What I love most about this roasted garlic aioli is how it manages to be both elegant and approachable at the same time. It sounds fancy – aioli – but it's really just a simple emulsion that anyone can master with a little patience. The roasted garlic gives it such incredible depth without any harshness, making it appealing even to people who usually shy away from garlic-heavy dishes. I also appreciate how versatile it is; I've used it in so many different ways that it's become a staple in my refrigerator. There's something deeply satisfying about making your own condiments from scratch, knowing exactly what goes into them. No preservatives, no strange ingredients you can't pronounce – just pure, wholesome flavors. Plus, the reaction I get when I serve this to guests is priceless. They always ask what makes it taste so good, and I love sharing the simple secret of roasted garlic. It's become my signature dish at potlucks and family gatherings. The best part? It takes less than an hour to make but tastes like you spent all day in the kitchen.
What You Need From Your Kitchen
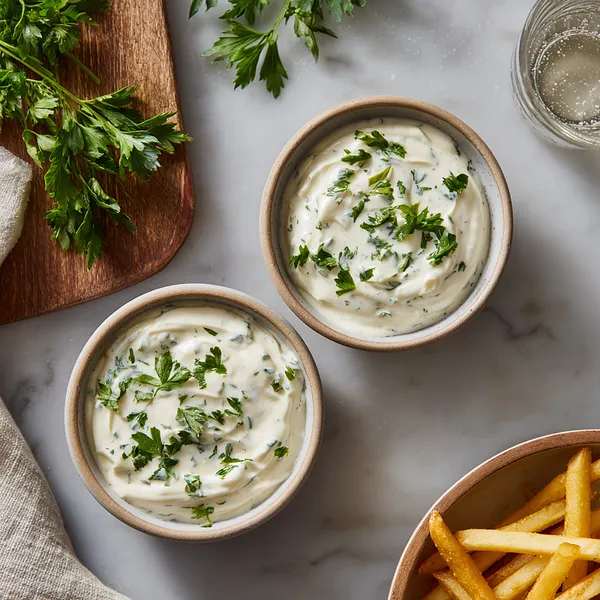
- Garlic bulb: Roast until soft and caramelized for sweet, mellow flavor
- Egg yolks: Bring to room temperature and use as the emulsifying base
- Neutral oil: Drizzle slowly while blending to create creamy texture
- Lemon juice: Add for brightness and to help stabilize the emulsion
- Dijon mustard: Whisk in for extra emulsification and subtle tang
- Fresh parsley: Chop finely and fold in at the end for color and freshness
Let's Make These Together
- Roast the garlic perfectly
- Begin by preheating your oven and preparing the garlic bulb. Slice off just enough of the top to expose all the cloves, keeping the bulb intact. Drizzle generously with olive oil and wrap tightly in foil. The roasting process transforms the sharp, pungent garlic into sweet, buttery cloves that will give your aioli incredible depth without any harshness.
- Create the base mixture
- Once your garlic has cooled enough to handle, squeeze those beautiful roasted cloves into your food processor. Add the egg yolks, fresh lemon juice, and Dijon mustard. Pulse everything together until you have a smooth, pale mixture. This forms the foundation of your aioli and ensures all the flavors are well distributed before you begin the emulsification process.
- Emulsify with patience
- This is where the magic happens! With your processor running on low speed, begin adding the oil in the thinnest stream possible. Imagine you're drawing a thread of oil into the bowl. The mixture will gradually transform from liquid to thick and creamy. Take your time with this step – rushing it is the main reason aioli fails. If you notice it getting too thick, add a tiny splash of water to keep it flowing smoothly.
- Season and perfect
- Transfer your beautiful, creamy aioli to a bowl and fold in the freshly chopped parsley. Now comes the fun part – tasting and adjusting! Add salt and pepper gradually, tasting as you go. Remember that the flavors will intensify slightly as the aioli chills, so don't oversalt. Give it a final stir and refrigerate to let all those wonderful flavors marry together.
- Serve with style
- After the aioli has chilled and the flavors have melded, transfer it to your prettiest serving bowl. Garnish with an extra sprinkle of fresh herbs and maybe a drizzle of quality olive oil on top. Serve alongside golden fries, grilled vegetables, or whatever your heart desires. Watch as everyone's eyes light up with that first taste!
 pin it
Switch Things Up
I first made this aioli on a lazy Sunday afternoon when I had some leftover garlic that was about to go bad. Instead of letting it sit there, I decided to roast the entire bulb and see what magic I could create. The smell that filled my kitchen was absolutely incredible – sweet, nutty, and so inviting. When I finally blended everything together and tasted that first spoonful, I literally did a happy dance in my kitchen. I immediately called my sister and told her she had to come over and try it. We ended up making homemade fries just so we could enjoy the aioli properly. Now, I make a fresh batch at least twice a month because my family requests it constantly. It's become my secret weapon for turning simple meals into something special.
Perfect Pairings
This roasted garlic aioli pairs beautifully with so many dishes! Serve it alongside crispy french fries or sweet potato fries for a classic combination. It's also phenomenal as a spread for burgers, sandwiches, or wraps. Try it with grilled seafood like shrimp or fish – the garlic complements the ocean flavors perfectly. Roasted vegetables love this aioli too, especially asparagus, zucchini, or bell peppers. For a party platter, serve it with raw vegetables, pita chips, or as a dipping sauce for chicken tenders. You can even thin it out slightly with a bit of water or lemon juice to use as a salad dressing!
 pin it
Frequently Asked Questions
- → Can I make this aioli without a food processor?
Absolutely! You can make this aioli by hand using a whisk and a large bowl. Just be prepared for an arm workout! Whisk the egg yolks, roasted garlic, lemon juice, and mustard together first, then add the oil drop by drop while whisking constantly. It takes more effort but produces equally delicious results.
- → How long does homemade aioli last?
When stored properly in an airtight container in the refrigerator, this roasted garlic aioli will keep for up to one week. Since it contains raw egg yolks, it's important to keep it consistently cold and use clean utensils when serving to prevent contamination.
- → What if my aioli breaks or separates?
Don't panic if your aioli breaks! Start fresh with a new egg yolk in a clean bowl. Slowly whisk in the broken aioli mixture, treating it like you would the oil. This almost always rescues a broken emulsion. To prevent breaking in the first place, add the oil very slowly and make sure all ingredients are at room temperature.
- → Can I use raw garlic instead of roasted?
You can use raw garlic, but the flavor will be much sharper and more pungent. Roasting the garlic creates a sweet, mellow flavor that's much more balanced and pleasant. If you must use raw garlic, start with just one small clove and add more to taste, as raw garlic can quickly overpower the aioli.
- → What type of oil works best?
A neutral oil like grapeseed, sunflower, or light vegetable oil works best for a smooth, creamy texture without overpowering flavor. You can use extra virgin olive oil for a more robust taste, but be aware that some olive oils can become bitter when emulsified. Many people prefer a blend of neutral oil with a small portion of olive oil for the best of both worlds.
- → Is it safe to eat raw egg yolks?
While there is a small risk associated with consuming raw eggs, you can minimize it by using pasteurized eggs, which are available in most grocery stores. Always use fresh eggs from a reliable source and keep the aioli refrigerated. If you're serving to pregnant women, young children, elderly people, or anyone with a compromised immune system, consider using pasteurized eggs or a vegan alternative.
Conclusion
This roasted garlic aioli is a game-changer in the kitchen. The depth of flavor from the caramelized garlic combined with the bright lemon creates a condiment that elevates everything it touches. Whether you're serving it with fries, using it as a sandwich spread, or dolloping it on grilled vegetables, this aioli brings restaurant-quality flavor to your home cooking. Plus, it keeps well in the fridge for up to a week, so you can enjoy it multiple times. Once you master this simple technique, you'll find yourself making batch after batch!