
 pin it
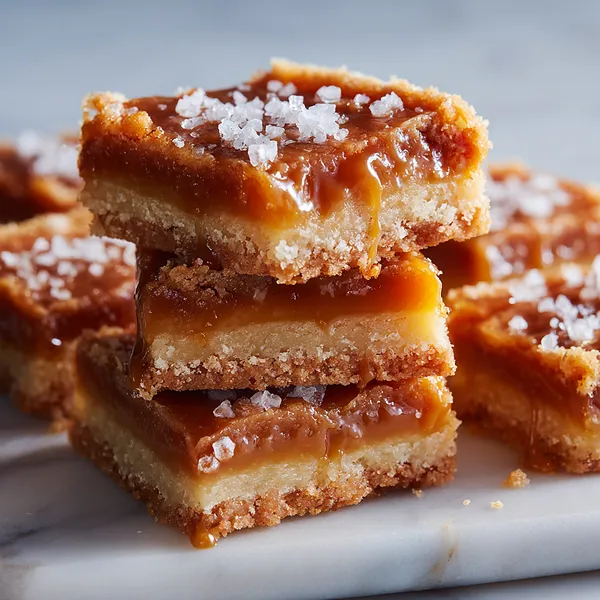
I'll never forget the first time I tasted salted caramel paired with butter-rich shortbread. It was at a small bakery during a trip to the Pacific Northwest, and I was instantly hooked on that perfect balance of sweet and salty. When I got home, I knew I had to recreate that experience in my own kitchen. These Gooey Salted Caramel Butter Bars are my homage to that magical first bite. What makes this recipe special is the three-layer construction: a tender, crumbly shortbread base that provides the perfect foundation, a thick layer of smooth, gooey caramel that stays soft and luxurious even after cooling, and a finishing touch of flaky sea salt that adds a sophisticated edge. I've made these bars countless times, tweaking the proportions until I achieved the perfect ratio of crust to caramel. The beauty of this recipe is that it looks incredibly fancy and tastes like it came from a high-end bakery, but it's actually one of the easiest desserts you can make. No special equipment required, no tricky techniques to master – just simple, straightforward steps that lead to spectacular results. Every time I serve these, people ask for the recipe, and they're always surprised when I tell them how easy they are to make.
Why I love this recipe
There are so many reasons why this recipe has become one of my all-time favorites. First, it's incredibly forgiving – even if you're not an experienced baker, you can achieve professional-looking results. The shortbread crust is nearly impossible to mess up, and the caramel layer sets beautifully every time. Second, these bars have the most amazing texture contrast – the crumbly, buttery crust gives way to that smooth, gooey caramel that literally melts in your mouth. The flaky sea salt on top isn't just for show; it actually enhances all the flavors and adds a delightful crunch. Third, they're make-ahead friendly, which is a lifesaver when I'm entertaining. I can bake them a day or two in advance, and they stay fresh and delicious. Fourth, they're endlessly customizable – I've added everything from chopped pecans to chocolate chips to the crust, and each variation is delicious. Finally, and perhaps most importantly, these bars bring people together. There's something about homemade desserts that creates connection, and these bars have been the centerpiece of so many wonderful gatherings in my home. They're the kind of treat that makes ordinary moments feel special.
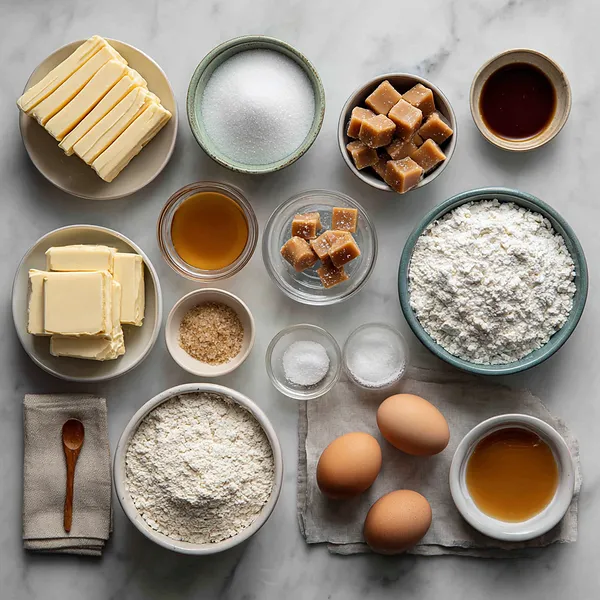
What You Need From Your Kitchen
- All-purpose flour: Sift before measuring for the lightest, most tender shortbread crust
- Unsalted butter: Make sure it's softened to room temperature for easy mixing and even distribution
- Brown sugar: Pack firmly into the measuring cup for accurate sweetness and rich molasses flavor
- Sweetened condensed milk: Use full-fat version for the richest, creamiest caramel layer
- Caramel sauce or caramel bits: Choose high-quality caramel for the best flavor and texture
- Heavy cream: Helps create a smooth, pourable caramel that sets perfectly
- Flaky sea salt: Use Maldon or another quality flaky salt for the best texture and flavor contrast
Let's Make These Together
- Create the shortbread base
- Start by preheating your oven and preparing your pan with parchment paper. Cream the butter and brown sugar until fluffy, then incorporate the flour until you have a crumbly mixture that holds together when pressed. This buttery foundation is what makes these bars so irresistible.
- Bake the crust to perfection
- Press the shortbread mixture firmly into your prepared pan, creating an even layer across the bottom. Bake until the edges turn golden brown and your kitchen smells like heaven. This partial baking ensures a sturdy base that won't get soggy under the caramel.
- Prepare the luscious caramel
- While your crust bakes, create the star of the show – that gorgeous caramel layer. Combine your condensed milk, caramel, and cream in a saucepan, stirring constantly over medium heat. Watch as everything melts together into a smooth, glossy mixture. The vanilla extract added at the end brings depth and warmth to the flavor.
- Layer and finish
- Pour your warm caramel over the pre-baked crust, spreading it edge to edge. Sprinkle that beautiful flaky sea salt on top – this is what elevates these bars from simple to spectacular. The final quick bake sets everything perfectly.
- Cool and slice
- Patience is key here! Let your bars cool completely so the layers set properly. When you're ready to cut, use the parchment overhang to lift the whole thing out of the pan. Clean your knife between cuts for those picture-perfect squares that'll make everyone's mouth water.
 pin it
Switch Things Up
I first made these bars on a rainy Sunday afternoon when I was craving something sweet but didn't want to spend hours in the kitchen. I had all these ingredients sitting in my pantry, and I thought, why not combine them into something magical? The first batch came out so perfectly gooey and golden that I couldn't stop eating them straight from the pan. My family devoured them within a day, and I've been making them ever since. Now, whenever someone asks me to bring dessert to a gathering, these bars are my secret weapon. I've experimented with adding a sprinkle of crushed pretzels on top for extra crunch, and sometimes I'll drizzle a bit of dark chocolate over the caramel for a more decadent version. What I love most is how versatile they are – you can cut them into small squares for bite-sized treats or larger portions for a more substantial dessert. They're equally delicious served warm with vanilla ice cream or chilled from the fridge.
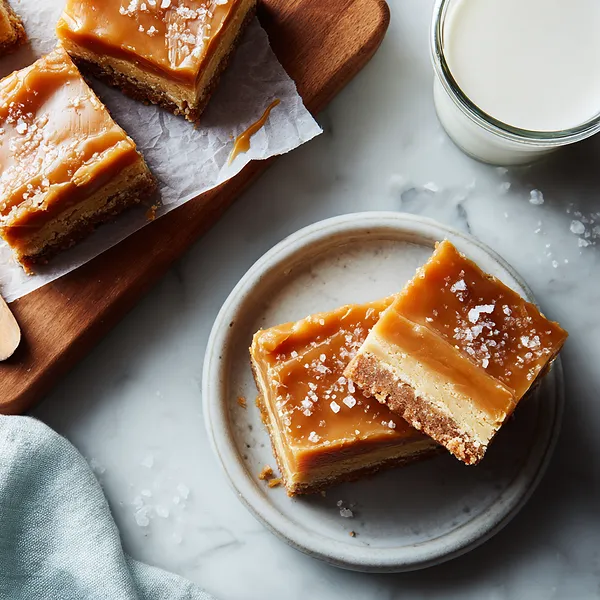
Perfect Pairings
These Salted Caramel Butter Bars pair wonderfully with a variety of beverages and accompaniments. Serve them with a hot cup of espresso or strong coffee to balance the sweetness, or enjoy them with a glass of cold milk for a classic combination. For a more indulgent experience, pair them with vanilla bean ice cream or fresh whipped cream. They also make an excellent complement to fruit – try serving them alongside fresh apple slices or pear wedges for a delightful contrast. If you're hosting a dessert spread, these bars work beautifully next to chocolate brownies, lemon bars, or shortbread cookies to offer your guests variety.
 pin it
Frequently Asked Questions
- → Can I use salted butter instead of unsalted?
While you can use salted butter, I recommend sticking with unsalted so you have better control over the salt level in the recipe. The flaky sea salt on top provides the perfect amount of saltiness, and using salted butter might make the bars too salty overall.
- → How do I know when the caramel layer is done baking?
The caramel should be bubbling around the edges and set, but still have a slight jiggle in the center when you gently shake the pan. It will continue to firm up as it cools. Overbaking can make the caramel too hard, so watch it carefully during those final minutes.
- → Can I freeze these bars for later?
Absolutely! These bars freeze beautifully for up to 3 months. Cut them into individual portions, wrap each bar in plastic wrap, then place them in a freezer-safe container or bag. Thaw at room temperature for about 30 minutes before serving for the best texture.
- → Why is my caramel layer too runny?
If your caramel seems too thin, it may need a bit more cooking time to thicken, or you might have added too much heavy cream. Make sure to measure accurately and cook the caramel mixture until it's thick enough to coat the back of a spoon before pouring it over the crust.
- → Can I make these bars in a different size pan?
Yes, but you'll need to adjust the baking time. A smaller, deeper pan (like 8x8) will require longer baking time and yield thicker bars. A larger pan will need less time and produce thinner bars. Watch for the visual cues – golden edges on the crust and bubbling caramel – rather than relying solely on time.
- → What's the best way to store these bars?
Store the bars in an airtight container at room temperature for up to 5 days, or in the refrigerator for up to a week. If you prefer a chewier texture, keep them at room temperature. For firmer, more structured bars, refrigerate them. Just bring them to room temperature before serving for the gooiest experience.
- → Can I add nuts or other mix-ins?
Definitely! Chopped pecans, walnuts, or even crushed pretzels can be added to the shortbread crust or sprinkled on top of the caramel before baking. Just fold them into the crust mixture or press them lightly into the caramel layer. Keep in mind this will change the texture and add extra richness.
Conclusion
These Gooey Salted Caramel Butter Bars are the ultimate crowd-pleaser dessert that combines simplicity with sophistication. The contrast between the buttery shortbread base and the luscious caramel creates a perfect harmony of textures and flavors. Whether you're making them for a bake sale, holiday gathering, or just because you deserve something sweet, these bars deliver every single time. Store them in an airtight container at room temperature for up to 5 days, or refrigerate for a firmer texture. They also freeze beautifully for up to 3 months – just thaw at room temperature before serving.