
 pin it
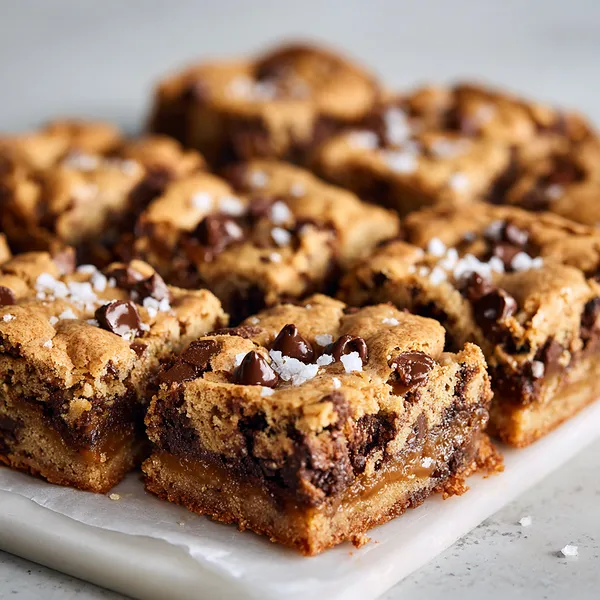
I first encountered salted caramel cookie bars at a small bakery in Portland, and I knew immediately I had to recreate them at home. What makes this recipe so special is the perfect ratio of cookie to caramel – there's enough caramel to make every bite gooey and indulgent, but not so much that it overwhelms the cookie itself. The base is a classic chocolate chip cookie dough that bakes up with crispy edges and a soft, almost underbaked center. Halfway through baking, you swirl in additional caramel sauce, which creates these beautiful pockets of sweetness throughout the bars. The finishing touch of flaky sea salt isn't optional in my book – it's what transforms these from simple cookie bars into something truly extraordinary. The chocolate drizzle adds visual appeal and an extra layer of richness. These bars are forgiving too; even if you slightly overbake them, they're still delicious. They cut cleanly when cooled but taste even better slightly warm when the chocolate chips are still melty.
Why I love this recipe
What I love most about this recipe is how it delivers bakery-quality results with minimal effort. There's no chilling the dough, no rolling out cookies, no fussy techniques – just mix, spread, bake, and devour. The texture is absolutely perfect: that slight crunch on top gives way to the most incredible gooey, chewy center. Every bite has chocolate chips and caramel, so there are no disappointing pieces. I also love how versatile these bars are. Need a last-minute dessert for a dinner party? These bars have you covered. Want to send a care package? They travel beautifully. Looking for something to bake with kids? This recipe is foolproof enough that even beginners succeed. And let's talk about that caramel – using store-bought salted caramel sauce means you get all the flavor without the hassle of making caramel from scratch. The sea salt on top is my favorite part because it adds this sophisticated touch that makes people think you spent hours in the kitchen.
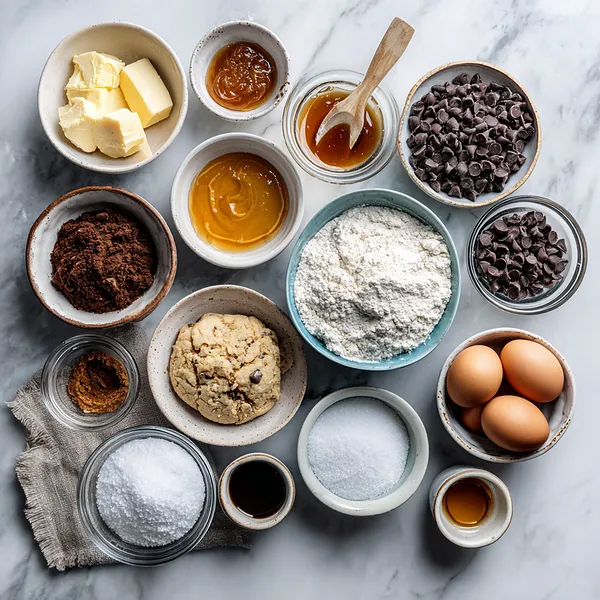
What You Need From Your Kitchen
- Unsalted Butter: Melt completely and let cool slightly before mixing with sugars
- Brown Sugar: Pack firmly into measuring cup for accurate measurement and rich flavor
- Eggs: Bring to room temperature for better incorporation into the batter
- All-Purpose Flour: Measure by spooning into cup and leveling off for precise results
- Semi-Sweet Chocolate Chips: Use high-quality chips that hold their shape during baking
- Salted Caramel Sauce: Choose a thick, high-quality sauce that won't make the bars too wet
- Flaky Sea Salt: Sprinkle generously on top while bars are still warm for best adhesion
Let's Make These Together
- Prepare Your Workspace
- Start by preheating your oven and preparing your baking pan with parchment paper. This step is crucial because it makes removing and cutting the bars so much easier. Make sure you have all your ingredients measured and ready to go – baking is much more enjoyable when you're organized.
- Create the Cookie Base
- Mix your melted butter with both sugars until they're completely combined and the mixture looks smooth and glossy. This is where the magic starts! When you add the eggs, make sure to whisk them in thoroughly – this creates the structure that gives your bars that perfect chewy texture.
- Bring It All Together
- Gently fold in your dry ingredients just until you can't see any flour streaks. Overmixing develops gluten and makes the bars tough, so be gentle here. When you add those chocolate chips, try not to eat too many – I know it's tempting!
- The Caramel Swirl
- This is my favorite part! Spread that dough evenly in your pan, then drizzle on that beautiful caramel. When you swirl it in, you're creating pockets of caramel heaven throughout the bars. Don't worry about making it perfect – those imperfect swirls are what make each piece unique.
- Bake and Finish
- Watch your bars carefully as they bake. You want golden edges but a center that still looks slightly underdone – it will firm up as it cools. As soon as they come out of the oven, add that final drizzle of caramel and chocolate, then finish with a generous sprinkle of sea salt. The warm bars will help the salt stick perfectly.
 pin it
Switch Things Up
I'll never forget the first time I made these cookie bars for a family gathering. I was skeptical about adding the sea salt on top – wouldn't it be too salty? But the moment I took my first bite, I understood what all the fuss was about. The salt doesn't make it salty; it amplifies every other flavor and creates this incredible sweet-salty balance that keeps you reaching for more. My cousin actually asked if I'd bought them from a fancy bakery, which might be the best compliment I've ever received. Now I make a double batch every time because they disappear within hours. I've experimented with different types of chocolate chips and even added some chopped pecans once, which was divine. The key is not to overbake them – you want that gooey center that makes these bars so special.
Perfect Pairings
These cookie bars are phenomenal on their own, but pairing them with the right accompaniments takes them to another level. Serve them warm with a scoop of vanilla ice cream and watch the caramel get even gooier and more delicious. A tall glass of cold milk is the classic pairing that never disappoints. For a more sophisticated presentation, try them with a cup of strong coffee or espresso – the bitterness perfectly balances the sweetness. If you're hosting a dessert party, set out a platter of these bars alongside fresh berries and whipped cream for a DIY dessert bar experience.
 pin it
Frequently Asked Questions
- → Can I make these bars ahead of time?
Absolutely! These bars actually taste even better the next day after the flavors have had time to meld together. You can make them up to 3 days in advance and store them in an airtight container at room temperature. For longer storage, freeze them for up to 3 months.
- → Can I use homemade caramel sauce instead of store-bought?
Yes! Homemade salted caramel will give these bars an even more special flavor. Just make sure your caramel is thick enough that it won't make the bars soggy. If it's too thin, cook it a bit longer to reduce it.
- → Why are my bars dry instead of gooey?
The most common reason is overbaking. Cookie bars continue to cook as they cool, so take them out when the center still looks slightly underdone. Also, make sure you're measuring your flour correctly – too much flour will make them dry.
- → Can I substitute the chocolate chips with something else?
Definitely! Try chunks of dark chocolate, white chocolate chips, butterscotch chips, or even chopped nuts like pecans or walnuts. You can also use a combination – half chocolate chips and half nuts works beautifully.
- → Do I have to use flaky sea salt?
While you can use regular sea salt, flaky sea salt really makes a difference. It provides little bursts of saltiness that enhance the sweetness without making the bars taste salty. Brands like Maldon or Jacobsen are perfect for this.
- → How do I get clean cuts when slicing the bars?
Let the bars cool completely before cutting. Use a sharp knife and wipe it clean between cuts. For even cleaner cuts, you can refrigerate the bars for 30 minutes before slicing – they'll firm up and cut more neatly.
- → Can I make these gluten-free?
Yes! Substitute the all-purpose flour with a 1:1 gluten-free baking flour blend. Make sure all your other ingredients (especially the caramel sauce) are certified gluten-free. The texture will be very similar to the original.
Conclusion
These Gooey Salted Caramel Chocolate Chip Cookie Bars are everything you want in a dessert – easy to make, incredibly delicious, and guaranteed to impress. The combination of buttery cookie dough, melty chocolate chips, and luscious salted caramel creates a flavor experience that's simply unforgettable. Whether you're bringing them to a potluck, serving them at a party, or just treating yourself on a Tuesday night, these bars deliver pure joy in every bite. The best part? They're even better the next day when the flavors have melded together.