
 pin it
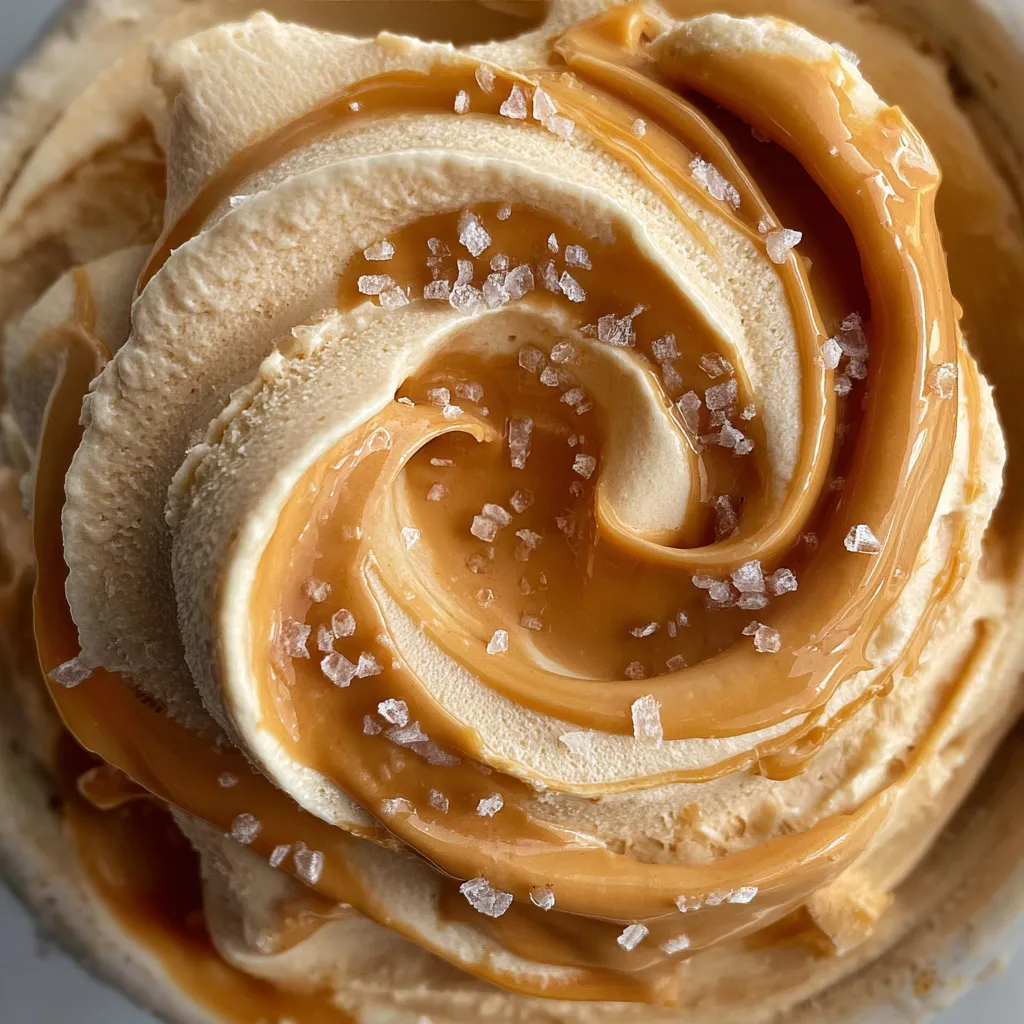
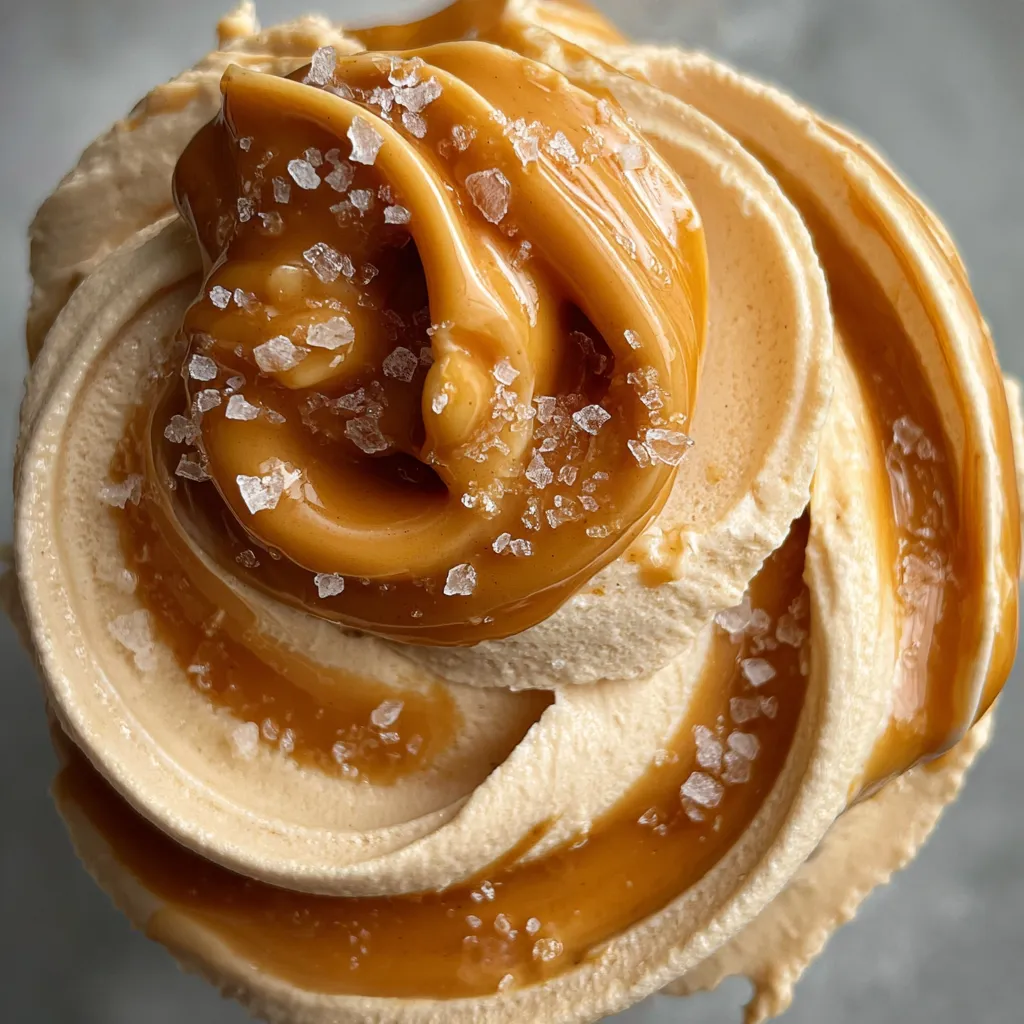
I first encountered salted caramel ice cream at a small artisanal shop in Vermont, and I was instantly hooked. The way the salt enhanced the caramel's richness was a revelation. This recipe recreates that magical experience at home using the Ninja Creami. I start by making a custard base with cream, milk, and egg yolks, then create a separate caramel sauce that gets swirled through the mixture. The key is getting the caramel to the perfect amber color - not too light, not too dark. When you spin it in the Ninja Creami, it creates the most incredible texture. The final touch of flaky sea salt on top adds both visual appeal and that perfect contrast that makes each bite unforgettable. It's become my go-to recipe when I want to impress guests or treat myself to something special.
Why I love this recipe
What I love most about this salted caramel ice cream is how it transforms simple ingredients into something extraordinary. There's something deeply satisfying about making caramel from scratch - watching sugar melt and transform into liquid gold never gets old. The Ninja Creami makes the process so much more accessible than traditional ice cream makers. I love how the salt doesn't just add flavor, but actually enhances the caramel's complexity, making it taste more buttery and rich. Every spoonful has different textures - the smooth ice cream base, ribbons of chewy caramel, and those little bursts of salt. It's sophisticated enough for special occasions but comforting enough for a quiet evening at home. This recipe has become my signature dessert, and I'm always proud to serve it to guests.
What You Need From Your Kitchen
- Heavy cream:Forms the rich, creamy base of the ice cream
- Egg yolks:Create the custard base and add richness
- Granulated sugar:Sweetens the base and makes the caramel
- Whole milk:Balances the richness of the cream
- Unsalted butter:Adds smoothness to the caramel
- Sea salt flakes:Provides the signature salty contrast
Let's Make These Together
- Create the caramel sauce
- Heat sugar and corn syrup in a heavy pan until it turns a beautiful amber color. This is where the magic happens - watch it carefully as it transforms from clear to golden to that perfect caramel hue. The smell will tell you when it's ready.
- Make the custard base
- Gently heat your cream and milk while whisking egg yolks with sugar. The key is to slowly temper the hot cream into the eggs so they don't scramble. Take your time here - good custard can't be rushed.
- Combine and chill
- Once your custard coats a spoon, strain it smooth and let it cool completely. Then comes the fun part - swirling in that gorgeous caramel to create beautiful ribbons throughout the mixture.
- Freeze and process
- After 24 hours of freezing, your Ninja Creami will transform this solid block into the creamiest ice cream you've ever made. Top with flaky sea salt for that perfect finish.
 pin it
Switch Things Up
I remember the first time I made this recipe - I was so nervous about making the caramel from scratch because I'd burned it before. But watching that sugar slowly transform into liquid gold was mesmerizing. The smell that filled my kitchen was incredible - rich, buttery, and slightly smoky. When I finally tasted the finished ice cream, I couldn't believe I had made something so professional-tasting. Now it's become my signature dessert for dinner parties. My friends always ask for the recipe, and I love seeing their faces when they take that first spoonful. The combination of the smooth, creamy base with those pockets of caramel and the pop of salt is just magical.
Perfect Pairings
This salted caramel ice cream pairs beautifully with warm desserts like apple crisp, chocolate brownies, or pecan pie. For a sophisticated presentation, serve it alongside espresso or dark roast coffee. It's also divine when drizzled with extra caramel sauce and topped with toasted pecans or crushed pretzels for added texture.
 pin it
Frequently Asked Questions
- → Why does my ice cream have ice crystals?
Make sure your mixture is completely frozen solid before processing, and ensure your custard was properly cooked to coat a spoon before freezing.
- → Can I make this without eggs?
Yes, but the texture won't be as rich and creamy. You can use a simple cream and milk base, but the custard base creates the signature smooth texture.
- → How long does homemade ice cream last?
Store in an airtight container in the freezer for up to 2 weeks. After that, ice crystals may start to form and affect the texture.
- → Can I use different types of salt?
Flaky sea salt works best as it doesn't dissolve completely and provides texture. Avoid table salt as it will dissolve and make the ice cream too salty.
- → What if my caramel seizes up?
If your caramel becomes grainy, you can try adding a tablespoon of hot water and whisking vigorously. Prevention is key - avoid stirring while cooking and ensure your pan is clean.
Conclusion
This salted caramel ice cream is the perfect balance of sweet and salty, with a luxuriously smooth texture that melts perfectly on your tongue. The homemade caramel sauce creates beautiful ribbons throughout the ice cream, while the sea salt flakes add the perfect finishing touch. It's a sophisticated dessert that's surprisingly achievable at home with the right technique and equipment.