
 pin it
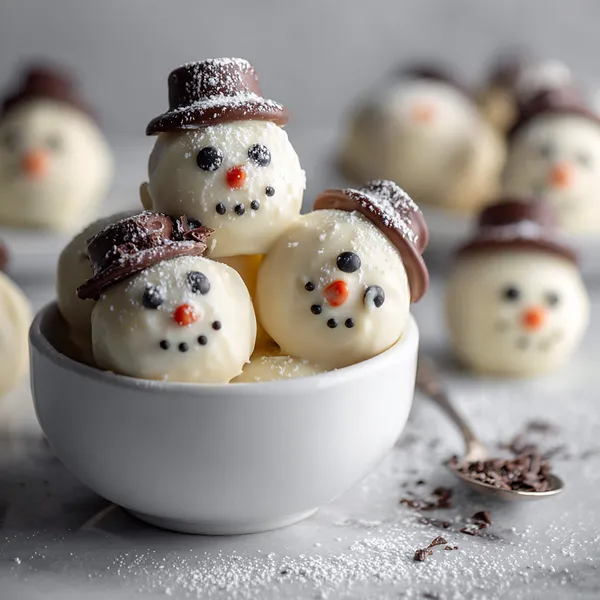
I'll never forget the first time I encountered these adorable snowman treats at a friend's holiday cookie exchange. I was immediately drawn to them—they were so whimsical and perfectly imperfect, each one with its own personality. When I bit into one, I was surprised by the texture: not a traditional cookie, but something softer and more indulgent. My friend explained they were made with edible cookie dough, which was a revelation to me at the time. The combination of the dense, sweet cookie dough center with the crisp white chocolate shell was absolutely addictive. I loved how the chocolate hat added a contrasting flavor, and the candy details made each bite feel playful. What really struck me was how much joy these little treats brought to everyone at the party. People didn't just eat them; they admired them, took photos, and talked about how clever the design was. I asked for the recipe immediately and made them the following weekend. Since then, I've made countless batches, tweaking the recipe here and there, but always keeping that essential charm that made me fall in love with them in the first place.
Why I love this recipe
There are so many reasons why these Melted Snowman Cookie Dough Bites have become one of my absolute favorite holiday recipes. First, they're incredibly fun to make—there's something therapeutic about rolling the dough into perfect balls and watching them transform into little characters. I love that this recipe requires no baking, which means I can make them even when my oven is occupied with other holiday dishes, or when it's too hot to turn on the oven. The fact that they're made with heat-treated flour makes the cookie dough safe to eat, so there's no worry about raw ingredients. But beyond the practical aspects, what I truly love is the pure joy these treats bring. Every time I make them, whether for family, friends, or coworkers, the reaction is the same: immediate smiles and delighted laughter. They're conversation starters at parties and the first thing to disappear from dessert tables. I also appreciate how customizable they are—you can make them as detailed or as simple as you like, and each batch can have its own unique personality. They're a recipe that brings out creativity and playfulness, reminding us that cooking should be fun.
What You Need From Your Kitchen
- Heat-treated flour: Spread on a baking sheet and microwave for 1 minute or bake at 350°F for 5 minutes, then cool completely
- Softened butter: Beat with sugars until light and fluffy to create the base of the cookie dough
- White chocolate melting wafers: Melt in microwave or double boiler until smooth for coating the snowman bodies
- Chocolate cookies: Use round chocolate cookies or sandwich cookies with filling removed as the snowman hats
- Candy eyes and orange pieces: Press gently into the white chocolate coating while still tacky to create the snowman faces
- Mini chocolate chips: Fold into the cookie dough for added texture and flavor
- Black decorating gel: Use to draw smiles and button details on the snowmen
Let's Make These Together
- Heat-treat the flour safely
- Begin by spreading your all-purpose flour on a microwave-safe plate or baking sheet. Heat it in the microwave for 60 seconds, stirring every 20 seconds to ensure even heating, or bake in a preheated 350°F oven for 5 minutes. This critical step kills any potential bacteria in the raw flour, making it safe to consume without baking. Allow the flour to cool completely to room temperature before proceeding with the recipe. This typically takes about 10-15 minutes.
- Create the cookie dough base
- In a large mixing bowl, combine your softened butter with both the granulated and brown sugars. Use an electric mixer or beat vigorously by hand for 2-3 minutes until the mixture becomes light, fluffy, and pale in color. This creaming process is essential for creating a smooth, tender cookie dough texture. Add the milk, vanilla extract, and salt, mixing thoroughly until everything is well incorporated and the mixture looks uniform.
- Form perfect snowman balls
- Gradually fold in your cooled, heat-treated flour, mixing just until a cohesive dough forms. Avoid overmixing, as this can make the dough tough. Gently stir in the mini chocolate chips, distributing them evenly throughout the dough. Using a cookie scoop or tablespoon, portion out equal amounts of dough and roll each piece between your palms into smooth, round balls. Aim for consistency in size—about 1.5 inches in diameter works perfectly. Place the balls on a parchment-lined baking sheet and chill in the refrigerator for at least 30 minutes or the freezer for 15 minutes until very firm.
- Coat in white chocolate
- Melt your white chocolate melting wafers in a microwave-safe bowl, heating in 30-second intervals and stirring between each until completely smooth and fluid. Remove the chilled cookie dough balls from the refrigerator. Working with one ball at a time, place it on a fork or dipping tool and submerge it completely in the melted white chocolate. Lift it out, allowing excess chocolate to drip back into the bowl, then gently tap the fork against the bowl's edge to remove any remaining drips. Transfer the coated ball back to the parchment-lined sheet. Repeat with all remaining balls, reheating the chocolate as needed if it begins to thicken.
- Decorate your snowmen
- While the white chocolate coating is still wet, gently press a chocolate cookie onto the top of each ball to create the hat. Work quickly during this step, as the chocolate sets fast. Once the coating has set for about 5 minutes but is still slightly tacky, begin adding the facial features. Press two candy eyes into place above the center of each snowman face, then add the orange candy piece for the nose. Using black decorating gel or tiny chocolate chips, draw a smile and add 2-3 buttons down the front. Feel free to give each snowman its own unique personality. Allow the snowmen to set completely at room temperature for 30 minutes or refrigerate for 10 minutes, then dust with powdered sugar for a magical snowy finish.
 pin it
Switch Things Up
I first made these snowman bites during a particularly snowy December weekend when my nieces came over for a baking day. We'd planned to make traditional cookies, but the power went out mid-morning, leaving us without an oven. Not wanting to disappoint two excited kids, I pivoted to these no-bake treats. We spent the afternoon rolling cookie dough, dipping it in melted chocolate, and giggling as we tried to make each snowman's face unique. One had a lopsided smile, another had eyes too far apart, but that was the charm. My youngest niece insisted on making one "super melted" snowman with the hat tilted dramatically. When we finally arranged them all on a platter, it looked like a little snowman village. The girls were so proud they took photos before we even tasted them. Now, every winter, they ask to make "our snowmen" again, and it's become our special tradition.
Perfect Pairings
These Melted Snowman Cookie Dough Bites pair wonderfully with a steaming mug of hot chocolate topped with marshmallows for the ultimate winter treat experience. For a grown-up gathering, serve them alongside peppermint coffee or a white chocolate mocha. They also make excellent companions to vanilla ice cream as part of a winter dessert board. If you're hosting a holiday party, arrange them on a platter with chocolate-covered pretzels, peppermint bark, and sugar cookies for a beautiful dessert spread. For kids' parties, pair them with fruit punch or chocolate milk. The sweet, cookie-dough flavor also complements salty snacks like roasted nuts or popcorn, creating a nice sweet-and-salty balance.
 pin it
Frequently Asked Questions
- → Can I make these snowman bites ahead of time?
Absolutely! These Melted Snowman Cookie Dough Bites are perfect for making ahead. You can prepare them up to one week in advance and store them in an airtight container in the refrigerator. For best results, place parchment paper between layers to prevent them from sticking together. Just bring them to room temperature about 15-20 minutes before serving so they're not too cold and the flavors can fully develop.
- → Is the cookie dough safe to eat without baking?
Yes, completely safe! This recipe uses heat-treated flour, which means the flour has been heated to kill any potential bacteria, making it safe to consume raw. Additionally, there are no eggs in this recipe, eliminating another common concern with raw cookie dough. As long as you properly heat-treat your flour using either the microwave or oven method described, you can enjoy these treats without any worry.
- → What can I use instead of white chocolate melting wafers?
While white chocolate melting wafers work best because they melt smoothly and set with a nice finish, you can substitute regular white chocolate chips or a white chocolate bar. If using regular white chocolate, add 1-2 teaspoons of coconut oil or vegetable shortening to help it melt more smoothly and achieve a better coating consistency. Avoid using white chocolate with added stabilizers or compounds, as they may not coat as evenly.
- → My cookie dough is too crumbly. What should I do?
If your cookie dough isn't holding together well and feels dry or crumbly, it likely needs more moisture. Add milk one teaspoon at a time, mixing well after each addition, until the dough reaches a consistency that holds together when pressed. The dough should be firm enough to roll into balls but not so dry that it cracks. Environmental factors like humidity can affect flour absorption, so slight adjustments are normal.
- → How do I prevent the white chocolate from cracking when I bite into the snowmen?
To minimize cracking, make sure your cookie dough balls are well-chilled before dipping—this helps the chocolate set quickly and evenly. Also, avoid making the chocolate coating too thick by properly tapping off excess chocolate after dipping. Let the coated snowmen come to room temperature before serving rather than eating them straight from the refrigerator, as the temperature difference between the cold interior and room temperature exterior can cause stress on the chocolate shell. Finally, using high-quality melting wafers designed for coating will give you a more flexible chocolate shell that's less prone to cracking.
- → Can I freeze these snowman bites for longer storage?
Yes, these freeze beautifully! Place the completed snowman bites on a baking sheet and freeze until solid, about 1-2 hours. Then transfer them to a freezer-safe container or bag with parchment paper between layers. They'll keep frozen for up to 3 months. When you're ready to serve, thaw them in the refrigerator for several hours or at room temperature for about 30 minutes. The texture and appearance should remain perfect after freezing.
Conclusion
These Melted Snowman Cookie Dough Bites are the perfect combination of adorable and delicious. The safe-to-eat cookie dough center is rich and satisfying, while the white chocolate coating adds a smooth, sweet finish. They're easy enough for beginners yet impressive enough to wow at any holiday gathering. Whether you're making them with kids or preparing them for a winter party, these little snowmen are guaranteed to bring smiles and compliments. Plus, they stay fresh in the refrigerator for up to a week, making them a great make-ahead treat for busy holiday schedules.