
 pin it
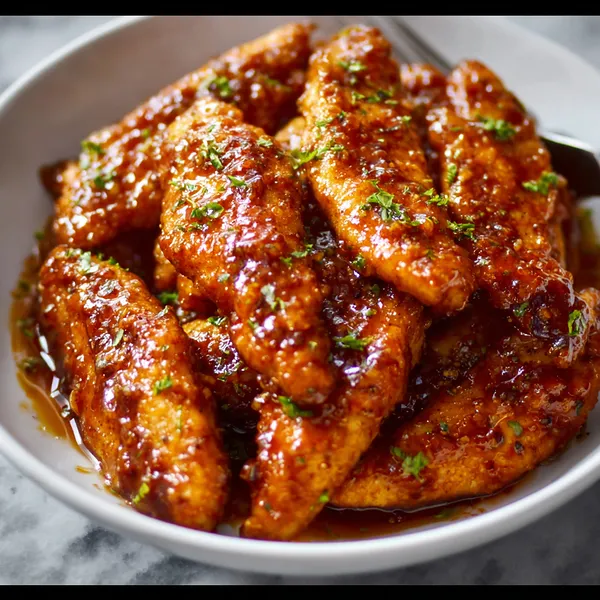
I discovered the magic of sticky glazed chicken when I visited a small restaurant in my neighborhood that specialized in Asian-American fusion. Their version inspired me to create my own recipe at home, and after several attempts, I perfected this sweet and spicy combination. The process is wonderfully satisfying: you start by coating tender chicken pieces in a crispy breading, then fry them until golden and crunchy. Meanwhile, you prepare the glaze by combining honey, hot sauce, soy sauce, and garlic in a pan, letting it simmer until it thickens into a glossy, sticky coating. The transformation happens when you toss the hot, crispy chicken in that glaze—each piece gets coated in this beautiful amber sauce that's simultaneously sweet, spicy, and savory. The honey caramelizes slightly on contact with the hot chicken, creating an irresistible texture that's both sticky and crispy. What I love most is how the glaze penetrates every crevice of the breading while maintaining that satisfying crunch. The fresh parsley adds a pop of color and a hint of freshness that balances the rich flavors perfectly.
Why I love this recipe
This recipe holds a special place in my heart because it represents everything I love about comfort food—it's indulgent, flavorful, and brings people together. The beauty of these sticky chicken tenders lies in their versatility; they work equally well as a family dinner or party appetizer. I love how the recipe allows for customization—you can adjust the heat level by adding more or less hot sauce, or switch up the sweetness by varying the honey amount. The texture contrast between the crispy exterior and tender chicken inside, all coated in that sticky glaze, is absolutely addictive. What really makes me smile is watching people's faces light up when they take their first bite. There's something universally appealing about sticky, glazed chicken that transcends age and preference. I also appreciate that this recipe uses simple, accessible ingredients that most people already have in their pantry. The preparation is straightforward enough for beginners, yet the results look and taste restaurant-quality. Every time I make these tenders, they disappear within minutes, which is the best compliment any recipe can receive.
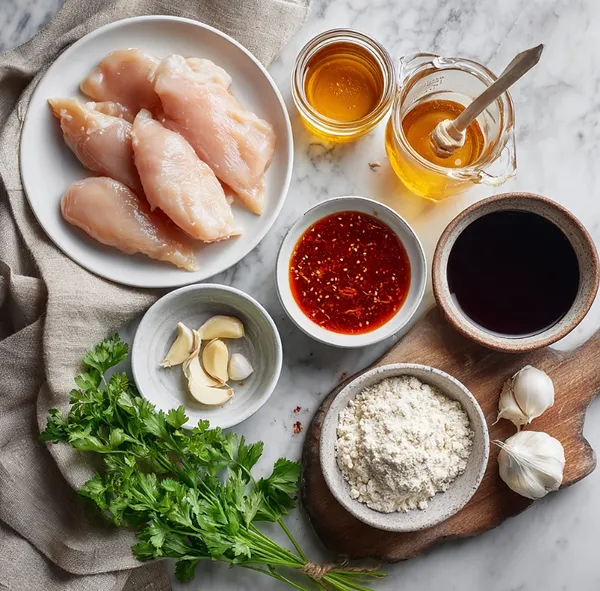
What You Need From Your Kitchen
- Chicken tenders: Pat dry and season before breading for best results
- Panko breadcrumbs: Use Japanese-style for extra crispiness compared to regular breadcrumbs
- Honey: Choose a good quality honey as it's the main sweetener in the glaze
- Hot sauce: Use your favorite brand; Frank's RedHot or sriracha work wonderfully
- Garlic: Fresh minced garlic provides the best flavor for the glaze
- Eggs: Beat well to ensure smooth coating of the chicken
Let's Make These Together
- Set Up Your Breading Station
- Begin by organizing your workspace with three shallow bowls containing flour, beaten eggs, and panko breadcrumbs respectively. Pat your chicken tenders completely dry with paper towels and season them with salt and pepper. This preparation step is crucial for achieving that perfect crispy coating. Make sure your bowls are arranged in order from left to right to create an efficient assembly line for breading.
- Bread the Chicken Perfectly
- Take each chicken tender and coat it thoroughly in flour, making sure to shake off any excess. Next, dip it into the beaten eggs, allowing any excess to drip off. Finally, press the tender into the panko breadcrumbs, coating all sides evenly. Gently press the breadcrumbs to help them adhere. Place each breaded tender on a clean plate and continue until all pieces are coated.
- Fry to Golden Perfection
- Heat about one inch of vegetable oil in your skillet to 350°F. Carefully lower the breaded chicken tenders into the hot oil, working in batches to avoid overcrowding. Fry each side for 3-4 minutes until they turn a beautiful golden brown color. Use a cooking thermometer to ensure the internal temperature reaches 165°F. Remove the cooked tenders to a paper towel-lined plate to drain excess oil.
- Create the Sticky Glaze
- In a saucepan over medium heat, melt the butter and add minced garlic, stirring for about 30 seconds until it becomes fragrant. Pour in the honey, hot sauce, and soy sauce, mixing everything together. Create a cornstarch slurry by mixing the cornstarch with water, then add it to the pan. Let the mixture simmer gently for 2-3 minutes, stirring occasionally until it thickens into a beautiful sticky glaze.
- Coat and Serve Hot
- Add your crispy fried chicken tenders to the pan with the glaze and toss them gently but thoroughly to ensure each piece is completely coated with that gorgeous sticky sauce. The heat from the chicken will help the glaze caramelize slightly, creating an irresistible finish. Transfer everything to your serving platter, drizzle any remaining glaze over the top, and finish with a generous sprinkle of fresh chopped parsley for color and freshness.
 pin it
Switch Things Up
I first made these sticky chicken tenders on a rainy Sunday when I was craving something comforting but exciting. I had some chicken tenders in the fridge and a jar of honey in the pantry, and I thought, why not create something special? As I mixed the glaze, the kitchen filled with the most incredible sweet and spicy aroma. The first batch came out so perfectly glazed and sticky that I immediately called my sister to tell her about it. Now, every time I make these, I remember that cozy afternoon experimenting in the kitchen. I've tweaked the recipe over time, adjusting the heat level and perfecting the glaze consistency. My favorite part is always that moment when you toss the hot chicken in the glaze and watch it transform into something magical. These tenders have become my signature dish, and I love sharing them with friends who always ask for the recipe.
Perfect Pairings
These sticky chicken tenders pair beautifully with classic sides that balance their bold flavors. Serve them alongside creamy coleslaw to cut through the sweetness, or pair with crispy french fries for the ultimate comfort meal. A fresh cucumber salad with a light vinaigrette provides a refreshing contrast to the sticky glaze. For a complete meal, add some steamed rice or garlic bread to soak up any extra sauce. If you're serving these as appetizers, offer ranch or blue cheese dipping sauce on the side. A cold beer or sweet iced tea complements the spicy-sweet flavor profile perfectly.
 pin it
Frequently Asked Questions
- → Can I bake these chicken tenders instead of frying?
Yes, you can bake them at 425°F for 20-25 minutes, flipping halfway through. However, frying produces a crispier texture. If baking, spray the breaded chicken with cooking oil before baking for better browning.
- → How spicy are these chicken tenders?
The spice level is moderate and customizable. The honey balances the hot sauce, creating a sweet heat that most people enjoy. You can reduce the hot sauce to 2 tablespoons for mild heat, or increase to 1/3 cup for extra spice.
- → Can I make the glaze ahead of time?
Yes, you can prepare the glaze up to 2 days in advance and store it in the refrigerator. Reheat it gently on the stove, adding a splash of water if it has thickened too much, before tossing with freshly fried chicken.
- → What can I substitute for panko breadcrumbs?
Regular breadcrumbs work but won't be as crispy. For a gluten-free option, use crushed gluten-free cornflakes or gluten-free breadcrumbs. You can also use crushed crackers like Ritz for a buttery flavor.
- → How do I keep the chicken crispy after adding the glaze?
Work quickly when coating the chicken and serve immediately. The glaze will soften the coating slightly, but if you serve right away, you'll maintain most of the crispiness. Avoid letting the glazed chicken sit too long before serving.
- → Can I use chicken breast instead of tenders?
Absolutely! Cut chicken breasts into strips about 1 inch wide to create your own tenders. You may need to adjust the cooking time slightly depending on the thickness of your strips to ensure they reach 165°F internally.
- → What's the best way to reheat leftovers?
Reheat in an oven at 375°F for 8-10 minutes to restore some crispiness. Avoid microwaving as it will make the coating soggy. You can also reheat in an air fryer at 375°F for 5-7 minutes for best results.
Conclusion
These Sweet & Spicy Sticky Chicken Tenders are the perfect combination of crispy, sticky, and flavorful. The glaze strikes the ideal balance between sweet honey and spicy heat, making every bite memorable. Whether you're serving them as an appetizer, main dish, or game day snack, they're guaranteed to disappear quickly. The recipe is simple enough for weeknight cooking but impressive enough for entertaining. Once you master this sticky glaze technique, you'll find yourself using it on wings, drumsticks, and more!