
 pin it
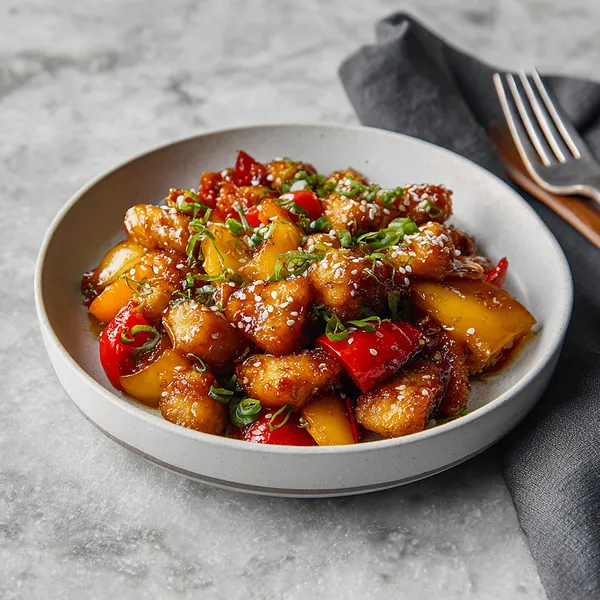
I first encountered sweet and sour chicken at a small Chinese restaurant near my college campus, and I was immediately hooked by that perfect balance of tangy and sweet. For years, I ordered it as takeout, never thinking I could recreate those flavors at home. Then one day, I decided to experiment with a sheet pan version, and everything changed. This recipe captures all the essence of that classic dish but makes it so much more accessible for home cooks. The chicken gets coated in cornstarch, which creates an incredible crispy exterior once it hits the hot oven. The sauce—a beautiful blend of ketchup, rice vinegar, brown sugar, soy sauce, and aromatics—coats everything in a glossy, flavorful embrace. What I love most is how the bell peppers and pineapple caramelize alongside the chicken, developing their own depth of flavor while staying tender-crisp. The sesame seeds and green onions add that final restaurant-quality touch. Every time I make this, I'm transported back to those carefree college days, but now I'm creating the magic in my own kitchen, and it tastes even better than I remembered.
Why I love this recipe
There are so many reasons this recipe has earned a permanent spot in my weekly rotation. First, it's incredibly forgiving—even if you slightly overcook the chicken or use different colored peppers, it still turns out fantastic. Second, the minimal cleanup is a game-changer for busy weeknights; one sheet pan means I'm not stuck at the sink for half an hour after dinner. Third, it's a crowd-pleaser that works for both kids and adults—the sweet sauce appeals to younger palates while the tangy vinegar and ginger keep it interesting for grown-ups. I also appreciate how versatile it is; you can easily swap the chicken for shrimp or tofu, add different vegetables like snap peas or broccoli, or adjust the sweetness level to your preference. The visual appeal is another bonus—those vibrant colors make it Instagram-worthy every single time. But honestly, what I love most is how this recipe makes me feel like a culinary genius without requiring any advanced skills. It's proof that simple techniques and quality ingredients can create something truly special. Every time I serve this, I get compliments, and every time I eat it, I'm reminded that home cooking can absolutely rival restaurant food.
What You Need From Your Kitchen
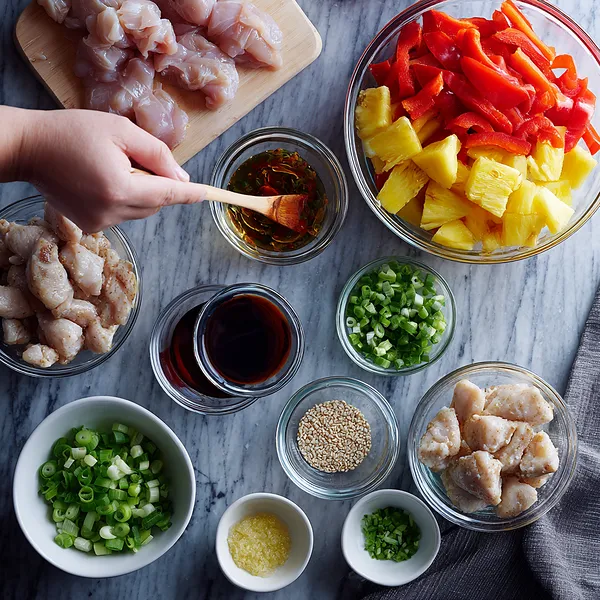
- Chicken breast: Cut into uniform bite-sized pieces for even cooking
- Bell peppers: Remove seeds and cut into 1-inch chunks
- Pineapple: Use fresh or canned chunks, drained well
- Cornstarch: Coat chicken pieces evenly for crispy texture
- Ketchup: Forms the base of the sweet and tangy sauce
- Rice vinegar: Provides essential tanginess and balance
- Brown sugar: Adds sweetness and helps caramelize the sauce
- Soy sauce: Brings umami depth and saltiness to the dish
- Garlic and ginger: Mince and grate finely for aromatic flavor
Let's Make These Together
- Prepare the Chicken
- Start by cutting your chicken breast into uniform bite-sized pieces, about 1-inch cubes. Pat them dry with paper towels to remove excess moisture, which helps the cornstarch coating adhere better. Toss the chicken pieces in cornstarch in a large bowl, making sure each piece is evenly coated. This step is crucial for achieving that restaurant-quality crispy exterior while keeping the inside juicy and tender.
- Mix the Sauce
- Whisk together your ketchup, rice vinegar, brown sugar, soy sauce, minced garlic, and grated ginger in a medium bowl. The sugar should dissolve completely, and the sauce should be smooth with no lumps. Taste it at this stage—if you prefer it sweeter, add a bit more brown sugar; if you like it tangier, add more vinegar. This is your chance to customize the flavor profile to your family's preferences.
- Assemble on the Pan
- Arrange your cornstarch-coated chicken pieces on your prepared sheet pan, making sure they're not overcrowded. Add the bell pepper chunks and pineapple pieces around the chicken, creating a colorful display. Pour about two-thirds of your sauce over everything and toss gently with your hands or a spatula to ensure every piece is coated. The remaining sauce will be used later to intensify the flavor.
- Bake and Finish
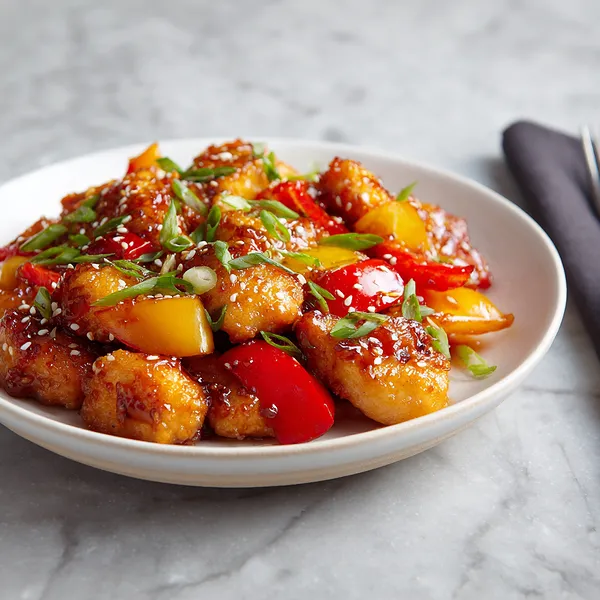
- Bake the sheet pan for 15 minutes, then remove and stir everything to promote even cooking. Drizzle the remaining sauce over the top and return to the oven for another 10 minutes until the chicken is cooked through and the sauce is caramelized and glossy. Finish with a generous sprinkle of sesame seeds and fresh green onions before serving over fluffy rice.
 pin it
Switch Things Up
I remember the first time I made this recipe on a particularly hectic Tuesday evening. I was exhausted from work and dreading the pile of dishes that usually comes with cooking dinner. Then I remembered seeing a sheet pan recipe somewhere and thought, why not give it a shot? I tossed everything together, slid it into the oven, and actually had time to relax for twenty minutes. When the timer went off and I pulled out that gorgeous pan of golden chicken and vibrant peppers, I couldn't believe how simple it had been. My partner walked in, took one look at the glossy, sesame-studded masterpiece, and said it looked like something from a restaurant. That night, we sat down to a meal that tasted incredible, and cleanup was just one pan. Since then, this recipe has become my go-to whenever I need something delicious without the stress. The leftovers are amazing too—I've packed them for lunch the next day and they reheat beautifully. It's become one of those recipes I find myself making at least twice a month.
Perfect Pairings
This sweet and sour chicken pairs beautifully with a variety of sides that complement its bold, tangy flavors. Serve it over a bed of fluffy jasmine rice or fried rice to soak up all that incredible sauce. For a lighter option, cauliflower rice works wonderfully and keeps the meal low-carb. If you want to add more vegetables to the plate, consider steamed broccoli, snap peas, or bok choy on the side. Spring rolls or vegetable dumplings make excellent appetizers before this main course. For drinks, an ice-cold Asian beer, ginger ale, or even a crisp white wine like Riesling balances the sweetness perfectly. If you're serving this for a gathering, consider adding an Asian-inspired slaw or cucumber salad to round out the meal.
 pin it
Frequently Asked Questions
- → Can I use chicken thighs instead of breast?
Absolutely! Chicken thighs work wonderfully in this recipe and add extra juiciness. They may require a few additional minutes of cooking time, so check that the internal temperature reaches 165°F before serving.
- → Is this recipe gluten-free?
It can be easily made gluten-free by substituting regular soy sauce with tamari or a certified gluten-free soy sauce. The cornstarch is naturally gluten-free, so that's perfect as is.
- → Can I prep this ahead of time?
Yes! You can cut the chicken and vegetables, mix the sauce, and store everything separately in the refrigerator for up to 24 hours. When ready to cook, just coat the chicken with cornstarch and follow the baking instructions as written.
- → What if I don't have fresh pineapple?
Canned pineapple works perfectly fine for this recipe. Just make sure to drain it very well and pat the chunks dry with paper towels to remove excess moisture that could make the dish watery.
- → How do I store and reheat leftovers?
Store leftovers in an airtight container in the refrigerator for up to 3 days. Reheat in the oven at 350°F for about 10 minutes or in the microwave in 1-minute intervals until heated through. The oven method helps maintain some crispiness.
- → Can I add more vegetables to this recipe?
Definitely! Broccoli florets, snap peas, mushrooms, or zucchini would all be excellent additions. Just make sure to cut them into similar-sized pieces for even cooking and don't overcrowd the pan.
Conclusion
This Sheet Pan Sweet & Sour Chicken proves that restaurant-quality meals don't require fancy techniques or multiple pots and pans. With just one sheet pan and about 40 minutes, you'll have a dinner that's bursting with color, flavor, and texture. The combination of tender chicken, caramelized sauce, and perfectly cooked vegetables creates a harmony that's hard to beat. Whether you're cooking for picky eaters or impressing dinner guests, this recipe delivers every single time. Say goodbye to greasy takeout containers and hello to homemade goodness that tastes even better and leaves you feeling accomplished.