
 pin it
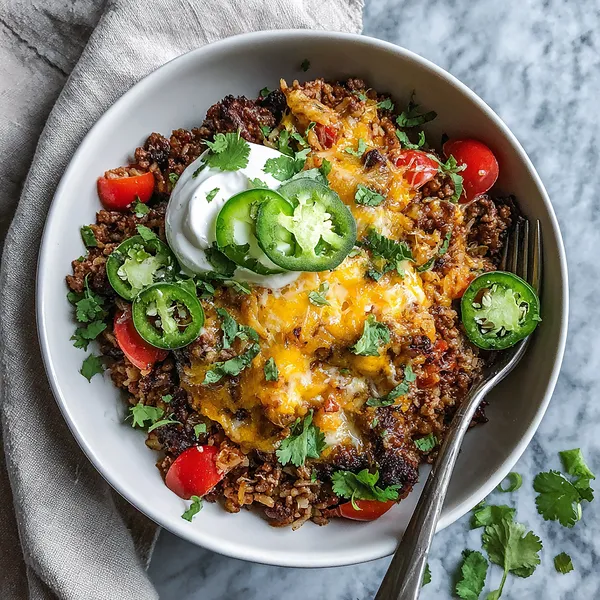
I'll never forget my first real burrito bowl experience at a tiny taqueria in Austin, Texas. The way they built each layer with intention – the warm rice as a foundation, the perfectly seasoned meat, then all those vibrant toppings creating this explosion of color and flavor. I was hooked. For years, I'd grab burrito bowls whenever I could, but they were always an "eating out" thing. Then one day, standing in my kitchen staring at ground beef and wondering what to make, inspiration struck. What if I could recreate that magic at home, but make it even easier? That's when this one-pot version was born. Instead of cooking everything separately like restaurants do, I realized the rice could cook right in with the beef and seasonings, soaking up all that delicious flavor. The result exceeded my expectations – it's just as satisfying as my favorite restaurant version, but I can make it in my pajamas on a Wednesday night. The beauty of this recipe is in its simplicity and how the flavors meld together as everything simmers in one pot.
Why I love this recipe
This recipe holds a special place in my heart because it represents everything I value in cooking: simplicity, flavor, and versatility. Life gets busy, and some nights you just can't spend an hour in the kitchen, but you also don't want to sacrifice taste or nutrition. This burrito bowl gives me both – real, wholesome ingredients coming together quickly without compromising on that bold, satisfying Tex-Mex flavor I crave. I love how it's become our family's customizable canvas. My daughter loads hers with extra cheese and sour cream, my son goes heavy on the jalapeños, and I pile on the fresh cilantro and tomatoes. It's also incredibly budget-friendly – no expensive cuts of meat or hard-to-find ingredients, just pantry staples transformed into something special. But honestly? The best part is that singular moment when I lift the lid after the rice has cooked, and I'm greeted by this gorgeous, fragrant pot of perfectly seasoned everything. One pot means one dish to wash, and that's its own kind of love language. This recipe has rescued countless weeknights and never fails to bring smiles to the dinner table.
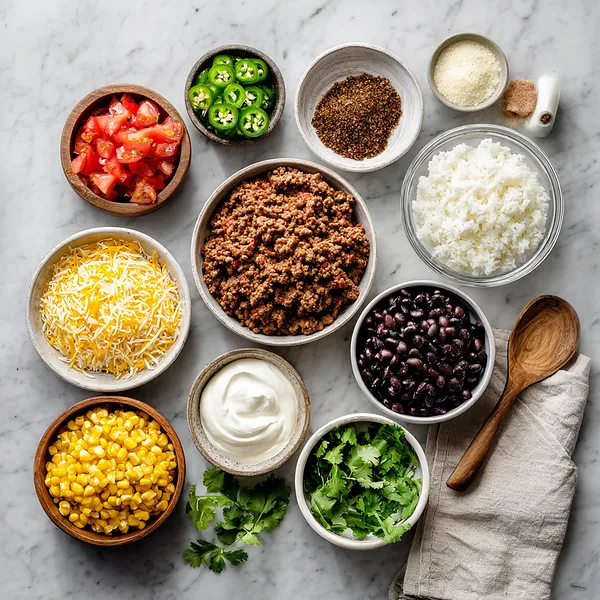
What You Need From Your Kitchen
- Ground Beef: brown in pot until fully cooked and crumbled, drain excess fat
- White Rice: add uncooked to pot with broth and simmer until tender
- Black Beans: drain, rinse, and add to pot during cooking
- Corn Kernels: add to pot with beans for sweetness and texture
- Beef Broth: use as cooking liquid for rice to infuse flavor
- Cheddar Cheese: sprinkle over hot mixture and let melt
- Fresh Tomatoes: dice and use as fresh topping after cooking
- Jalapeños: slice thinly and add as spicy garnish
Let's Make These Together
- Brown Your Beef
- Start by heating your large pot over medium-high heat. Add the ground beef and use a wooden spoon to break it up as it cooks. You want nice, evenly browned crumbles with no pink remaining – this should take about 5-7 minutes. If there's excessive fat, drain most of it, but leave a little behind for flavor. This is your flavor foundation!
- Season and Build
- Now comes the magic. Sprinkle that taco seasoning over your browned beef and give it a good stir so every piece is coated. Then add your uncooked rice, beef broth, drained black beans, and corn kernels. Stir everything together until it's well combined. Bring the whole mixture to a boil – you'll see it bubbling away – then immediately reduce the heat to low and cover tightly with your lid.
- Let It Simmer
- This is where patience pays off. Let everything simmer gently for 18-20 minutes without lifting the lid. The rice is absorbing all that seasoned broth and the flavors are melding together beautifully. You'll know it's done when the rice is tender and has soaked up most of the liquid. If you peek and see the rice isn't quite tender, give it another 2-3 minutes.
- Melt the Cheese
- Once your rice is perfectly cooked, remove the pot from the heat. Quickly sprinkle all that shredded cheddar cheese evenly across the top. Put the lid back on and let the residual heat work its magic for 2-3 minutes. When you lift that lid, you'll be greeted with gorgeously melted, gooey cheese.
- Top and Serve
- Now for the fun part – the fresh toppings! Scatter those diced tomatoes across the melted cheese, arrange your jalapeño slices (as many or as few as you like), add generous dollops of sour cream, and finish with a shower of fresh cilantro. Serve it straight from the pot for that family-style feel, or portion it into individual bowls. Don't forget to let everyone add extra toppings to their liking!
 pin it
Switch Things Up
I first made this on a particularly chaotic Tuesday evening when I was craving Chipotle but couldn't justify the drive or the cost. I had ground beef thawing and a pantry full of staples, so I threw everything into my favorite Dutch oven and hoped for the best. Twenty minutes later, my kitchen smelled like a Mexican restaurant, and that first bite – with the creamy cheese melting into the seasoned beef and rice – was absolute magic. My kids were fighting over the last servings, and my husband declared it better than takeout. Now, it's become our go-to whenever we need comfort food fast. I love how forgiving this recipe is too. Sometimes I add extra jalapeños for heat, other times I throw in some bell peppers I need to use up. The one-pot method means everything gets infused with that amazing taco seasoning, and honestly, I've never looked back. This has saved countless weeknight dinners in our house.
Perfect Pairings
These burrito bowls pair beautifully with a side of crispy tortilla chips and fresh guacamole or a zesty pico de gallo. For a complete Tex-Mex feast, serve alongside some Mexican street corn (elote) or a simple side salad with lime-cilantro dressing. If you're feeding a crowd, set up a toppings bar with extra cheese, sliced avocado, hot sauce, and lime wedges so everyone can customize their bowl. And don't forget a refreshing drink – homemade agua fresca, Mexican beer with lime, or even a virgin margarita would complement these bold flavors perfectly!
 pin it
Frequently Asked Questions
- → Can I use brown rice instead of white rice?
Yes, but you'll need to adjust the cooking time and liquid. Brown rice typically takes 40-45 minutes to cook and requires about 2 cups of broth instead of 1.5 cups. Keep the pot covered and check for tenderness before adding cheese.
- → How do I make this recipe vegetarian?
Simply omit the ground beef and add extra beans (try a mix of black beans and pinto beans) or use a plant-based ground meat substitute. Use vegetable broth instead of beef broth, and you'll have a delicious vegetarian burrito bowl!
- → Can I freeze leftovers?
Yes! The rice, beef, beans, and corn mixture freezes well for up to 3 months. However, don't add the cheese or fresh toppings before freezing. Thaw overnight in the refrigerator, reheat thoroughly, then add fresh cheese and toppings.
- → What if I don't have taco seasoning?
No problem! Make your own by mixing 1 tablespoon chili powder, 1 teaspoon each of cumin and paprika, 1/2 teaspoon each of garlic powder, onion powder, and oregano, and a pinch of cayenne pepper. Adjust to taste!
- → My rice came out mushy, what happened?
This usually means there was too much liquid or the heat was too high during simmering. Make sure you're using the exact amount of broth specified (1.5 cups), keep the heat on low once covered, and don't stir the rice while it's cooking. A tight-fitting lid is also essential.
- → Can I make this in an Instant Pot?
Absolutely! Use the sauté function to brown the beef and add seasonings. Add rice, broth, beans, and corn, then pressure cook on high for 8 minutes with natural release for 5 minutes. Quick release remaining pressure, add cheese, and top with fresh ingredients.
Conclusion
This One-Pot Ground Beef Burrito Bowl is the ultimate weeknight hero. With minimal prep, one pot, and maximum flavor, you'll have a restaurant-quality Tex-Mex meal on the table in 30 minutes. The combination of seasoned beef, fluffy rice, and all those colorful toppings creates layers of texture and taste that everyone will love. Plus, cleanup is a breeze – which means more time enjoying your delicious creation!