
 pin it
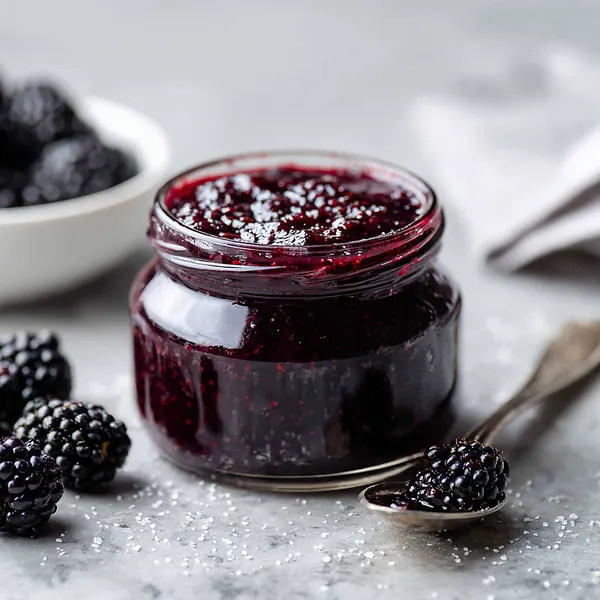
I first discovered the magic of homemade blackberry jam during a summer trip to my grandmother's farmhouse in the countryside. She had these wild blackberry bushes growing along her property line, and every August, we'd spend an afternoon picking berries together, our fingers stained purple by the end. Back in her cozy kitchen, she showed me her simple method – no fancy equipment needed, just good fruit, sugar, and patience. What struck me most was how the berries transformed from fresh fruit into this glossy, thick preserve that captured the essence of summer in a jar. The process was almost meditative: stirring the pot, watching the foam rise, testing for the perfect consistency on a cold plate. Years later, I still use her basic technique, though I've added my own twist with extra lemon zest for brightness. This recipe represents more than just a preserve to me – it's a connection to tradition, to simpler times, and to the satisfaction of creating something beautiful and delicious with your own hands. Every time I make it, I'm transported back to that sunny kitchen, my grandmother's patient voice guiding me through each step, teaching me that the best things in life often come from the simplest ingredients treated with care and respect.
Why I love this recipe
What I absolutely love about this blackberry jam recipe is how it proves that you don't need to be a master canner or have years of experience to create something truly spectacular. It's forgiving, straightforward, and delivers consistent results every single time. The deep, complex flavor you get from fresh blackberries is simply unmatched by anything you can buy at the store. I love how versatile it is too – some mornings I'll spread it thick on toast, other days I'll dollop it into oatmeal or swirl it through vanilla ice cream for an instant dessert. There's also something deeply satisfying about the whole process: the way the berries break down and release their juices, the gradual thickening as the sugar works its magic, and that moment when you realize it's reached the perfect consistency. The color alone makes me happy – that rich, jewel-toned purple that practically glows in the jar. Beyond the taste and appearance, I love that this recipe connects me to a long tradition of food preservation, something humans have been doing for centuries. In our modern world of instant everything, taking the time to make jam feels almost rebellious, and the reward is a jar of pure, unadulterated deliciousness that you made with your own two hands.
What You Need From Your Kitchen
- Fresh Blackberries: Rinse thoroughly and pat dry, then gently crush half of them while leaving others whole for a nice texture.
- Granulated Sugar: Measure accurately and mix with the berries to help release their natural juices and preserve the jam.
- Fresh Lemon Juice: Squeeze fresh lemons and strain out seeds to add brightness and help with pectin activation.
- Lemon Zest: Finely grate the yellow outer peel of the lemon for extra citrus flavor without bitterness.
- Fruit Pectin: Optional thickening agent that helps the jam set faster, especially useful with very ripe berries.
Let's Make These Together
- Prepare Your Berries
- Start by giving your fresh blackberries a gentle rinse under cold water, being careful not to bruise these delicate beauties. Pat them dry with paper towels and pick through them to remove any stems, leaves, or berries that don't look their best. Transfer them to your large, heavy-bottomed pot – this is important because the thick bottom distributes heat evenly and prevents scorching. Now comes the fun part: take a potato masher and crush about half the berries, leaving the rest whole. This gives your jam that perfect texture with some whole berry pieces suspended in glossy, thick fruit spread.
- Mix with Sugar and Lemon
- Add your measured sugar, freshly squeezed lemon juice, and that beautiful aromatic lemon zest right into the pot with your berries. Give everything a good stir with your wooden spoon until well combined. Here's a little trick: let this mixture sit for about 5 minutes before you start cooking. During this time, the sugar begins to dissolve and draws out the natural juices from the blackberries, creating a syrupy base that will help your jam cook evenly. You'll notice the sugar starting to dissolve and the berries releasing their gorgeous purple juice.
- Cook to Perfection
- Place your pot over medium-high heat and bring everything to a rolling boil – that's a boil that doesn't stop bubbling even when you stir it. If you're using pectin, this is when you add it according to the package directions. Now begins the most important part: stirring frequently and watching carefully. As the mixture boils, you'll see foam forming on the surface – just skim this off with a spoon and discard it. Keep stirring every minute or so to prevent sticking, and watch as the liquid gradually reduces and thickens. This typically takes 15-20 minutes, but cooking time can vary based on your berries' natural pectin content and water content. The jam is approaching readiness when it starts to coat the back of your spoon and drips off in thick drops rather than running off quickly.
- Test and Jar
- Here's the foolproof way to know when your jam is perfectly set: keep a small plate in your freezer while cooking. When you think the jam might be ready, remove the pot from heat and drop a spoonful of jam onto that ice-cold plate. Wait 30 seconds, then push your finger through the jam. If it wrinkles up and holds the line your finger made, congratulations – it's done! If it's still runny, return the pot to the heat and cook for another 2-3 minutes before testing again. Once it passes the wrinkle test, let it cool for about 5 minutes, then carefully ladle the hot jam into your sterilized jars, leaving a quarter-inch of space at the top. Wipe the rims clean with a damp cloth, seal with the lids, and let them cool completely on your counter. You'll hear the satisfying 'pop' of the lids sealing as they cool down.
 pin it
Switch Things Up
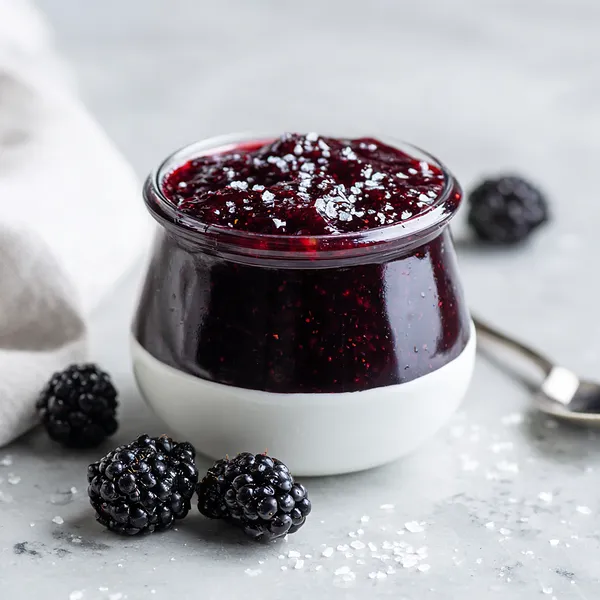
I remember the first time I made blackberry jam – it was a sunny Saturday morning and I had just returned from the farmer's market with the most gorgeous, plump blackberries I'd ever seen. I knew I had to do something special with them beyond just eating them straight from the container. As the berries started to bubble and release their incredible aroma, my kitchen transformed into something magical. The deep purple color intensified as the mixture thickened, and I couldn't help but taste-test every few minutes (quality control, right?). When I finally poured that first batch into jars and heard the satisfying 'pop' of the lids sealing, I felt like a real homesteader. The next morning, spreading that jam on warm toast was pure bliss – sweet, slightly tart, with whole berry pieces that burst in your mouth. Now I make this every summer when blackberries are at their peak, and I've started a little tradition of giving jars to neighbors and friends. There's something incredibly satisfying about creating something so delicious from scratch, and watching people's faces light up when they taste it makes all the stirring worthwhile.
Perfect Pairings
This blackberry jam pairs beautifully with so many foods beyond the classic toast. Try it swirled into Greek yogurt for a protein-packed breakfast, or spread it between layers of a vanilla cake for an elegant dessert. It's absolutely divine on warm buttermilk biscuits with a pat of butter, or as a topping for fluffy pancakes and waffles. For a savory twist, use it as a glaze for roasted pork tenderloin or mix it with balsamic vinegar for a unique salad dressing. It also makes an excellent addition to a cheese board – pair it with creamy brie, sharp cheddar, or tangy goat cheese and some crackers. Don't forget about scones! A dollop of this jam alongside clotted cream on a fresh-baked scone is the ultimate afternoon tea treat.
 pin it
Frequently Asked Questions
- → How long does homemade blackberry jam last?
When stored in sterilized jars in the refrigerator, your homemade blackberry jam will last up to 3 weeks. For longer storage, you can process the sealed jars in a water bath canner for 10 minutes, which extends the shelf life to about 1 year when stored in a cool, dark place. Once opened, always refrigerate and use within 3 weeks.
- → Can I use frozen blackberries instead of fresh?
Absolutely! Frozen blackberries work wonderfully for jam-making. Just thaw them completely first and drain any excess liquid before you begin cooking. Frozen berries may actually produce slightly more liquid during cooking, so you might need to cook the jam a bit longer to achieve the right consistency. The flavor will be just as delicious.
- → Why isn't my jam thickening properly?
There are several reasons jam might not set: the berries may have been overripe (less natural pectin), you didn't cook it long enough, or the ratio of sugar to fruit was off. If your jam is too runny after cooling, you can actually pour it back into the pot, bring it to a boil again, and add some commercial pectin or cook it longer until it reaches the right consistency.
- → Do I need to remove the blackberry seeds?
This is entirely a personal preference! Traditional blackberry jam includes the seeds, which add a rustic texture many people love. However, if you prefer a smoother jam, you can press the cooked mixture through a fine-mesh sieve or food mill to remove most of the seeds. Just be aware that you'll lose some volume when straining.
- → Can I reduce the amount of sugar in this recipe?
While you can reduce the sugar somewhat, keep in mind that sugar isn't just for sweetness – it's also crucial for preservation and helping the jam set properly. Reducing sugar significantly may result in a thinner consistency and shorter shelf life. If you want less sugar, consider using a low-sugar pectin specifically designed for reduced-sugar recipes, which will help maintain the proper texture.
- → What's the best way to sterilize jars for canning?
The easiest method is to wash jars and lids in hot, soapy water, then place them in a large pot of boiling water for 10 minutes. Alternatively, run them through a complete dishwasher cycle on the hottest setting. Keep the jars hot until you're ready to fill them – this prevents the glass from cracking when you add the hot jam.
Conclusion
This homemade blackberry jam is a delightful way to preserve the taste of summer berries year-round. The natural sweetness of the blackberries combined with just the right amount of sugar and a hint of lemon creates a perfectly balanced spread. Whether you're slathering it on morning toast, using it as a cake filling, or gifting it to loved ones, this jam brings joy to every occasion. The simple process proves that making your own preserves isn't intimidating – it's actually quite rewarding. Store your jam in sterilized jars in the refrigerator for up to three weeks, or process in a water bath for longer shelf life.