
 pin it
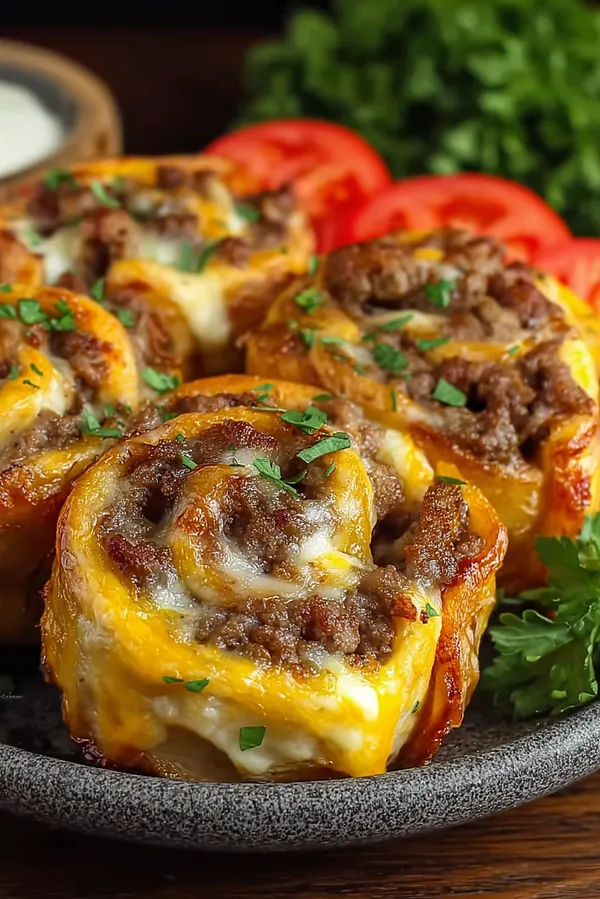
I first encountered the concept of cheeseburger rollups at a friend's potluck, and I was immediately hooked. The idea of transforming a classic cheeseburger into a rolled, sliceable format was genius. When I decided to create my own version, I knew I wanted to elevate it with garlic butter, because let's be honest, garlic butter makes everything better. These rollups start with perfectly seasoned ground beef cooked with diced onions until beautifully browned. Then comes the magic - spreading that beef mixture over pizza dough, layering it with a generous amount of cheddar and mozzarella cheese. Rolling it up creates these beautiful spirals that look incredibly impressive but are actually quite simple to make. The garlic butter brushed on top before baking adds this restaurant-quality finish that takes them from good to absolutely incredible. When they bake, the cheese melts into the beef, the dough turns golden and slightly crispy, and the garlic butter creates this amazing crust. Slicing them reveals those gorgeous swirls of beef and cheese, and topped with fresh parsley, they're almost too pretty to eat - almost!
Why I love this recipe
What I love most about this recipe is how it takes familiar flavors and presents them in such a fun, creative way. There's something so satisfying about the process of rolling these up and seeing those perfect spirals. They're incredibly versatile - great as a main dish, appetizer, or party food. I love that they can be made ahead and reheated without losing their appeal. The garlic butter is truly the star here, adding this layer of richness that elevates the entire dish. These rollups are also perfect for feeding a crowd because they're easy to portion and serve. Kids absolutely go crazy for them, which makes them perfect for family dinners. I appreciate that while they look and taste impressive, they're made with simple, accessible ingredients. The combination of textures - the tender dough, the savory beef, the gooey melted cheese - creates this perfect bite every time. Plus, there's something nostalgic about them that reminds me of the best parts of enjoying a classic cheeseburger, but in a form that's even more fun to eat.
What You Need From Your Kitchen
- Ground Beef: Brown with onions until fully cooked and drain excess fat
- Cheddar Cheese: Shred and layer over the beef mixture for a sharp, tangy flavor
- Mozzarella Cheese: Shred and combine with cheddar for perfect melting texture
- Pizza Dough: Roll out into a rectangle to wrap around the filling
- Butter: Melt and mix with garlic for brushing
- Garlic: Mince finely and combine with melted butter
- Onion: Dice and sauté with the ground beef
Let's Make These Together
- Prepare the Meat Filling
- Start by heating your skillet over medium-high heat and cooking the ground beef with diced onions. Break up the meat as it cooks to ensure even browning. Once the beef is no longer pink and the onions are soft and translucent, drain any excess grease. Add the Worcestershire sauce and season generously with salt and pepper. This step builds the foundational flavor of your rollups, so don't rush it. Let the mixture cool slightly before using it to prevent the dough from becoming too soft when you assemble.
- Roll and Fill the Dough
- On a clean, lightly floured surface, roll out your pizza dough into a large rectangle. Aim for an even thickness throughout so your rollups cook uniformly. Spread the cooled beef mixture evenly over the dough, leaving that important border around the edges - this prevents the filling from spilling out when you roll. Sprinkle both cheeses generously and evenly over the beef. The combination of cheddar and mozzarella gives you both flavor and that perfect stretchy, melty texture.
- Create Perfect Spirals
- Starting from one long edge, begin rolling the dough tightly but gently. You want a snug roll that holds together but isn't so tight that it squeezes out the filling. Once rolled, pinch the seam closed and position the roll seam-side down. Using a sharp knife, slice into six even pieces. The key here is to use a sawing motion rather than pressing down, which keeps the beautiful spiral shape intact. Arrange them in your baking dish with the swirls facing up.
- Apply Garlic Butter Magic
- This is where the magic happens! Mix your melted butter with minced garlic and brush it generously over the top of each rollup before baking. This creates a golden, flavorful crust as they bake. After they come out of the oven, brush them again with more garlic butter while they're still hot - it soaks in and adds an incredible depth of flavor. Top with fresh parsley for color and a hint of freshness.
 pin it
Switch Things Up
I remember the first time I made these rollups for a casual Friday night dinner. I was craving cheeseburgers but wanted something different, something I could prep ahead and serve warm throughout the evening. As I rolled up the beef and cheese in the dough, I knew I was onto something special. When they came out of the oven, golden and bubbling, my family couldn't believe how amazing they looked. The garlic butter brushed on top added this incredible aroma that filled the whole house. We ended up eating them straight from the pan, and they became an instant favorite. Now, whenever I make these, I always double the recipe because they vanish so quickly. The best part is how versatile they are - sometimes I add pickles inside for that classic burger tang, or throw in some crispy bacon bits. These rollups have become my go-to for game nights and family gatherings.
Perfect Pairings
These Cheeseburger Rollups pair beautifully with classic burger accompaniments. Serve them with crispy french fries or sweet potato fries for the ultimate comfort meal. A fresh garden salad with ranch dressing provides a nice contrast to the rich, cheesy rollups. For dipping, offer ketchup, mustard, special sauce, or even a tangy pickle relish. Coleslaw makes an excellent side dish, adding crunch and freshness. If you're serving these at a party, pair them with loaded potato skins, mozzarella sticks, or buffalo wings for an amazing appetizer spread.
 pin it
Frequently Asked Questions
- → Can I use a different type of meat?
Absolutely! Ground turkey, chicken, or even plant-based meat alternatives work well in this recipe. Just adjust the cooking time as needed and ensure the meat is fully cooked before assembling the rollups.
- → Can I freeze these cheeseburger rollups?
Yes! You can freeze them either before or after baking. To freeze unbaked rollups, assemble them completely, wrap tightly in plastic wrap and foil, and freeze for up to 2 months. Bake from frozen, adding 10-15 minutes to the cooking time. For baked rollups, cool completely, wrap well, and freeze. Reheat in the oven at 350°F until warmed through.
- → What can I serve with these rollups?
These pair wonderfully with french fries, a fresh garden salad, coleslaw, or roasted vegetables. For dipping, try ketchup, mustard, special sauce, ranch dressing, or even a spicy sriracha mayo.
- → Can I make these ahead of time?
Yes! You can assemble the rollups completely, cover them tightly, and refrigerate for up to 4 hours before baking. This makes them perfect for entertaining. Just add a few extra minutes to the baking time if they're going in cold from the refrigerator.
- → How do I prevent the dough from getting soggy?
The key is to drain the beef very well after cooking to remove excess grease. Also, let the meat mixture cool slightly before spreading it on the dough. Make sure your oven is fully preheated, and don't overcrowd the rollups in the pan - this allows for proper air circulation and helps them crisp up nicely.
- → Can I add other ingredients to the filling?
Definitely! Crumbled bacon, diced pickles, jalapeños, sautéed mushrooms, or bell peppers are all great additions. Just make sure any vegetables are cooked and drained well before adding to prevent excess moisture in the rollups.
Conclusion
These Garlic Butter Cheeseburger Rollups are the perfect fusion of classic cheeseburger flavors in a fun, shareable format. Whether you're serving them as an appetizer, main dish, or party snack, they're guaranteed to disappear fast. The combination of seasoned beef, melted cheese, and garlic butter creates an irresistible flavor that everyone will love. Make a double batch because trust me, one won't be enough!