
 pin it
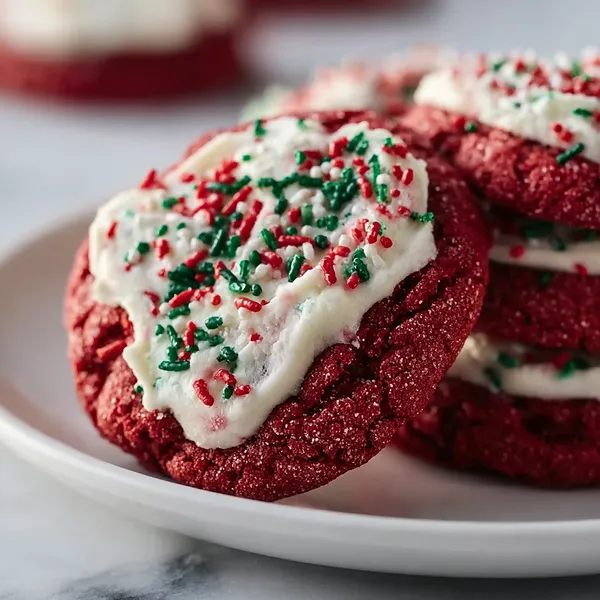
I first discovered red velvet sandwich cookies at a small bakery during a holiday market, and I was instantly captivated by their festive appearance and the promise of cream cheese frosting. The baker told me they were a twist on traditional red velvet cake, and I knew I had to recreate them at home. After several attempts to get the texture just right, I finally developed this recipe that produces soft, tender cookies with just the right amount of cocoa flavor. The red velvet cookies themselves have a subtle chocolate taste that isn't overpowering, which allows the tangy cream cheese frosting to really shine. What makes these special is how the slightly crisp edges give way to a soft, almost cake-like center. The cream cheese frosting is thick enough to hold its shape between the cookies but still melts slightly from the warmth of freshly baked cookies. When you add those festive sprinkles on top, they transform from simple sandwich cookies into a holiday celebration on a plate. Every time I make these, I'm transported back to that little bakery and the magic of discovering something new and delicious.
Why I love this recipe
What I love most about this recipe is how it brings together the elegance of red velvet cake with the fun, approachable nature of cookies. There's something inherently joyful about sandwich cookies - they remind me of childhood treats but with a sophisticated twist. The cream cheese frosting is what really sets these apart from other cookies; it's tangy enough to balance the sweetness but still indulgent and rich. I also appreciate how forgiving this recipe is - even if your cookies aren't perfectly round or uniform, they still look charming when stacked and decorated. These cookies are incredibly versatile too; you can make them for holidays with festive sprinkles, or keep them simple for any occasion. They also freeze beautifully, which means I can make a big batch and have homemade cookies ready whenever I need them. But beyond all the practical reasons, I love these cookies because they never fail to make people smile. There's something about that vibrant red color and creamy white frosting that just looks happy and inviting.
What You Need From Your Kitchen
- All-purpose flour: Whisk together with cocoa powder and set aside for even distribution
- Unsalted butter: Soften to room temperature and cream with sugar until light and fluffy
- Eggs: Add one at a time to the creamed butter mixture, beating well after each addition
- Red food coloring: Mix into the wet ingredients to achieve vibrant red color
- Cream cheese: Soften to room temperature and beat until smooth for the frosting
- Powdered sugar: Gradually add to cream cheese while beating for smooth frosting
- Holiday sprinkles: Sprinkle immediately on frosted cookie edges for festive decoration
Let's Make These Together
- Prepare the dry ingredients
- Start by preheating your oven to 350°F and lining your baking sheets with parchment paper. In a medium bowl, whisk together the all-purpose flour and cocoa powder until well combined. This step is crucial because it ensures the cocoa powder is evenly distributed throughout the flour, which will give your cookies that consistent red velvet color and subtle chocolate flavor throughout.
- Create the cookie base
- In your large mixing bowl, cream together the softened butter and granulated sugar using an electric mixer on medium speed. Beat for about 3-4 minutes until the mixture becomes light, fluffy, and pale in color. This process incorporates air into the dough, which helps create tender cookies. Add your eggs one at a time, making sure each egg is fully incorporated before adding the next. Then mix in the red food coloring and vanilla extract, beating until the color is vibrant and evenly distributed throughout the mixture.
- Combine and shape dough
- With your mixer on low speed, gradually add the flour and cocoa mixture to the wet ingredients. Mix only until the flour is just incorporated - overmixing can lead to tough cookies. Using a tablespoon or cookie scoop, drop rounded portions of dough onto your prepared baking sheets, spacing them about 2 inches apart to allow for spreading. The dough should be thick and slightly sticky.
- Bake to perfection
- Bake the cookies in your preheated oven for 10-12 minutes. Watch them carefully - you want the edges to be set and just beginning to firm up, while the centers should still look slightly soft and puffy. They might seem underdone, but they'll continue to cook on the hot baking sheet after you remove them from the oven. Let them rest on the baking sheet for 5 minutes to set, then carefully transfer them to a wire rack to cool completely before frosting.
- Make the cream cheese frosting
- While your cookies are cooling, prepare the frosting by beating the softened cream cheese in a clean bowl until it's smooth and creamy with no lumps. Gradually add the powdered sugar, beating continuously until the frosting is light, fluffy, and well combined. The frosting should be thick enough to hold its shape but spreadable. If it seems too thick, add a tiny bit of milk, one teaspoon at a time.
- Assemble your sandwich cookies
- Once your cookies are completely cool, it's time for the fun part! Take one cookie and spread or pipe a generous layer of cream cheese frosting on the flat bottom side. Place another cookie on top, flat side down, and gently press them together. The frosting should spread slightly to the edges. While the frosting is still soft, roll the edges of the cookie sandwich in holiday sprinkles or sprinkle them over the exposed frosting. Repeat this process with all remaining cookies, and enjoy your beautiful creations!
 pin it
Switch Things Up
I'll never forget the first time I made these cookies for my family's holiday gathering. I was nervous because I'd never made sandwich cookies before, but something about the vibrant red color and the promise of cream cheese frosting kept me motivated. As I was assembling them, I got a little too generous with the frosting on the first few (okay, maybe more than a little), and they looked absolutely ridiculous - frosting oozing out everywhere! But when my nephew took his first bite, his eyes lit up and he declared them the best cookies he'd ever had. Now it's become our tradition - I make them every year, and yes, I still go heavy on the frosting because that's how we like them. The messier, the better! Last year, I even let the kids help decorate with sprinkles, which resulted in more sprinkles on the counter than on the cookies, but the memories and laughter made it all worthwhile.
Perfect Pairings
These Red Velvet Sandwich Cookies pair beautifully with a cold glass of whole milk, which helps balance their rich sweetness. For an adult twist, serve them alongside a hot cup of coffee or even a glass of dessert wine. They also make an excellent companion to vanilla ice cream - try crumbling one over a scoop for an impromptu cookie sundae. During the holidays, I love serving these with hot cocoa topped with marshmallows for the ultimate cozy dessert experience. They're also fantastic alongside fresh berries or a fruit salad if you want something lighter to cut through the richness.
 pin it
Frequently Asked Questions
- → Can I make these cookies ahead of time?
Yes! You can bake the cookies up to 3 days in advance and store them in an airtight container at room temperature. Make the frosting and assemble the sandwiches on the day you plan to serve them for the best texture and freshness. Assembled cookies can be refrigerated for up to 5 days.
- → Why are my cookies spreading too much?
If your cookies are spreading excessively, it could be because your butter was too soft or melted, or your dough was too warm. Make sure your butter is softened but not melted, and consider chilling the dough for 15-20 minutes before baking if your kitchen is very warm.
- → Can I use gel food coloring instead of liquid?
Absolutely! Gel food coloring actually works better because it's more concentrated, so you'll need less of it to achieve a vibrant red color. Start with about 1 teaspoon of gel coloring and add more if needed. This also means you're adding less liquid to your dough, which can help maintain the proper consistency.
- → How do I store these cookies?
Because these cookies contain cream cheese frosting, they must be stored in an airtight container in the refrigerator. They'll stay fresh for up to 5 days. Let them sit at room temperature for about 10-15 minutes before serving for the best flavor and texture.
- → Can I freeze these sandwich cookies?
Yes, you can freeze them! Place assembled cookies in a single layer on a baking sheet and freeze until solid, then transfer to a freezer-safe container or bag with parchment paper between layers. They'll keep for up to 2 months. Thaw in the refrigerator overnight before serving.
- → What if I don't have red food coloring?
While the red color is what makes these red velvet cookies special, you can still make them without food coloring. They'll taste the same but will be brown from the cocoa powder. Alternatively, you could use natural red food coloring made from beets, though the color won't be as vibrant.
Conclusion
These Red Velvet Sandwich Cookies are the ultimate holiday showstopper that combines nostalgic flavors with festive flair. The soft, cocoa-kissed cookies paired with tangy cream cheese frosting create a perfect balance of sweetness and richness. Whether you're baking for a holiday party, gifting to loved ones, or simply treating yourself, these cookies deliver both visual appeal and incredible taste. The addition of holiday sprinkles makes them extra special and perfect for the season. They're surprisingly easy to make and guaranteed to impress everyone who tries them.