
 pin it
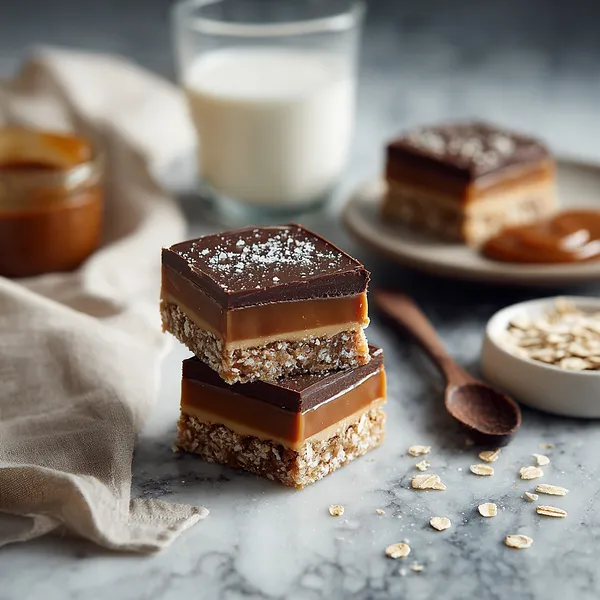
I first encountered Caramelitas years ago at a small bakery café during a trip through the countryside, and I was completely mesmerized by their layered beauty and complex flavor profile. The way the buttery oat crust formed a sturdy foundation, topped with ribbons of glossy caramel that gleamed like liquid gold, all crowned with a layer of smooth chocolate—it was a masterpiece. When I bit into that first square, the contrast of textures was revelatory: the slight crunch of the oat base, the chewiness of the caramel center, and the snap of quality chocolate. From that moment, I knew I had to recreate this magic at home. After studying baking techniques and experimenting with ingredient ratios, I developed my own version that captures that same bakery-quality perfection.
Why I love this recipe
I love these Caramelitas because they represent the perfect intersection of simple ingredients and sophisticated results. There's something magical about how three humble layers—oats, caramel, and chocolate—transform into something so crave-worthy and impressive. What makes this recipe special is its versatility; you can make it for weeknight desserts, special occasions, or holiday gift boxes. The texture play keeps me coming back: that satisfying crunch of the oat crust giving way to sticky-sweet caramel, finished with a smooth chocolate top. Plus, there's the practical magic of making something bakery-quality at home without requiring advanced baking skills. Every time I make a batch, the entire kitchen fills with an intoxicating aroma of buttered oats and caramel that signals comfort and indulgence.
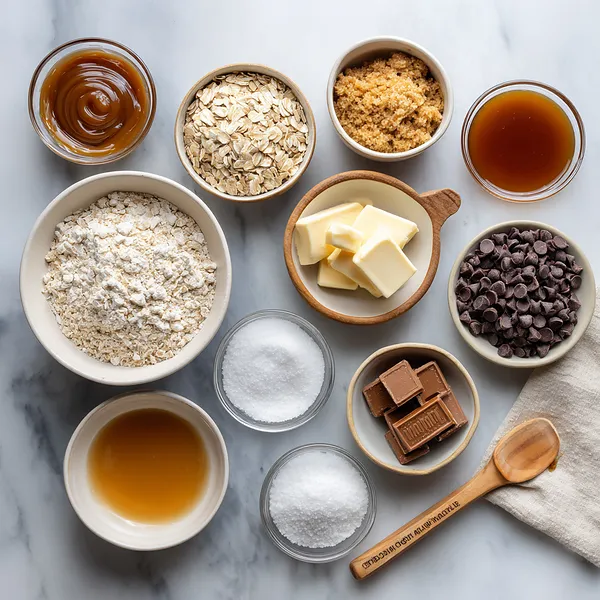
What You Need From Your Kitchen
- Rolled oats: Forms the base and topping, providing a crumbly texture and nutty flavor that anchors the three-layer bar.
- Butter: Creates the rich, tender crumb of the oat base and helps bind all the layers together seamlessly.
- Brown sugar: Adds moisture and deep caramel notes to the base while contributing to the chewy texture throughout.
- Caramel sauce: The star middle layer that provides the signature gooey, sweet center that makes these bars irresistible.
- Chocolate chips: Melts into a glossy top layer that balances the sweetness with rich cocoa undertones.
- Coconut oil: Helps the chocolate melt smoothly and creates a professional-looking glossy finish without graininess.
Let's Make These Together
- Make your crumbly oat base
- Start by creaming together your softened butter and brown sugar until it's light and fluffy. This step is crucial because it incorporates air into the mixture, which will give your final bars a tender crumb. Once fluffy, add vanilla extract for depth. In a separate bowl, combine flour, rolled oats, and sea salt. These dry ingredients are what will create that satisfying crunch and nutty backbone. Fold everything together gently—you want a texture like coarse breadcrumbs, not a wet dough. This is the foundation for everything that comes next.
- Bake, then layer with caramel magic
- Press about two-thirds of your oat mixture firmly into the prepared pan, making sure it's compact and even. A light pre-bake (10-12 minutes) sets the structure. While it's still warm, pour that beautiful caramel sauce over the top and spread it evenly with an offset spatula. The warmth helps it distribute smoothly and ensures every bite has that gooey caramel center. This is where the magic starts—you can almost smell the caramel becoming part of the structure.
- Top with chocolate and that special finishing touch
- Scatter your semi-sweet chocolate chips generously over the warm caramel layer. They'll start to soften immediately. Quickly melt coconut oil (just 15-30 seconds in the microwave) and drizzle it over the chips to help them melt into a glossy, professional-looking layer. Then top with your reserved oat mixture, pressing gently so it sticks to the chocolate. Bake for another 15-18 minutes until golden brown.
- Cool and finish with fleur de sel flourish
- This is the hardest part—resisting the urge to cut into your warm bars! Let them cool completely on a wire rack (about 2 hours) so the layers set properly and you get clean cuts. Right after baking, while everything is still slightly warm, sprinkle a light dusting of fleur de sel across the top. This salt crystals create a sophisticated flavor contrast that elevates the entire bar from good to absolutely unforgettable.
 pin it
Switch Things Up
I first discovered Caramelitas at a local farmers market in Colorado, sampling from a small bakery booth. The vendor explained how she'd combined classic German chocolate cake inspiration with American brownie simplicity. I was immediately hooked and spent the next week perfecting my own version in my kitchen. After several attempts tweaking the caramel-to-chocolate ratio and testing different oat crust thicknesses, I finally nailed the balance. Now, these bars are my go-to gift for neighbors and my most-requested dessert at potlucks. The recipe has become such a staple in my baking rotation that I make a triple batch every month.
Perfect Pairings
Caramelitas pair beautifully with a cold glass of whole milk, which cuts through the richness perfectly. For coffee lovers, serve alongside a strong espresso or cappuccino to balance the sweetness. These bars also work wonderfully with vanilla ice cream—the cold creaminess melts into the warm caramel layer. For a sophisticated pairing, try them with a cup of hot chamomile or lavender tea, which complements the caramel notes. They're also excellent alongside fresh fruit like raspberries or strawberries for a lighter contrast.
 pin it
Frequently Asked Questions
- → Can I use salted caramel instead of regular caramel?
Absolutely! Salted caramel works beautifully and adds extra depth. Just reduce the fleur de sel topping to avoid oversalting. Some bakers prefer the extra complexity that salted caramel brings to these bars.
- → How do I achieve perfectly clean cuts?
Use a sharp knife dipped in hot water and wiped dry between each cut. Chilled bars (refrigerated for 30 minutes) also cut cleaner than room-temperature bars. Some bakers use dental floss for perfectly clean edges.
- → Can I make these gluten-free?
Yes! Substitute all-purpose flour with a 1:1 gluten-free flour blend. The oats should also be certified gluten-free oats. The texture will be slightly different but still delicious.
- → What's the best way to store leftover Caramelitas?
Keep them in an airtight container at room temperature for up to 5 days. For longer storage, refrigerate up to 2 weeks or freeze for up to 2 months. They actually taste even better after a day as flavors meld together.
- → Can I double this recipe?
Yes! Use a 9x18 inch pan or two 9x13 inch pans. Baking time remains about the same—just check the edges at 15 minutes to ensure even browning. Doubling works perfectly for parties or meal prep.
Conclusion
Caramelitas are the ultimate treat that combines simplicity with indulgence. With their three irresistible layers and that perfect salty-sweet finish, these bars are destined to become a household favorite. Whether you're making them for a special occasion or just because you deserve something delicious, one bite will remind you why caramel, chocolate, and oats are the perfect trio. Make a batch today and watch them disappear faster than you expected!