
 pin it
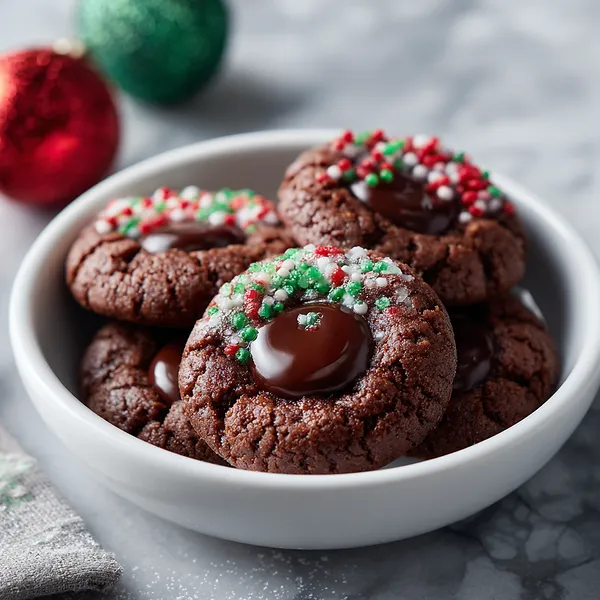
I first discovered thumbprint cookies at my grandmother's house during the holidays, but hers were always filled with raspberry jam. While I loved them, I always craved more chocolate. Years later, when I started my own holiday baking traditions, I decided to reimagine this classic with a chocolate twist. These cookies start with a tender, cocoa-rich dough that's incredibly forgiving and easy to work with. The magic happens when you press your thumb into each ball of dough, creating that signature indentation. After baking, the cookies have this wonderful crackled surface and stay soft in the center. Then comes my favorite part – the ganache filling. It's simply chocolate and cream, heated until silky smooth, then spooned into each cookie. While it's still wet, I scatter festive sprinkles on top, and they stick beautifully. The result is a cookie that's chocolate through and through – from the base to the filling – with a pop of holiday color. They're sophisticated enough for adult gatherings but fun enough that kids go crazy for them. Every time I make these, I'm transported back to those cozy holiday moments, but with the chocolate intensity I always wished for as a kid.
Why I love this recipe
What I love most about this recipe is how it delivers maximum impact with minimal effort. The dough is straightforward – no chilling required, no rolling pins, no cookie cutters. You simply scoop, roll, and press. Yet the end result looks like something from a professional bakery. The chocolate flavor is deep and satisfying, not too sweet, which makes them perfect for chocolate lovers. I also appreciate how customizable they are – you can use different sprinkles for various occasions, or even fill them with different flavored ganaches. The texture is another winner: the cookies are tender and slightly chewy, while the ganache center adds a smooth, luxurious contrast. These cookies also store beautifully, which is rare for filled cookies. They don't get soggy or dry out quickly. I love that I can make them a few days ahead without sacrificing quality. But honestly, the biggest reason I love this recipe is the joy it brings. When I arrange these cookies on a platter, everyone's eyes light up. They photograph beautifully, taste incredible, and make people feel special. That's what holiday baking is all about for me.
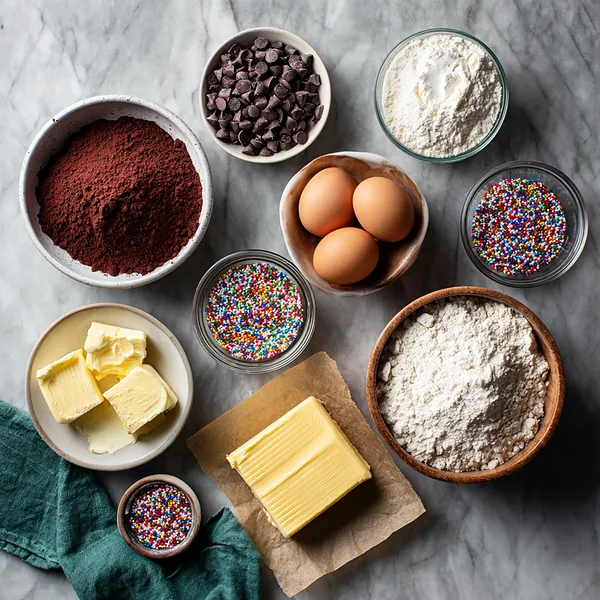
What You Need From Your Kitchen
- Unsalted Butter: Bring to room temperature and cut into cubes for easier creaming with sugar
- All-Purpose Flour: Measure accurately using the spoon-and-level method to avoid dense cookies
- Cocoa Powder: Sift before using to remove any lumps and ensure even distribution in the dough
- Semi-Sweet Chocolate Chips: Use for making the smooth ganache filling, can substitute with dark chocolate for richer flavor
- Heavy Cream: Heat gently until just simmering to create the perfect ganache consistency
- Festive Sprinkles: Choose holiday-colored nonpareils, jimmies, or sanding sugar for decoration
Let's Make These Together
- Create the Cookie Dough Base
- Start by bringing your butter to room temperature – this is crucial for achieving that light, fluffy texture. Cream it with sugar until the mixture looks pale and airy, which incorporates air for tender cookies. Add your egg and vanilla, mixing until everything is smoothly combined. This creates the flavorful foundation of your cookies.
- Incorporate Dry Ingredients
- Whisk your flour, cocoa powder, and salt together in a separate bowl first. This ensures the cocoa is evenly distributed throughout the dough, giving every cookie that rich chocolate flavor. Gradually fold the dry mixture into your wet ingredients, being careful not to overmix. Stop as soon as you no longer see streaks of flour – overmixing develops gluten and makes cookies tough.
- Shape and Indent Cookies
- Roll your dough into uniform balls about 1 inch in diameter. Consistent sizing ensures even baking. Place them on your prepared baking sheets with plenty of space between each one. Now comes the fun part – press your thumb firmly into the center of each ball to create a deep well. Don't be shy about this; you need a good indentation to hold that luscious ganache later. The cookies will spread slightly as they bake, but the thumbprint should remain visible.
- Bake to Perfection
- Slide your cookies into the preheated oven and bake until they're set but still soft to the touch. They might look slightly underdone, but they'll continue to firm up as they cool. If you notice the thumbprints have puffed up during baking, quickly re-press them while the cookies are still hot from the oven. Let them cool on the baking sheet for a few minutes to set, then transfer to a wire rack.
- Prepare Ganache Filling
- Making ganache is incredibly simple but feels so luxurious. Heat your cream until it just starts to simmer, then pour it over your chocolate chips. Let physics do its magic for a couple minutes, then whisk until you have a glossy, silky mixture. The ganache will thicken as it cools slightly, reaching the perfect consistency for filling. Don't let it cool too much or it'll be too thick to work with.
- Fill and Decorate
- Once your cookies are completely cool, spoon or pipe the ganache into each thumbprint. Fill them generously – the ganache should dome slightly above the cookie surface. While the ganache is still wet and sticky, sprinkle your festive decorations on top. They'll adhere beautifully to the wet chocolate. Let everything set for about half an hour, and you'll have gorgeous, bakery-worthy cookies ready to enjoy.
 pin it
Switch Things Up
I remember the first time I made these cookies – it was two weeks before Christmas and I was desperately trying to find something special for our neighborhood cookie swap. I wanted chocolate, but thumbprint cookies are usually filled with jam, which felt too predictable. That's when inspiration struck: why not fill them with chocolate ganache instead? The dough came together so easily, and making those little thumbprints with my thumb was oddly satisfying. When I piped the warm ganache into each indentation and added the sprinkles, they looked absolutely stunning. At the cookie swap, they were gone in minutes. People kept asking for the recipe, surprised at how simple they were to make. Now, every holiday season, I make at least three batches because my family requests them constantly. My kids love helping press the thumbprints, and my husband has been known to sneak one straight from the cooling rack. They've become our signature holiday cookie, and honestly, I can't imagine the season without them now.
Perfect Pairings
These Chocolate Thumbprint Cookies pair beautifully with so many beverages and desserts. Serve them alongside a cup of hot cocoa or coffee for the ultimate chocolate experience – the slight bitterness of coffee balances the sweetness perfectly. They're also wonderful with a glass of cold milk, especially for kids. For a more sophisticated pairing, try them with a robust red wine or port. If you're creating a dessert spread, these cookies complement vanilla ice cream wonderfully, or serve them alongside peppermint bark and gingerbread for a festive cookie platter. They also pair nicely with fruit – fresh raspberries or strawberries provide a bright, tart contrast to the rich chocolate. For a cozy evening treat, enjoy them with hot spiced apple cider or peppermint tea.
 pin it
Frequently Asked Questions
- → Can I make these cookies ahead of time?
Absolutely! These cookies actually store beautifully. You can bake the cookie bases up to 3 days ahead and store them unfilled in an airtight container. Fill them with ganache the day you plan to serve them for the freshest appearance. Alternatively, you can make them completely finished and store them in an airtight container for up to 5 days at room temperature, or refrigerate for up to 2 weeks.
- → Can I freeze chocolate thumbprint cookies?
Yes! Freeze the baked and filled cookies in a single layer on a baking sheet until solid, then transfer to a freezer-safe container with parchment paper between layers. They'll keep for up to 3 months. Thaw at room temperature for about 30 minutes before serving. Note that the sprinkles may bleed slightly upon thawing, so you might want to add fresh sprinkles after thawing if appearance is important.
- → What if I don't have heavy cream for the ganache?
In a pinch, you can substitute with half-and-half or whole milk, though the ganache will be slightly less rich and may take longer to set. For a dairy-free option, use full-fat coconut cream (the thick part from a chilled can of coconut milk). Avoid using low-fat milk products as they won't create a proper ganache consistency.
- → Why did my thumbprints disappear during baking?
This happens when the indentation isn't pressed deeply enough before baking, or if the dough is too warm. Make sure you press firmly to create a deep well. If your thumbprints do puff up during baking, you can re-press them immediately after removing the cookies from the oven while they're still hot – just be careful not to burn yourself!
- → Can I use different fillings instead of chocolate ganache?
Definitely! While chocolate ganache is my favorite, you can fill these with raspberry jam, caramel, peanut butter, Nutella, or even lemon curd. Just be aware that different fillings may require different setting times. Jam fillings can be added before baking, while cream-based fillings like ganache should be added after the cookies have cooled.
- → How do I prevent the cookies from spreading too much?
Make sure your butter isn't too soft or melted – it should be at room temperature but still hold its shape. Also, avoid overmixing the dough, which can develop too much gluten. If your kitchen is warm, you can refrigerate the shaped dough balls for 15-20 minutes before baking to help them hold their shape better.
- → What's the best way to get uniform cookie sizes?
Use a cookie scoop or measuring tablespoon to portion out the dough. A 1-tablespoon scoop creates perfectly sized cookies. You can also weigh the dough portions if you want to be extra precise – each ball should be about 18-20 grams.
Conclusion
These Chocolate Thumbprint Cookies are the perfect addition to your holiday baking lineup. They combine the rich, cocoa-forward flavor of a classic chocolate cookie with an indulgent ganache filling that takes them to the next level. The festive sprinkles add a pop of color and holiday cheer, making them as beautiful as they are delicious. Whether you're baking for a cookie exchange, holiday party, or simply to enjoy with your family, these cookies are guaranteed to disappear quickly. The best part is how easy they are to make – no complicated techniques required, just simple steps that lead to impressive results. Store them in an airtight container and they'll stay fresh for up to a week, though I doubt they'll last that long!