
 pin it
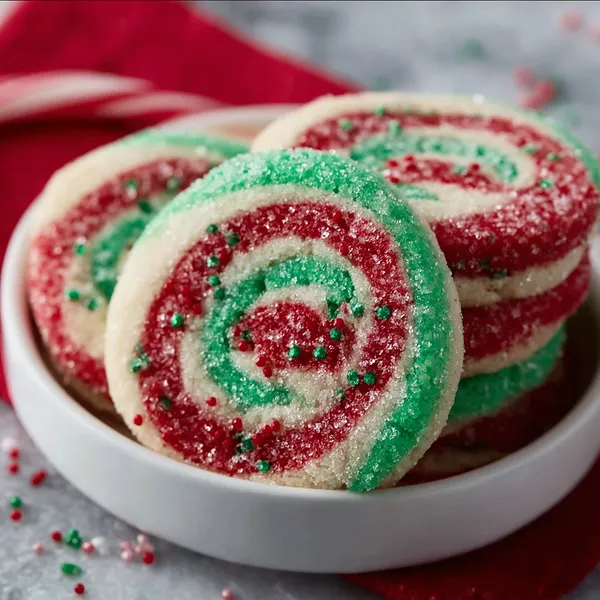
I first encountered pinwheel cookies at my grandmother's Christmas party when I was about eight years old. She had this beautiful crystal platter filled with the most gorgeous spiral cookies I'd ever seen, and I remember thinking they looked too pretty to eat. Of course, I did eat one—and then three more—because they tasted just as amazing as they looked. That buttery, vanilla-sweet flavor with the slight crunch from the sugar coating was pure magic. Years later, when I started my own holiday baking traditions, these cookies were the first ones I wanted to master. I experimented with different color combinations and techniques until I found the perfect method. The secret is keeping your dough chilled so the colors stay distinct and don't bleed into each other. When you roll the three layers together tightly and wrap them in plastic wrap, then chill them thoroughly before slicing, you get those crisp, clean spirals that make people gasp. Every time I make these, I think of my grandmother and that beautiful crystal platter. These cookies represent everything I love about Christmas baking—they're festive, fun, and bring people together with both their beauty and their taste.
Why I love this recipe
I love this recipe because it transforms simple sugar cookie dough into an absolute work of art with just a few extra steps. There's something incredibly satisfying about the process—dividing the dough, tinting each portion, rolling them out, stacking them, and then revealing those perfect swirls with each slice. It feels like unwrapping a present every single time! The colors are so vibrant and cheerful that they instantly lift everyone's spirits during the busy holiday season. What really makes these special is how they taste just as good as they look—that classic buttery sugar cookie flavor never gets old, and the coarse sugar adds the perfect textural contrast. I also appreciate that the recipe is more forgiving than it appears. Even if your spirals aren't absolutely perfect, they still look amazing and taste delicious. These cookies have become my go-to impressive dessert because they always generate compliments and recipe requests. Kids and adults alike are mesmerized by the swirls. Plus, you can make the dough ahead of time, freeze the logs, and slice and bake them whenever you need fresh cookies. That make-ahead convenience is priceless during the hectic holiday season!
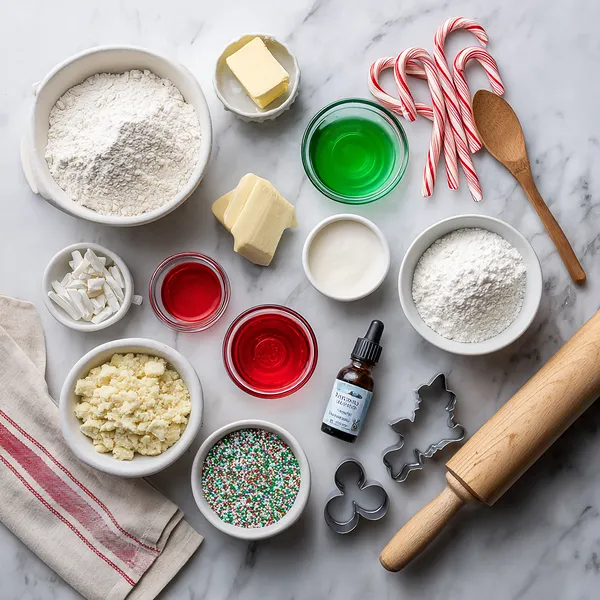
What You Need From Your Kitchen
- All-purpose flour: Sift before measuring for lighter cookies and to prevent dense texture
- Unsalted butter: Must be softened to room temperature for proper creaming with sugar
- Granulated sugar: Provides sweetness and helps create the light, crispy texture when creamed with butter
- Egg: Brings the dough together and adds richness; use at room temperature for better incorporation
- Gel food coloring: Creates vibrant red and green colors without adding excess liquid to the dough
- Coarse sugar: Roll the outside of the log in this for a beautiful sparkly coating and extra crunch
Let's Make These Together
- Prepare the Base Dough
- Start by creaming your softened butter with sugar until it's light and fluffy—this is essential for tender cookies. Beat in the egg and vanilla extract until everything is smooth and well combined. Gradually incorporate your flour mixture, mixing just until the dough comes together. Don't overmix or your cookies will be tough.
- Divide and Color
- Split your dough into three equal portions using a kitchen scale for accuracy. Keep one portion plain for that classic white color. Knead red gel food coloring into the second portion until you achieve a vibrant Christmas red. Do the same with green coloring for the third portion. The gel coloring works better than liquid because it won't change the dough's consistency.
- Roll and Stack Layers
- Once your dough has chilled and firmed up, roll each colored portion into matching rectangles on parchment paper. Take your time to make them the same size and thickness for even spirals. Stack them carefully—red, then white, then green—and press gently so they stick together without mixing the colors.
- Form the Pinwheel Log
- Here's where the magic happens! Use your parchment paper to help you roll the stacked layers into a tight log, starting from the long side. Keep the roll as tight as possible to create those beautiful defined spirals. Wrap it well in plastic and chill thoroughly—patience here means perfect cookies later.
- Slice and Bake
- After your log is completely firm, roll it in coarse sugar for that gorgeous sparkly finish. Use a sharp knife and slice with confidence to reveal those stunning pinwheel patterns. Place them on your baking sheet and bake just until the edges barely turn golden. These cookies are best when they're still soft in the center and crisp around the edges.
 pin it
Switch Things Up
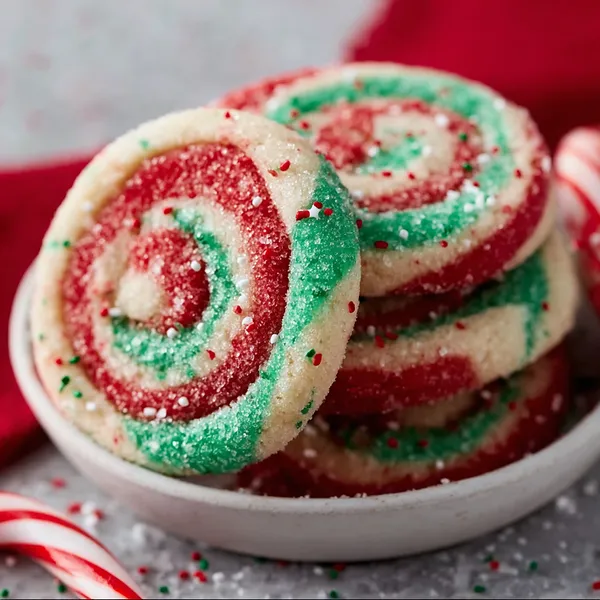
I'll never forget the first time I made these pinwheel cookies—it was three days before Christmas, and I was desperately searching for something impressive to bring to our neighborhood cookie swap. I'd seen similar cookies in bakery windows but always assumed they were too complicated. When I discovered how simple the technique actually was, I couldn't believe it! The key moment came when I sliced into that first rolled log and saw the perfect spiral staring back at me—I literally squealed with excitement. My hands were stained red and green from the food coloring for two days afterward, but it was totally worth it. Now these cookies have become my signature holiday treat. Every December, I set aside an afternoon, put on Christmas music, and roll out batch after batch. The kitchen smells like vanilla and butter, and there's something incredibly satisfying about watching those colorful spirals come together. My kids love helping with the rolling process, even though we end up with flour everywhere.
Perfect Pairings
These Christmas Pinwheel Cookies pair beautifully with a steaming mug of hot chocolate topped with marshmallows, or a classic glass of cold milk for dunking. For an adult gathering, serve them alongside spiced eggnog or a peppermint mocha. They also complement a cheese board surprisingly well—try them with mild brie or cream cheese for a sweet and savory contrast. If you're hosting a holiday brunch, these cookies are perfect with strong coffee or chai tea. For a complete dessert spread, arrange them on a platter with chocolate truffles, peppermint bark, and gingerbread cookies to create a festive cookie wonderland.
 pin it
Frequently Asked Questions
- → Can I make these cookies ahead of time?
Absolutely! These cookies are perfect for make-ahead baking. You can prepare the dough logs and keep them wrapped in the refrigerator for up to 3 days before slicing and baking. For longer storage, wrap the logs tightly in plastic wrap and then aluminum foil, and freeze for up to 3 months. When you're ready to bake, you can slice and bake directly from frozen—just add 1-2 minutes to the baking time.
- → Why is my pinwheel pattern not staying distinct?
The most common reason for blurred pinwheel patterns is not chilling the dough long enough. Make sure each colored portion is chilled for at least 30 minutes before rolling, and the final log needs at least 2 hours in the refrigerator (overnight is even better). If the dough gets too warm while you're working with it, pop it back in the fridge. Also, use gel food coloring rather than liquid to prevent the colors from bleeding into each other.
- → Can I use different color combinations?
Yes! While the traditional Christmas colors are red, green, and white, you can customize these pinwheel cookies for any occasion. Try pink and white for Valentine's Day, orange and black for Halloween, or pastel colors for Easter. You can even create a rainbow effect by using multiple thin layers. Just remember to keep the same basic technique and chilling times regardless of the colors you choose.
- → How do I prevent the cookies from spreading too much while baking?
The key to preventing excessive spreading is ensuring your dough is thoroughly chilled before baking. Don't let the sliced cookies sit at room temperature before going into the oven. Also, make sure your butter was properly softened (not melted) when you made the dough. Using parchment paper or silicone baking mats instead of greasing the pan can also help control spreading.
- → What's the best way to get clean, even slices?
Use a sharp, thin knife and wipe it clean between each slice to prevent color transfer. Slice with a gentle sawing motion rather than pressing straight down, which can squash the spiral pattern. If the log starts to flatten on one side, rotate it a quarter turn every few slices. If the dough becomes too soft and difficult to slice cleanly, return it to the refrigerator for 10-15 minutes before continuing.
- → How should I store these cookies to keep them fresh?
Store the completely cooled cookies in an airtight container at room temperature for up to one week. Layer them between sheets of parchment paper to prevent sticking. You can also freeze baked cookies for up to 2 months—just make sure they're in a freezer-safe container. Thaw at room temperature for about 30 minutes before serving. The coarse sugar coating helps keep them crispy even after storage.
Conclusion
These Festive Christmas Pinwheel Cookies are the ultimate holiday baking project that combines beauty and flavor in every bite. The tri-color swirls create an eye-catching design that'll make your cookie platter the star of any Christmas celebration. Whether you're baking them for a cookie exchange, gifting them to neighbors, or simply enjoying them with your family over hot cocoa, these cookies deliver both visual wow-factor and delicious buttery sweetness. The sparkling sugar coating adds that extra festive touch that makes them feel truly special. Make a double batch because they disappear fast!