
 pin it
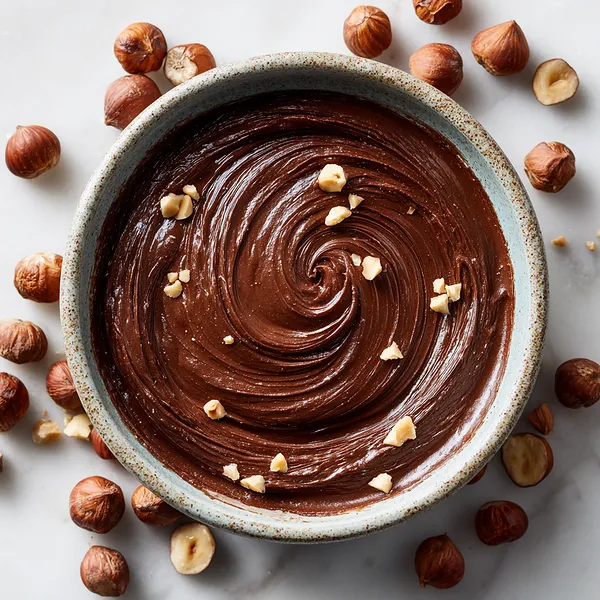
I'll never forget the first time I tasted authentic homemade Nutella at a small café in Rome. The owner made it fresh every morning, and the difference between that and the jarred version was night and day. When I came home, I was determined to recreate that experience, but with a healthier, plant-based twist. This recipe is my love letter to that unforgettable spread. What makes this vegan version so special is the way the hazelnuts release their natural oils when roasted and blended, creating an incredibly creamy base without any dairy. The cocoa powder adds that deep, rich chocolate flavor, while the maple syrup brings just the right amount of sweetness without being cloying. The coconut oil helps achieve that signature glossy finish and smooth texture that makes it so spreadable. I've experimented with countless ratios and techniques, and this version strikes the perfect balance - it's sweet enough to satisfy your chocolate cravings but not so sweet that you can't taste the beautiful nuttiness of the hazelnuts. Every time I make a batch, I'm transported back to that little Roman café, and I smile knowing I've created something even better - a spread that's delicious and nourishing at the same time.
Why I love this recipe
What I love most about this recipe is its incredible simplicity paired with sophisticated results. You're taking just six humble ingredients and transforming them into something that tastes like it came from an artisan chocolatier. The process itself is almost meditative - watching the hazelnuts go from whole nuts to a crumbly paste, then magically transform into a silky, flowing chocolate spread is pure kitchen alchemy. I love that I can pronounce every single ingredient and feel good about what I'm eating. There's something deeply satisfying about making your own staple spreads instead of relying on store-bought versions filled with palm oil and refined sugars. This recipe also gives me complete control - some days I want it extra chocolatey, so I add more cocoa; other days I prefer it sweeter, so I drizzle in extra maple syrup. It's become one of those recipes I make on autopilot now, whipping up a fresh batch whenever the mood strikes. Plus, the look on people's faces when they taste it and realize it's both vegan and homemade is priceless. It's proof that plant-based eating doesn't mean sacrificing flavor or indulgence - if anything, it enhances it.
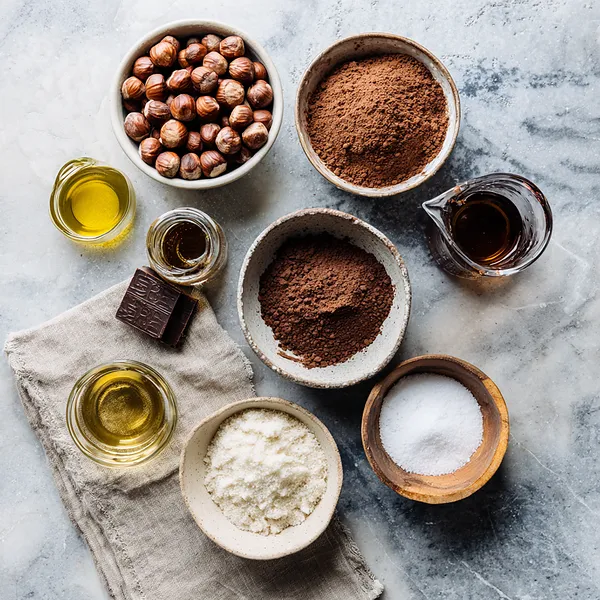
What You Need From Your Kitchen
- Hazelnuts: Roast until golden and fragrant, then remove skins by rubbing in a kitchen towel
- Cocoa powder: Use unsweetened cocoa powder for the best chocolate flavor
- Maple syrup: Provides natural sweetness; can substitute with agave nectar or date syrup
- Coconut oil: Melt before adding to help create a smooth, glossy texture
- Vanilla extract: Enhances the chocolate flavor and adds depth
Let's Make These Together
- Roast the hazelnuts perfectly
- Start by preheating your oven to 350°F and spreading the hazelnuts on a baking sheet. Roast them for 12-15 minutes, shaking the pan halfway through to ensure even browning. You'll know they're ready when they smell incredibly nutty and fragrant, and the skins start to crack. Let them cool slightly, then wrap them in a kitchen towel and rub vigorously to remove the skins. This step is crucial for achieving that smooth, non-bitter taste.
- Transform hazelnuts into butter
- Place your skinned hazelnuts in a high-powered food processor and begin blending. This is where the magic happens! At first, you'll have chunky pieces, then a flour-like powder, followed by a thick paste that will stick to the sides. Keep going - after about 8-10 minutes of processing and scraping down the sides, the natural oils will release and transform the paste into a smooth, flowing nut butter. This patience is what separates good Nutella from great Nutella!
- Create the chocolate blend
- Once your hazelnut butter is silky smooth, add the cocoa powder, maple syrup, melted coconut oil, vanilla extract, and sea salt. Blend everything together for 2-3 minutes until the mixture becomes glossy and uniform. Take a moment to taste it - this is your chance to adjust the sweetness or chocolate intensity to your liking. Want it sweeter? Add more maple syrup. Craving deeper chocolate flavor? Stir in a bit more cocoa.
- Store and enjoy
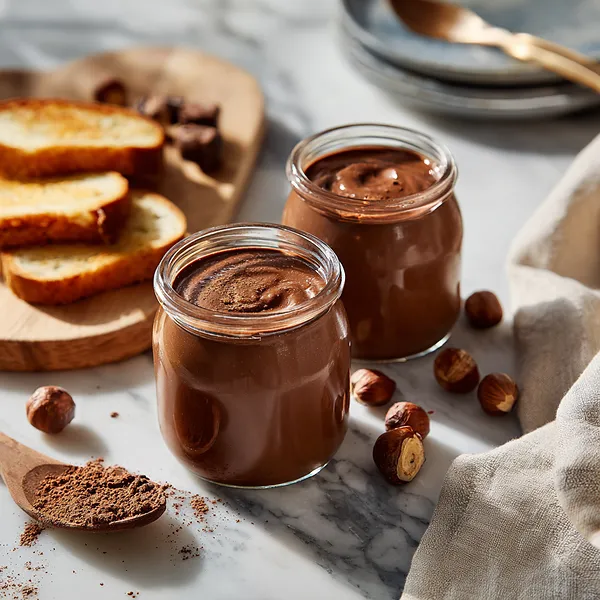
- Transfer your homemade vegan Nutella to a clean glass jar and seal it tightly. While the spread will be quite fluid when freshly made, it will thicken beautifully as it cools. You can store it in the refrigerator for up to two weeks, or keep it at room temperature for 3-4 days if you prefer a softer, more spreadable consistency. Just remember to stir it if any natural separation occurs!
 pin it
Switch Things Up
I first made this recipe on a lazy Sunday morning when I was craving something sweet but didn't want to compromise my plant-based lifestyle. I had a bag of hazelnuts sitting in my pantry and thought, why not try making my own chocolate spread? The moment I tasted the first batch, warm from the food processor, I knew I'd discovered something special. The hazelnuts had transformed into this incredibly smooth, buttery base that paired perfectly with the rich cocoa. I remember spreading it on warm toast and taking that first bite - the creamy texture, the deep chocolate flavor, the subtle nuttiness - it was everything I wanted and more. Now, I make a fresh batch every week, sometimes adding a pinch of cinnamon or a dash of espresso powder to switch things up. It's become my go-to gift for friends, and they're always amazed when I tell them how simple it is to make.
Perfect Pairings
This vegan Nutella pairs beautifully with so many things! Spread it generously on warm croissants or fresh sourdough toast for breakfast, swirl it into your morning oatmeal or smoothie bowls, or use it as a dip for fresh strawberries and banana slices. It's also incredible sandwiched between two cookies, drizzled over vanilla ice cream, or stirred into hot almond milk for a decadent hot chocolate. For a special treat, try spreading it on crepes with sliced bananas, or use it as a filling for homemade donuts. It even works wonderfully in baking - fold it into brownie batter or use it as a frosting for chocolate cupcakes.
 pin it
Frequently Asked Questions
- → Can I use other nuts instead of hazelnuts?
While hazelnuts give the authentic Nutella flavor, you can substitute with almonds, cashews, or even sunflower seeds for a nut-free version. Keep in mind that the flavor profile will change - almonds create a milder spread, while sunflower seeds can have a slightly greenish tint due to a natural reaction with baking soda in some recipes.
- → Why is my Nutella grainy instead of smooth?
Graininess usually means the hazelnuts haven't been processed long enough. Make sure you blend for a full 8-10 minutes until the nuts release their natural oils and become completely smooth and flowing. Also, ensure you're using a high-powered food processor or blender - less powerful machines may struggle to achieve that silky texture.
- → How can I make this spread less sweet?
Simply reduce the amount of maple syrup to taste. Start with 1/4 cup instead of 1/3 cup and adjust from there. You can also balance the sweetness by adding an extra pinch of sea salt or a teaspoon of espresso powder, which enhances the chocolate flavor without adding sweetness.
- → Can I make this recipe sugar-free?
Yes! Replace the maple syrup with a sugar-free liquid sweetener like monk fruit syrup or erythritol-based sweetener. Keep in mind that the texture might be slightly different, and you may need to adjust the amount to achieve your desired sweetness level.
- → Why did my Nutella separate in the jar?
Natural separation is completely normal, especially if stored in the refrigerator. The oils from the hazelnuts naturally rise to the top. Simply stir the spread thoroughly before using to recombine everything. If you prefer a more stable spread, you can add an extra tablespoon of coconut oil, which helps bind the ingredients together.
- → How long does homemade vegan Nutella last?
When stored in an airtight container in the refrigerator, your homemade Nutella will last up to 2 weeks. At room temperature, it's safe for 3-4 days if your kitchen isn't too warm. Always use a clean utensil when scooping to prevent contamination and extend shelf life.
Conclusion
This homemade vegan Nutella is proof that healthy treats can be just as indulgent as their store-bought counterparts. With its silky texture and rich chocolate-hazelnut flavor, it's perfect for spreading on toast, drizzling over pancakes, or simply enjoying by the spoonful. The beauty of making it yourself is that you know exactly what's going into your spread - no mystery ingredients, no preservatives, just pure, wholesome goodness. Store it in an airtight jar in the refrigerator for up to two weeks, though I doubt it'll last that long once you taste it!