
 pin it
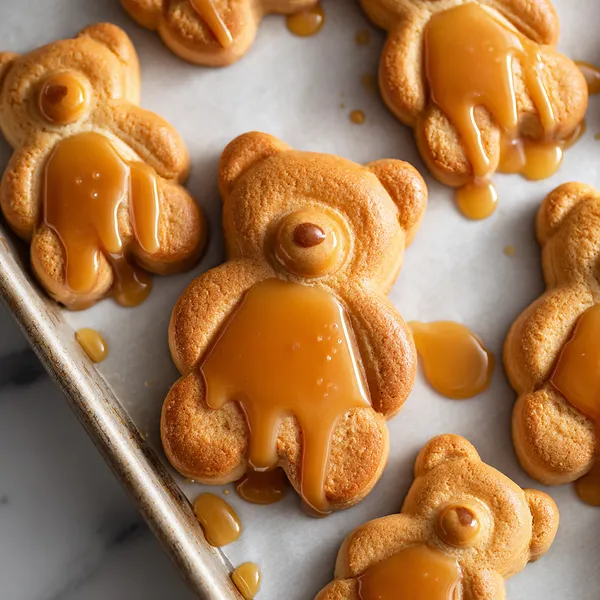
I first encountered teddy bear shaped pastries at a small bakery tucked into a quiet street, and I remember standing at the glass case just staring at them. They looked almost too precious to eat — these little golden bears with glossy caramel coats, lined up like the sweetest army imaginable. I bought two, sat outside, and took the most careful first bite. The cookie was tender and buttery, with just the right amount of sweetness, and that honey glaze added this rich, floral depth that made the whole thing feel almost luxurious. I went back the next day. And the day after that. Eventually I decided I had to recreate them at home, and after a few rounds of testing with different dough ratios and glaze consistencies, I landed on this version — which, honestly, might even be better than the original. There's something deeply satisfying about pulling a tray of tiny bears out of your own oven.
Why I love this recipe
I love this recipe because it manages to be both whimsical and genuinely delicious at the same time — which is rarer than you'd think. A lot of cute novelty baked goods sacrifice flavor for appearance, but these bears nail both. The butter cookie base is rich and tender without being crumbly, and the honey glaze brings this beautiful caramel depth that you just can't get from a simple sugar icing. I also love how versatile they are — you can make them for a child's birthday, a holiday cookie platter, a brunch table, or just a cozy weekend project. Every time I make them, the reaction is the same: eyes go wide, someone says 'oh my goodness,' and they're gone within minutes. That never gets old.
What You Need From Your Kitchen
- All-Purpose Flour: Forms the base of the cookie dough — spoon and level it for accuracy, never pack it.
- Unsalted Butter: Used both in the dough and the glaze — make sure it's fully softened for the dough and cold-cubed for the glaze.
- Honey: The star of the glaze — use a good quality raw or wildflower honey for the richest flavor and most beautiful amber color.
- Brown Sugar: Adds deep molasses notes to the glaze and helps it achieve that gorgeous glossy finish.
- Heavy Cream: Smooths out the glaze and gives it that luxurious, pourable consistency that drapes beautifully over the bears.
- Egg: Binds the cookie dough and adds richness — use a large egg at room temperature for best results.
Let's Make These Together
- Cream butter and sugar
- Beat softened butter with powdered sugar in a large bowl until the mixture turns pale, fluffy, and almost mousse-like — this step is crucial for a tender, melt-in-your-mouth cookie texture. Don't rush it; give it a full 3 minutes.
- Build and chill the dough
- Mix in the egg and vanilla, then gradually fold in flour and salt until a smooth, pliable dough forms. Wrap it tightly and refrigerate for 20 minutes — this resting step firms up the dough and makes it much easier to press into the molds cleanly.
- Press into bear molds
- Grease your silicone bear mold lightly, then press small portions of chilled dough into each cavity. Press firmly so every detail of the bear is captured — ears, paws, face and all. Smooth the backs flat with your fingertip.
- Bake to golden perfection
- Bake at 350°F for 18–20 minutes until the edges are just golden. The tops should feel set but not hard. Let them cool in the mold for 10 minutes before gently unmolding onto a wire rack — patience here prevents breakage.
- Cook the honey caramel glaze
- In a saucepan over medium heat, combine honey and brown sugar until the sugar dissolves. Add heavy cream and butter, stir constantly for 2–3 minutes until the glaze thickens and turns a rich amber. Pull it off heat and let it cool just slightly before glazing.
- Glaze and let set
- Spoon or pour the warm glaze generously over each bear cookie, letting it run naturally down the sides and pool at the base. For extra coverage, apply a second coat after 5 minutes. Let everything set fully at room temperature before serving or packaging.
 pin it
Switch Things Up
I decided one afternoon to try using a silicone bear mold I had sitting in a drawer for months. I made the butter cookie dough, pressed it carefully into each mold, and honestly was not expecting much. But when those little bears came out of the oven — perfectly shaped, golden and smelling like warm vanilla — I immediately knew I had to make the glaze. I drizzled hot honey caramel over every single bear and watched it pour down their little faces and paws. I stood there eating three of them before they even cooled down. No regrets.
Perfect Pairings
These honey bear cookies pair beautifully with a warm mug of chamomile tea or a frothy vanilla latte. For kids, serve alongside cold milk for classic cookie dunking bliss. They also complement a dessert board with fresh strawberries, sliced pears, and a small bowl of whipped cream. For a more grown-up pairing, try them with a light Earl Grey or a drizzle of extra dark honey on the side.
 pin it
Frequently Asked Questions
- → Can I use a different mold shape if I don't have a bear mold?
Absolutely! Any silicone character or novelty mold will work with this dough. Bunnies, stars, or even simple round molds will give you the same buttery, glazed result — the honey glaze looks gorgeous on any shape.
- → Can I make the dough ahead of time?
Yes! The dough can be made up to 2 days in advance and stored wrapped tightly in the refrigerator. Let it sit at room temperature for 5 minutes before pressing into molds so it's pliable enough to work with.
- → Why did my glaze harden too fast?
If your glaze hardens before you finish pouring, simply return it to low heat and stir for 30 seconds to loosen it up again. Adding a tiny splash of heavy cream can also help restore a smooth, pourable consistency.
- → Can I freeze these cookies?
You can freeze the unglazed baked bears very well — just store them in a single layer in a freezer-safe container for up to 1 month. Thaw at room temperature and then glaze fresh. Glazed cookies are best kept at room temperature and consumed within 4 days.
- → My bears cracked when I unmolded them — what went wrong?
This usually happens if the cookies weren't given enough time to cool in the mold, or if the mold wasn't greased adequately. Make sure to let them rest a full 10 minutes after baking and use a light layer of butter or baking spray on the mold before filling.
- → Can I make these gluten-free?
Yes — substitute the all-purpose flour with a 1:1 gluten-free baking blend. The texture may be slightly more delicate, so handle the unmolded bears gently. The honey glaze is naturally gluten-free so no changes needed there.
Conclusion
These Honey Glazed Teddy Bear Cookies are pure joy in edible form. They bring warmth, sweetness, and a guaranteed smile to anyone who sees them. Whether you're baking for kids, a party, or just because you deserve something magical today — these little bears deliver every single time. The honey glaze is the crown jewel, and once you try it, plain cookies will never feel the same again.