
 pin it
I remember the first time I encountered this dessert at a friend's holiday party three years ago – I couldn't believe something so decadent could be no-bake. The layers were mesmerizing, and each bite delivered that perfect hot chocolate flavor I craved during winter. I immediately asked for the recipe and made it the very next weekend. What I love about this recipe is how it captures the essence of hot chocolate in a completely different form. The Oreo crust provides that chocolatey crunch reminiscent of dunking cookies in cocoa, while the cream cheese layer adds a tangy richness that elevates everything. The chocolate pudding is the star – it's like drinking liquid hot chocolate but in creamy, spoonable form. And those toasted marshmallows on top? They're not just decoration; they're essential for that authentic hot chocolate experience. Every time I make this, I'm transported back to cozy winter evenings wrapped in blankets, and that feeling is what makes this dessert so special to me.
Why I love this recipe
This recipe has become my go-to for so many reasons. First, it's ridiculously easy – no oven required, which means I can make it even on the hottest summer days when I'm craving chocolate. Second, it's a total showstopper that looks incredibly impressive but requires minimal effort. The layers create this stunning visual effect that makes people think you spent hours in the kitchen. Third, it's incredibly versatile – you can make it ahead, which is perfect for busy schedules and party planning. But beyond all the practical reasons, I love this recipe because it brings pure joy to everyone who tries it. There's something about the combination of textures – the crunchy Oreos, creamy pudding, fluffy whipped topping, and those slightly charred marshmallows – that hits every satisfaction point. It's comforting yet exciting, familiar yet surprising. Plus, it feeds a crowd, so it's perfect for gatherings where you want to impress without stress. Every single time I serve this, it becomes the talk of the party, and that never gets old!
What You Need From Your Kitchen
- Oreo cookies: Crush them finely and mix with melted butter to create the chocolate cookie crust base
- Cream cheese: Soften to room temperature and beat with sugar until smooth, then fold in whipped topping for the creamy middle layer
- Instant chocolate pudding mix: Whisk with cold milk until thickened to create the rich chocolate layer that tastes like hot cocoa
- Whipped topping: Divide between the cream cheese layer and the final topping for light, fluffy texture throughout
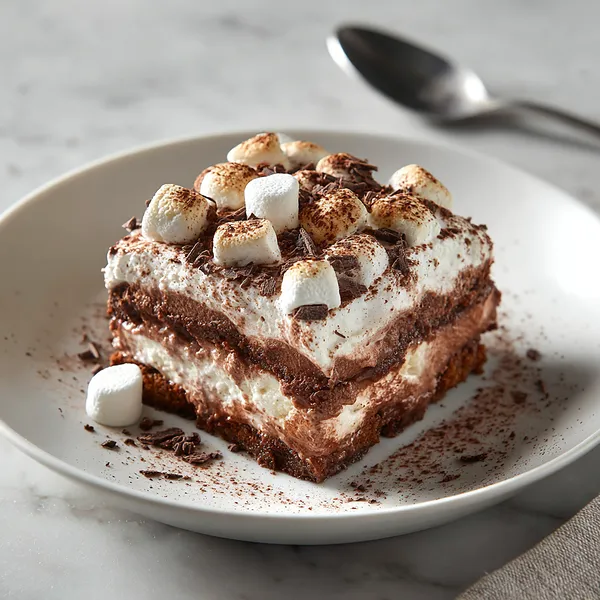
- Mini marshmallows: Arrange on top and torch until golden for that authentic hot chocolate experience
- Chocolate chips: Melt and drizzle over the finished dessert for added chocolate flavor and visual appeal
- Graham cracker crumbs: Sprinkle on top as a finishing touch that adds texture and reminds you of s'mores
Let's Make These Together
- Create the Oreo Crust Base
- Start by crushing your Oreo cookies into fine crumbs using a food processor or by placing them in a sealed bag and crushing with a rolling pin. Mix these crumbs thoroughly with melted butter until the mixture holds together when pressed. Press this mixture firmly into the bottom of your 9x13 inch dish, creating an even layer that will serve as the foundation for your beautiful dessert. Pop this in the fridge while you work on the next layer.
- Prepare the Cream Cheese Layer
- Beat your softened cream cheese with sugar using an electric mixer until it's completely smooth and fluffy with no lumps remaining. This is crucial for a silky texture. Gently fold in one cup of whipped topping until fully incorporated, being careful not to deflate the mixture. Spread this dreamy cream layer over your chilled Oreo crust, making sure it reaches every corner and edge of the dish.
- Make the Chocolate Pudding
- In a clean bowl, whisk together your instant chocolate pudding mix with cold milk vigorously for about two minutes. You'll notice it start to thicken almost immediately. Let it sit for five minutes to fully set up – this ensures your pudding layer will be stable and won't mix with the other layers. Once set, carefully spread it over the cream cheese layer, creating smooth, even coverage that showcases those gorgeous layers.
- Add the Whipped Topping and Marshmallows
- Spread your remaining whipped topping over the set chocolate pudding layer, creating fluffy clouds of sweetness. Now comes the fun part – arrange mini marshmallows across the entire top in an even layer. If you have a kitchen torch, carefully toast them until they're golden and slightly charred, just like marshmallows over a campfire. The contrast between the toasted exterior and soft interior is absolutely divine.
- Finish with Chocolate Drizzle and Garnishes
- Melt your chocolate chips until smooth and silky, then drizzle it artistically over the entire dessert. Don't worry about being perfect – those chocolate drizzles add character and make each serving look bakery-worthy. Finish with a sprinkle of graham cracker crumbs and maybe some chocolate shavings if you're feeling fancy. Refrigerate for at least an hour to let everything set, then slice and watch everyone's jaws drop when they see those beautiful layers.
 pin it
Switch Things Up
I first made this for a winter potluck and honestly wasn't sure how it would turn out – I mean, lasagna for dessert? But the moment I torched those marshmallows on top and drizzled the chocolate, I knew I had something special. When I brought it to the party, people literally gasped when I cut into it and those beautiful layers were revealed. One friend said it was like eating a hug in dessert form, and honestly, that's the perfect description. Now I make it for every holiday gathering, and it's become my signature dish. The best part is watching people's faces when they take that first bite!
Perfect Pairings
This Hot Chocolate Lasagna pairs beautifully with a cup of strong coffee or espresso to balance the sweetness, or go all-in with a glass of cold milk for that classic cookies-and-milk experience. For a grown-up twist, serve alongside Irish cream liqueur or a chocolate martini. If you're serving this at a dinner party, pair it with fresh berries or a light fruit salad to cut through the richness. It also makes an amazing complement to holiday meals – serve it after a hearty dinner when everyone wants something sweet but satisfying.
 pin it
Frequently Asked Questions
- → Can I make this dessert ahead of time?
Absolutely! This Hot Chocolate Lasagna is actually better when made ahead. You can prepare it up to 2 days in advance and keep it covered in the refrigerator. Just wait to add the marshmallows and chocolate drizzle until a few hours before serving for the best presentation. The layers have time to set perfectly and the flavors meld together beautifully.
- → Can I use homemade whipped cream instead of whipped topping?
Yes, you can substitute homemade whipped cream for the whipped topping. Whip heavy cream with a bit of sugar and vanilla until stiff peaks form. However, stabilized whipped cream or whipped topping tends to hold up better over time in layered desserts, so if making ahead, commercial whipped topping might be a better choice for stability.
- → What if I don't have a kitchen torch for the marshmallows?
No problem! You can place the dessert under a preheated broiler for 1-2 minutes, watching very carefully to prevent burning. Alternatively, you can skip the toasting altogether – the marshmallows will still taste delicious and look beautiful. You can also toast them separately on skewers over a gas stove flame and then place them on top.
- → Can I use a different type of cookie for the crust?
Definitely! While Oreos create that authentic chocolate cookie flavor, you can experiment with chocolate graham crackers, chocolate wafer cookies, or even chocolate chip cookies. Just make sure to adjust the amount of butter as needed – the mixture should hold together when pressed but not be overly greasy.
- → How do I get clean slices when serving?
The key to beautiful slices is using a sharp knife dipped in hot water and wiped clean between each cut. Make sure the dessert has been chilled for at least 3-4 hours total so all layers are fully set. You can also run the knife under hot water, dry it, and then make your cut. This melts through the layers cleanly without dragging or smearing.
- → Can this be made in individual servings?
Yes! You can layer this dessert in individual glasses, mason jars, or small dessert cups for a beautiful presentation. This is perfect for parties because guests can grab their own serving and the layers are visible from the side. Just follow the same layering order and adjust quantities based on the number of servings you need.
Conclusion
This Hot Chocolate Lasagna is the ultimate crowd-pleaser that combines everything we love about hot chocolate into one spectacular no-bake dessert. The layers create a perfect balance of textures and flavors, from the crunchy Oreo base to the creamy chocolate pudding and fluffy whipped topping. It's an impressive dessert that looks like it took hours but comes together so easily. Make it ahead for parties, holidays, or whenever you need something truly special that'll have everyone coming back for seconds!