
 pin it
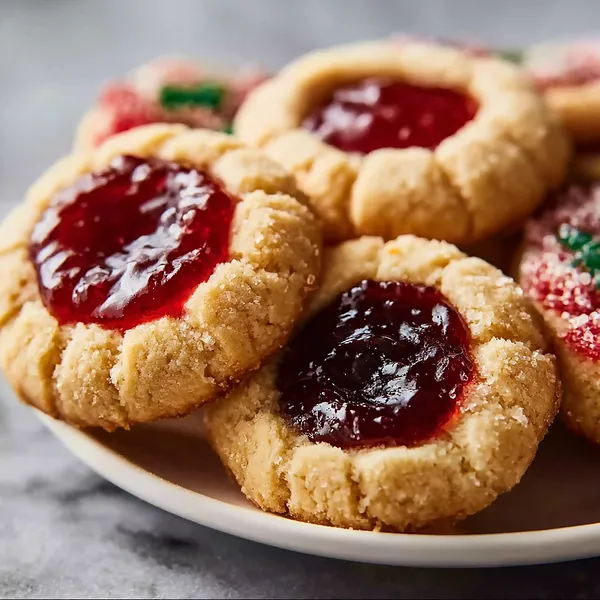
I first discovered thumbprint cookies at my grandmother's house during Christmas when I was seven years old. She had this beautiful tin filled with cookies of all kinds, but the thumbprint cookies with their jewel-like jam centers caught my eye immediately. I remember asking her why they were called thumbprint cookies, and she let me help make the next batch so I could see for myself. The magic of pressing my thumb into that soft dough and watching the little well form was unforgettable. What makes these cookies so special is their simplicity - there's no complicated technique or fancy equipment needed. The dough comes together quickly with butter, sugar, flour, and vanilla. After chilling, you roll the dough into balls, coat them in sugar, and then make that signature thumbprint indentation. The jam nestles perfectly into that little well, creating a beautiful contrast of colors and textures. When they come out of the oven, the edges are golden and slightly crispy while the centers remain tender. The jam becomes glossy and slightly set, creating that perfect sweet burst with every bite. These cookies embody everything I love about baking - they're beautiful, delicious, and filled with memories.
Why I love this recipe
What I love most about this recipe is its incredible versatility and foolproof nature. Even if you're new to baking, you can make these cookies successfully on your first try. The dough is forgiving and easy to work with, and the results always look professional. I love that I can customize them endlessly by changing the jam flavors - raspberry for tartness, strawberry for sweetness, apricot for a sophisticated touch, or even lemon curd for something different. These cookies are also perfect for making with kids because they get to do the fun part of pressing their thumbs into the dough. There's something so satisfying about that simple action that creates such a beautiful result. I also appreciate that this recipe uses basic pantry ingredients, so I can make them on a whim without a special trip to the store. The cookies store beautifully in an airtight container for up to a week, making them ideal for advance preparation during busy holiday seasons. But beyond all the practical reasons, I love these cookies because they bring people together. Every time I serve them, they spark conversations and smiles. They remind people of their own grandmothers, childhood memories, and simpler times. That's the real magic of this recipe.
What You Need From Your Kitchen
- All-purpose flour: Provides the structure for the cookies and creates that tender, crumbly texture
- Unsalted butter: Gives the cookies their rich, buttery flavor and melt-in-your-mouth texture
- Granulated sugar: Sweetens the dough and helps create a crisp exterior when mixed into the butter
- Vanilla extract: Adds depth of flavor and enhances the overall taste of the cookies
- Fruit jam or preserves: Creates the signature sweet, fruity center that makes these cookies special
- Coarse sugar: Adds a beautiful sparkle and slight crunch to the cookie exterior
Let's Make These Together
- Cream butter and sugar
- Start by beating your room temperature butter with granulated sugar until the mixture becomes light, fluffy, and pale in color. This process incorporates air into the dough, creating a tender cookie texture. Add vanilla extract and mix until everything is perfectly combined and aromatic.
- Mix in dry ingredients
- Combine your flour and salt in a separate bowl, then gradually add this mixture to your butter mixture. Mix just until the dough comes together - overmixing can make cookies tough. The dough should be soft and pliable, not sticky. If it feels too soft to handle, pop it in the fridge for 15 minutes.
- Shape and coat cookies
- Roll the dough into uniform 1-inch balls for even baking. Roll each ball generously in coarse sugar to create that beautiful sparkly coating. Place them on your prepared baking sheet with enough space between each cookie, then use your thumb to create a well in the center of each one. This indentation is where the magic happens!
- Fill and bake to perfection
- Carefully spoon your chosen jam into each thumbprint indentation. Use just enough to fill the well without overfilling - about half a teaspoon is perfect. Bake until the edges turn a lovely golden color while the centers remain tender. The jam will bubble and become glossy, creating that irresistible jewel-like appearance.
- Cool and enjoy
- Let the cookies rest on the baking sheet for a few minutes after baking - this helps them set and makes them easier to transfer. Move them to a wire rack to cool completely. The jam needs time to set properly, so resist the temptation to bite into them right away. Once cooled, these cookies are ready to bring joy to everyone who tries them!
 pin it
Switch Things Up
I'll never forget the first time I made these cookies for a holiday cookie exchange. I was nervous because everyone brings their A-game, but these little beauties stole the show! The best part was watching people's faces light up when they bit into them - that moment when the buttery cookie meets the sweet jam is pure joy. Now I make them every December, and my family actually requests them year-round. One time I ran out of raspberry jam and used apricot instead, and honestly, it was even better! The golden color of the apricot jam looked stunning against the sugary cookie. I've also started making half the batch with strawberry and half with blackberry jam, which makes for a gorgeous presentation. My neighbor once told me these were better than her grandmother's recipe, and that's when I knew I had a winner on my hands.
Perfect Pairings
These thumbprint cookies pair beautifully with hot beverages like coffee, tea, or hot chocolate. For an elegant dessert spread, serve them alongside shortbread cookies and chocolate truffles. They're also wonderful with a glass of cold milk for a nostalgic afternoon snack. If you're hosting a brunch, these cookies complement fruit salads and yogurt parfaits perfectly. For a more indulgent pairing, serve them with vanilla ice cream or whipped cream. During the holidays, they're excellent alongside mulled wine or eggnog. The fruity jam centers also make them a natural companion to cheese boards featuring mild, creamy cheeses like brie or mascarpone.
 pin it
Frequently Asked Questions
- → Can I use salted butter instead of unsalted?
Yes, you can use salted butter, but reduce or omit the additional salt in the recipe to prevent the cookies from being too salty. Unsalted butter gives you better control over the final flavor.
- → Why did my thumbprint indentations puff up during baking?
This is normal! The dough rises slightly as it bakes. Simply use the back of a small spoon to gently press down the indentations again right after removing the cookies from the oven while they're still hot and pliable.
- → Can I make the dough ahead of time?
Absolutely! The dough can be made up to 3 days in advance and stored in the refrigerator, or frozen for up to 3 months. Let refrigerated dough sit at room temperature for about 10 minutes before rolling to make it easier to work with.
- → What type of jam works best for these cookies?
Any thick jam or preserve works well - raspberry, strawberry, apricot, and blackberry are traditional favorites. Avoid jelly as it's too thin and will run during baking. Seedless jams give a smoother appearance, but seeded varieties taste just as delicious.
- → How should I store thumbprint cookies?
Store completely cooled cookies in an airtight container at room temperature for up to one week. Layer them between sheets of parchment paper to prevent sticking. They also freeze beautifully for up to 3 months.
- → Can I add nuts to this recipe?
Yes! Rolling the cookie balls in finely chopped pecans, walnuts, or almonds instead of (or in addition to) sugar adds wonderful flavor and texture. Press the nuts gently to help them adhere before making the thumbprint.
- → My dough is too crumbly - what should I do?
If your dough won't hold together, it may need a bit more moisture. Add 1-2 teaspoons of milk or water, one teaspoon at a time, mixing well after each addition until the dough comes together properly.
Conclusion
These Jam Thumbprint Cookies are a timeless classic that never goes out of style. Their beautiful appearance makes them perfect for gift-giving, holiday cookie platters, or simply enjoying with your afternoon tea. The combination of buttery cookie and sweet jam is universally loved, making these a crowd-pleaser every single time. With just a handful of ingredients and simple techniques, you can create bakery-worthy cookies right in your own kitchen. Once you master this basic recipe, feel free to experiment with different jam flavors and even add nuts to the coating for extra texture.