
 pin it
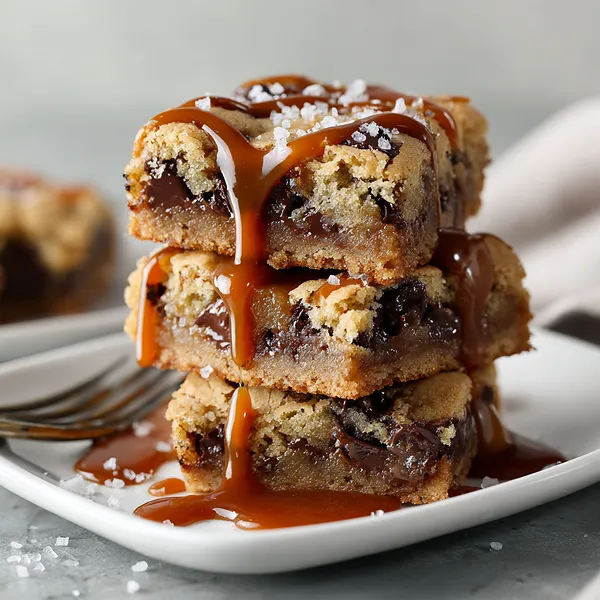
I first encountered salted caramel cookie bars at a small bakery in Portland during a rainy weekend trip. I'd ducked inside to escape the drizzle, and there they were in the display case, stacked high and glistening with caramel. The baker told me they were her bestseller, and after one bite, I understood why. The combination of textures—that crispy edge giving way to a chewy center, punctuated by melty chocolate and ribbons of salted caramel—was unlike anything I'd tasted before. I went home determined to recreate them. After several attempts (and a lot of taste-testing), I finally nailed the recipe. What makes these bars so special is the balance: they're sweet but not cloying, thanks to the sea salt; rich but not heavy, thanks to the buttery cookie base; and indulgent but somehow you can still eat more than one. The secret is using good quality caramel and not overbaking them—you want them slightly underdone so they stay gooey in the middle. Every time I make these, I'm transported back to that cozy Portland bakery, rain pattering on the windows, holding a warm bar and feeling completely content.
Why I love this recipe
There are so many reasons I love this recipe, but I'll start with the most important one: it never fails. Whether I'm making it for the hundredth time or teaching a friend how to bake, these bars turn out perfectly every single time. There's something deeply satisfying about that consistency. I also love how these bars make people happy. I mean truly, genuinely happy. I've brought them to office parties, holiday gatherings, and casual get-togethers, and the reaction is always the same: eyes light up, conversations pause, and someone inevitably asks, "What ARE these?" They're the kind of dessert that creates memories. I love that they're easy enough for a weeknight but impressive enough for special occasions. I love how they satisfy both the cookie lovers and the caramel fanatics in my life. And honestly, I love the way my kitchen smells when they're baking—that intoxicating blend of butter, sugar, and vanilla that makes you want to camp out by the oven. But most of all, I love that these bars remind me that the best recipes aren't always the most complicated ones. Sometimes magic happens when you take a few simple, quality ingredients and combine them thoughtfully.
What You Need From Your Kitchen
- All-purpose flour: Forms the base structure of the cookie dough and provides that perfect chewy texture
- Unsalted butter: Cream with sugars until fluffy for a rich, tender cookie base
- Brown sugar: Adds moisture and that deep caramel-like flavor that complements the caramel layer
- Eggs: Bind the dough together and add richness
- Chocolate chips: Fold into the dough for pockets of melty chocolate throughout
- Caramel candies: Melt with heavy cream to create that gooey, stretchy caramel center
- Heavy cream: Mix with caramels to create a smooth, pourable caramel sauce
- Flaky sea salt: Sprinkle on top for that perfect sweet-salty contrast
Let's Make These Together
- Prep Your Workspace
- Start by preheating your oven and preparing your baking pan with parchment paper. This simple step will save you so much hassle later when it's time to remove the bars. Mix together your dry ingredients and set them aside, then get your butter and sugars ready for creaming.
- Create the Cookie Base
- Cream your butter and sugars together until they're light and fluffy—this is crucial for that perfect texture. Beat in your eggs and vanilla, then gently mix in your flour mixture. The dough should be thick and studded with chocolate chips. Press most of it into your prepared pan, saving some for the top.
- Make That Gooey Caramel
- Melt your caramels with heavy cream in the microwave, stirring frequently until smooth and glossy. This caramel layer is what makes these bars absolutely irresistible, so take your time to get it perfectly melted. Pour it over your cookie base and spread it evenly.
- Assemble and Bake
- Scatter pieces of reserved cookie dough over the caramel layer—it doesn't need to be perfect! Sprinkle with sea salt and slide it into the oven. The hardest part is waiting for them to bake and cool, but trust me, it's worth the patience.
- Cool and Slice
- Let the bars cool for at least 30 minutes before attempting to cut them. Use the parchment overhang to lift the whole slab out of the pan, then cut into squares. If you can resist eating one immediately, you're stronger than I am!
 pin it
Switch Things Up
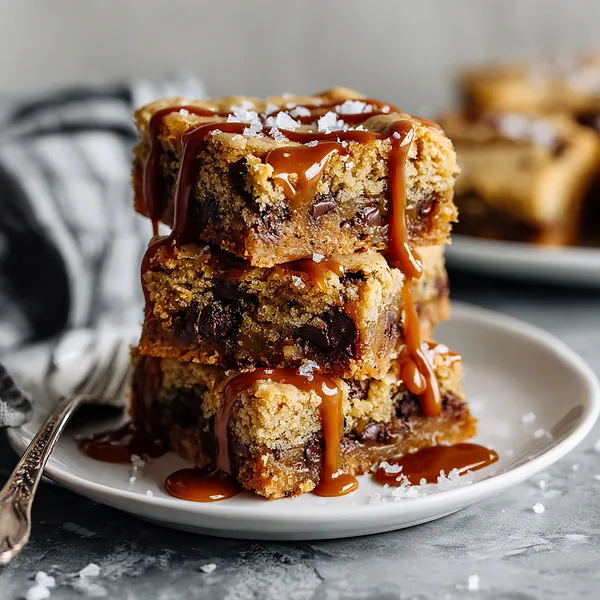
I'll never forget the first time I made these bars for a family gathering. I was a bit nervous because I'd tweaked my usual cookie recipe to add that caramel layer, and I wasn't sure how it would turn out. When I pulled them from the oven and saw that golden caramel bubbling up through the cookie dough, I knew I'd created something special. I let them cool (barely—I was so impatient!) and cut into them. That first bite was a revelation. The caramel was still warm and gooey, stretching like taffy as I pulled the bar away. My sister grabbed one, took a bite, and immediately went back for seconds before she'd even finished the first. By the end of the evening, the entire pan was gone, and I had five people asking for the recipe. Now, I make these bars at least once a month. Sometimes I add a sprinkle of cinnamon to the dough for warmth, or I'll use dark chocolate chips for a more sophisticated flavor. But honestly, the original version is pretty much perfect as is.
Perfect Pairings
These salted caramel cookie bars are incredibly versatile when it comes to pairings. Serve them warm with a scoop of vanilla ice cream for an over-the-top dessert experience—the cold ice cream against the warm caramel is absolutely heavenly. A cold glass of whole milk is the classic choice and never disappoints. For a more grown-up pairing, try them with a strong cup of coffee or espresso; the bitterness of the coffee balances the sweetness beautifully. If you're hosting, consider serving them alongside fresh berries or whipped cream to lighten the richness. And for a truly indulgent treat, drizzle extra warm caramel sauce over the top just before serving.
 pin it
Frequently Asked Questions
- → Can I use homemade caramel instead of caramel candies?
Absolutely! If you have a favorite caramel sauce recipe, you can use about 1 1/2 cups of it in place of the melted caramel candies. Just make sure it's thick enough to stay in a layer and not too runny, or it might seep through the bottom cookie layer.
- → How do I prevent the bars from being too hard after baking?
The key is not to overbake them. They should look slightly underdone in the center when you remove them from the oven—they'll continue to set as they cool. Also, make sure you're measuring your flour correctly (spoon it into the measuring cup rather than scooping) to avoid adding too much.
- → Can I freeze these cookie bars?
Yes! These bars freeze beautifully. Cut them into individual portions, wrap each one in plastic wrap, then place them all in a freezer-safe container or bag. They'll keep for up to 3 months. Thaw at room temperature or microwave for 20-30 seconds for that fresh-baked taste.
- → What kind of chocolate chips work best?
Semi-sweet chocolate chips are the classic choice and provide nice balance with the sweet caramel, but you can absolutely use milk chocolate for extra sweetness or dark chocolate for a more sophisticated flavor. You could even use a combination of different types!
- → My caramel layer leaked through to the bottom. What did I do wrong?
This usually happens when the caramel mixture is too thin or too hot when poured. Make sure your caramel has cooled for a minute or two after melting, and if it seems runny, add a few more caramel pieces to thicken it up. Also, ensure your bottom cookie layer is pressed firmly and evenly with no gaps.
Conclusion
These Gooey Salted Caramel Chocolate Chip Cookie Bars are pure magic in dessert form. They combine everything we love about cookies—buttery dough, melty chocolate—with an irresistible caramel center that makes them absolutely unforgettable. The flaky sea salt on top isn't just for show; it creates this incredible sweet-salty contrast that keeps you reaching for just one more piece. Whether you're bringing them to a potluck, making them for a special occasion, or just treating yourself on a random Tuesday, these bars deliver happiness in every bite. They're proof that sometimes the best recipes are the ones that make you close your eyes and smile with that first taste.